Peregrine Management Suite Administration
Security
Users and Roles
Management Suite is a multi-user application with role-based access control. Using roles, you can assign users only those permissions that they need for performing their tasks. When you install Management Suite, a single user called Administrator and three roles, Global Administrators, Users and API Users are created. You may create other users and roles using the pages provided under security.
To begin setting up access control security, you would start with creating roles and permissions for the roles. Then you will assign roles to users.
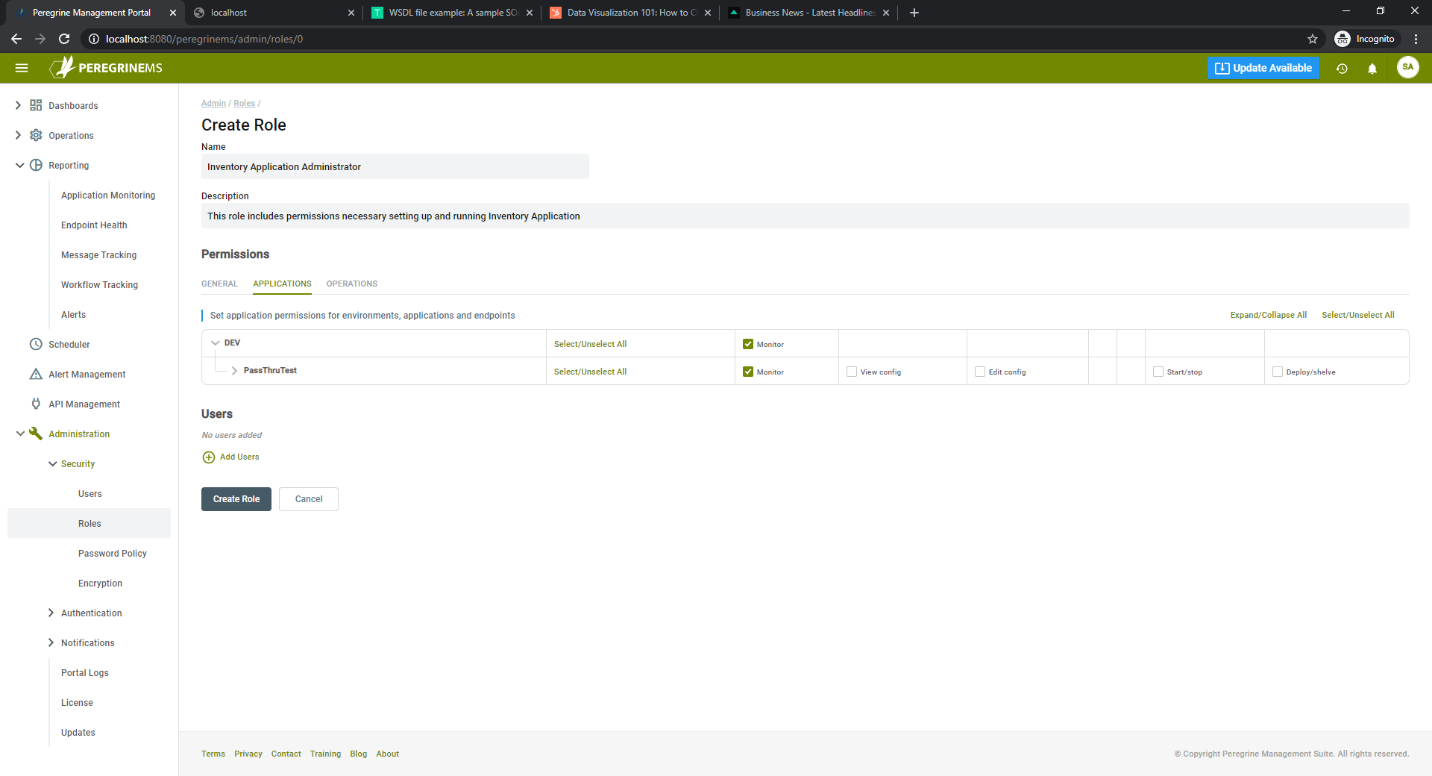
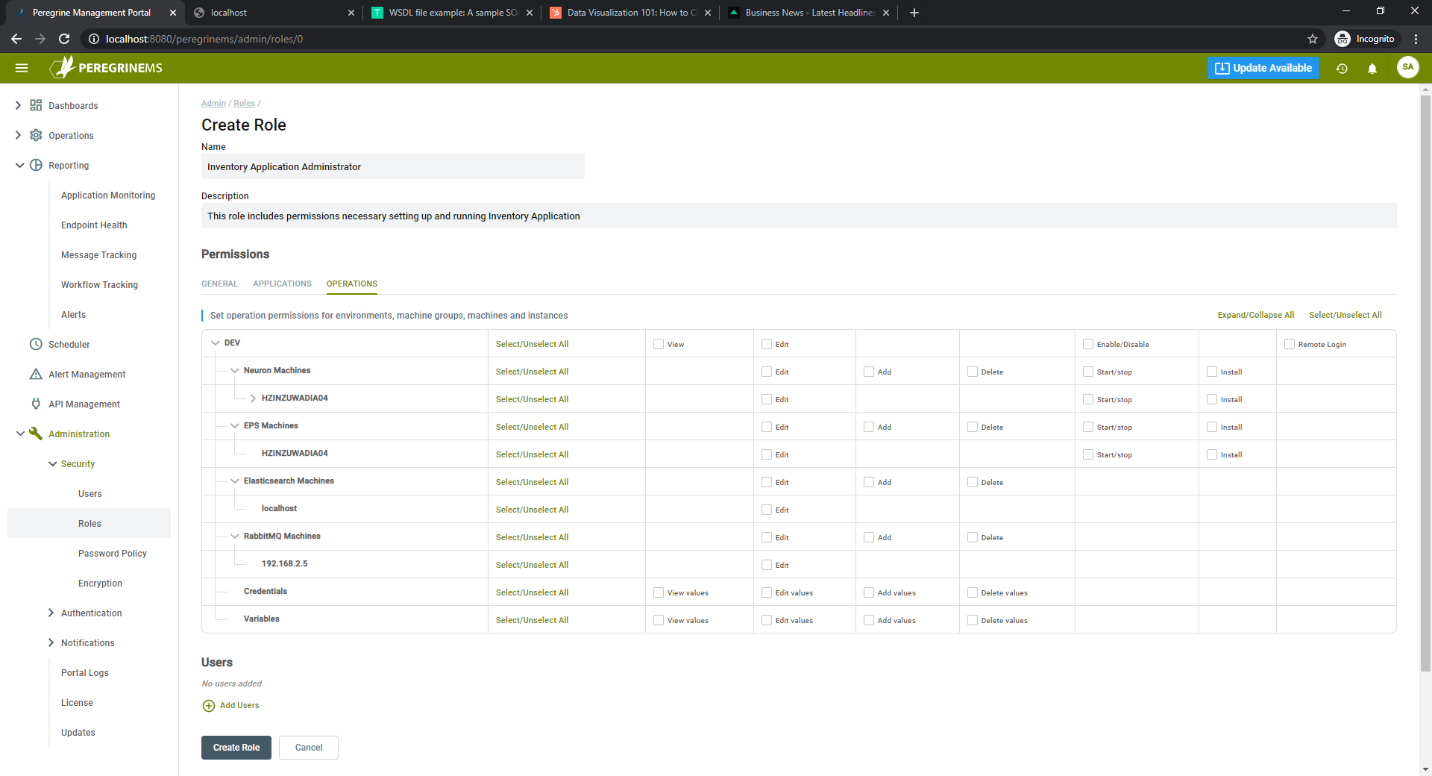
The following page shows the access permissions that you can configure for a role. You can configure general permissions for each menu item in Management Suite. You can also configure specific application permissions and operations permissions as shown in the screen below.
When you assign multiple roles to user, the user’s effective permission will be a union of each role’s permissions.
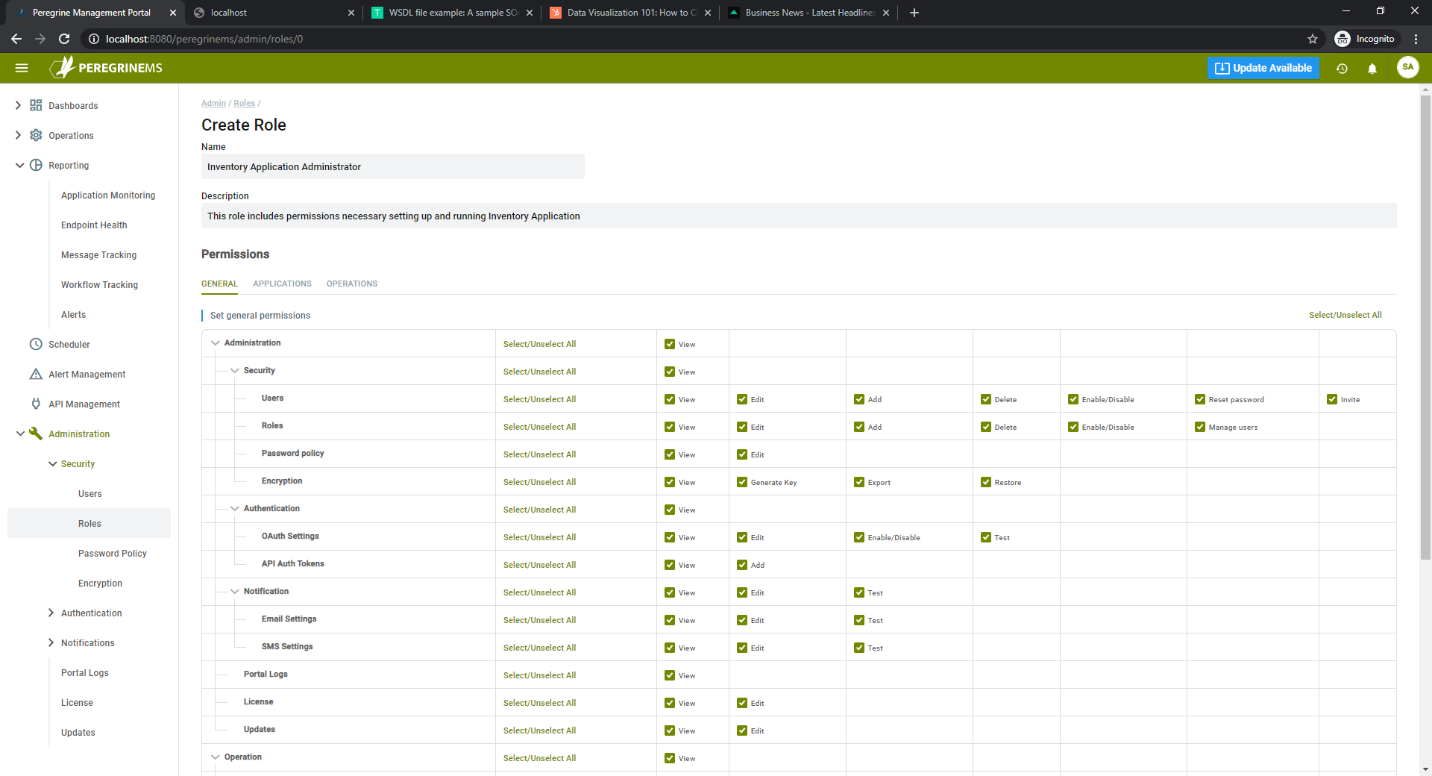
Permissions are sub-divided into View, Edit, Manage, Add, Delete, Test, Enable/Disable, Start/Stop, Install, Deploy and Invite as applicable. You can assign or remove a permission by checking the corresponding checkboxes.
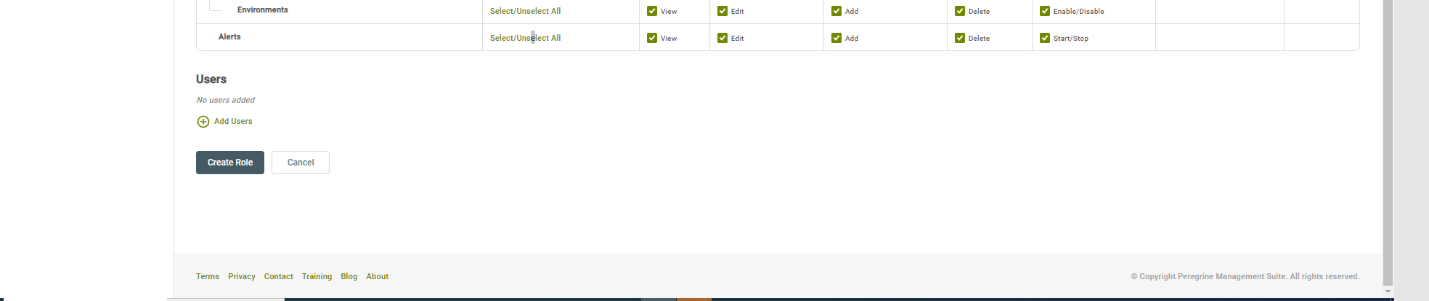
You can add new users from the Roles page or by selecting create user on the page shown below.
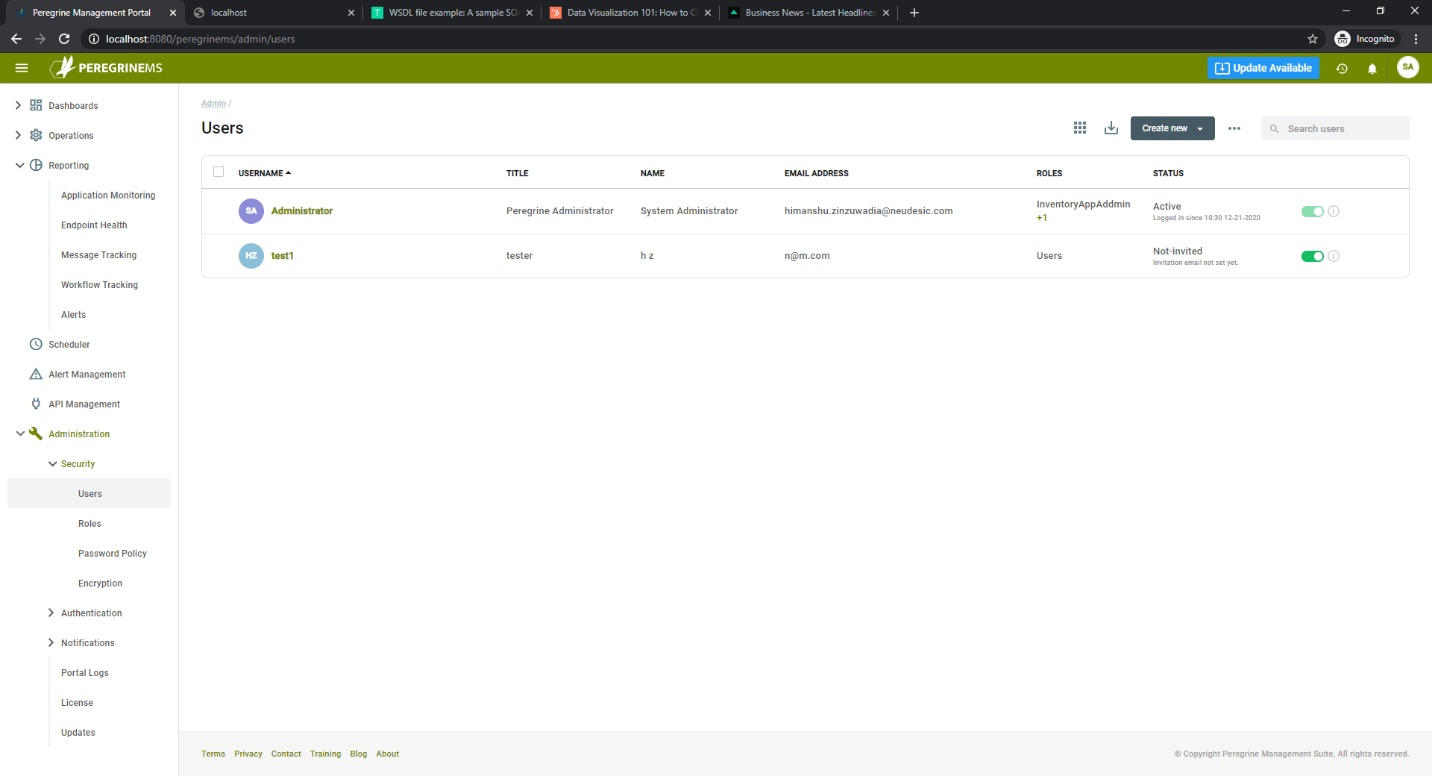
For each user specify the following:
- Username
- First Name
- Last Name
- Email Address
- Title
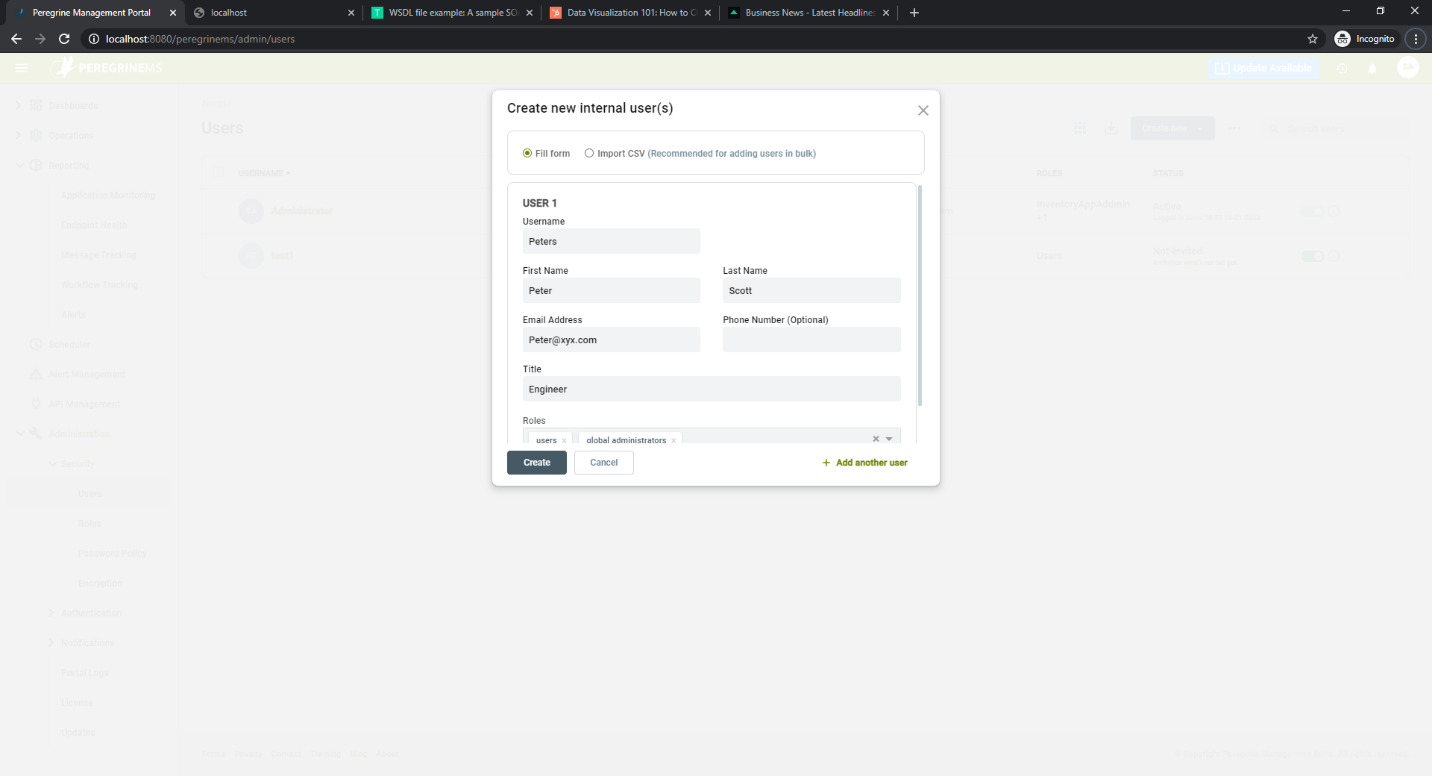
Assign roles to the users using the drop down for User Roles. User roles control what users can see and do in the Management Suite portal.
You can also bulk import users from CSV file. After importing users, assign roles to user by selecting appropriate roles from the drop-down list.
Encryption
Encryption keys encrypt information such as user data and passwords which are stored in Peregrine Hybrid DB. Installation creates one-year encryption key by default. You can generate new encryption keys using this page.

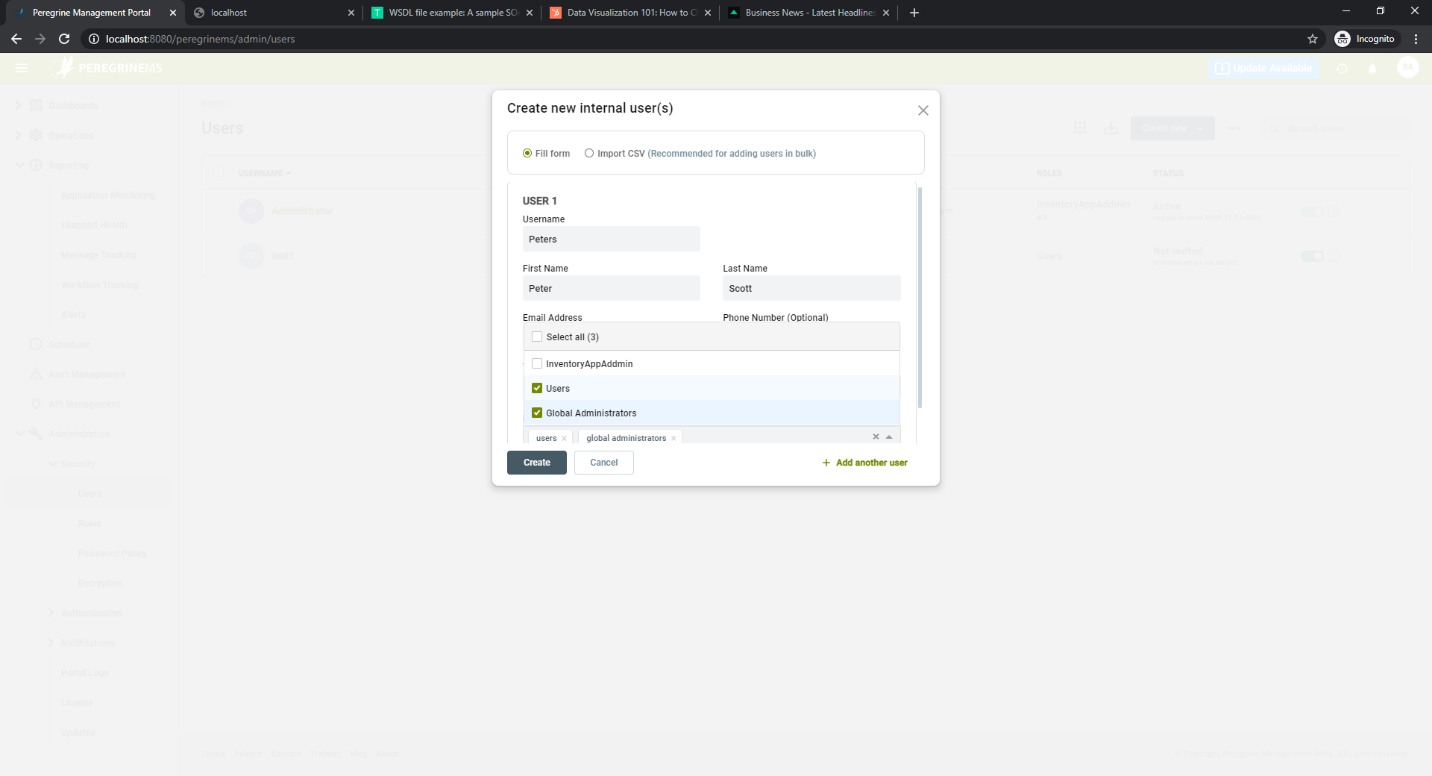
Password Policy
You can setup password complexity, rotation and other related fields using this page. It is recommended to turn on two factor authentication for additional security. The reset settings to PCI compliance automatically adjusts your password settings such that it meets all the requirements of PCI standard.
Minimum length of characters – When user wants to reset or change password, this will be used to enforce user to select password that has this minimum length.
Contain both numeric and alphabetic characters – When user wants to reset or change password, this will be used to enforce user to create password with both numeric and alphabetic characters.
Change password periodically – This and the next setting will enforce password rotation based on the frequency specified.
Change user password at least once every – frequency of password change.
Cannot repeat password used previously – if enabled, prevents user from reusing old password.
Cannot repeat password used for the last – combined with above rule, validates that the past n passwords are not used where n is the value in this field.
Lockout after failed attempts and number of attempts – enforces that the user account will be locked out after so many failed attempts.
Lockout time span – the time for which the account access will be locked following failed password attempts.
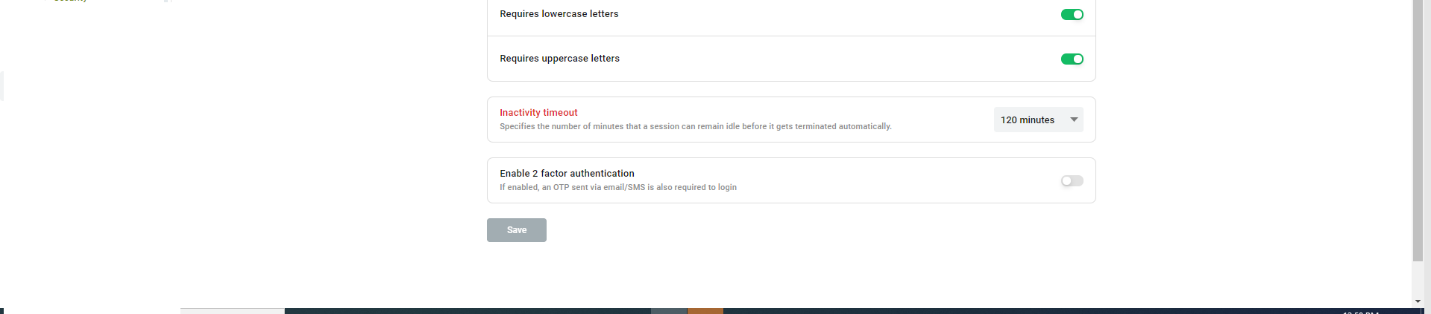
Require Special Character, Lowercase letters, Uppercase letters – Use to enforce password complexity
Inactivity Timeout – if user doesn’t log out of the portal when done, they will be automatically logged out after inactivity time exceeds this time specified here.
Enable two factor authentication – In addition to password, this setting requires users to enter one time passcode that gets sent to their email/SMS.
Authentication
OAuth Settings
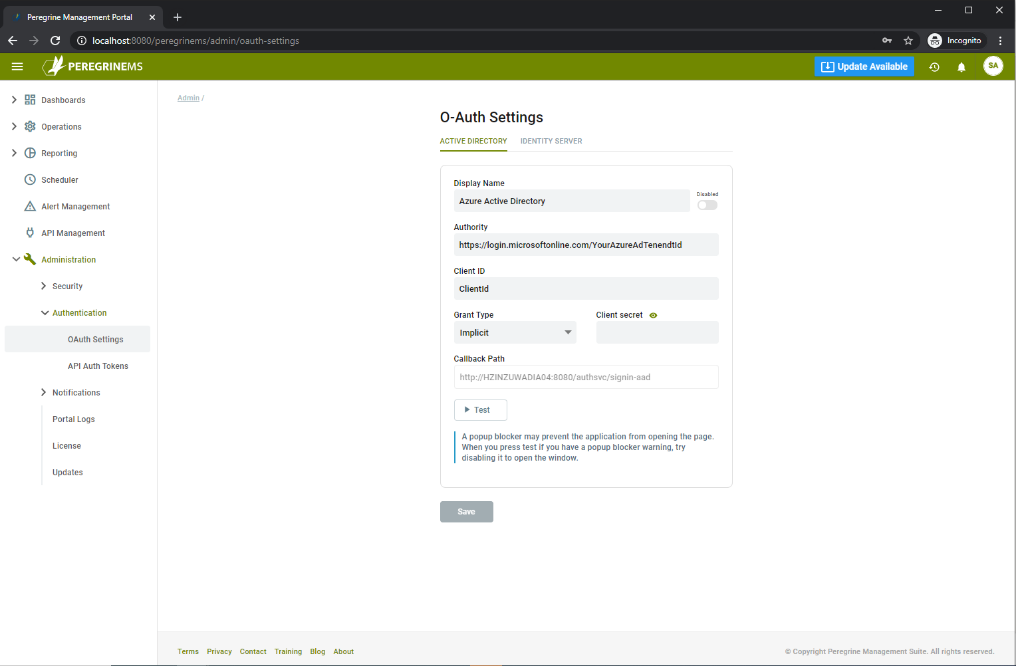
This section applies only if you need to configure Azure Active Directory or an external Identity server for access control of Management Suite.
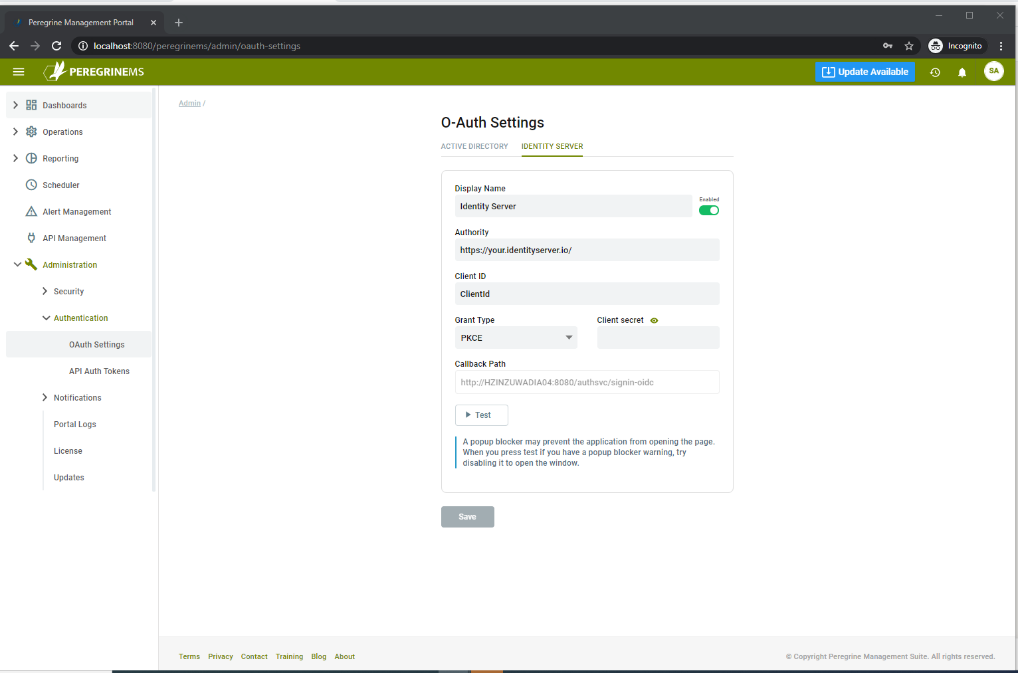
You may control access to Neuron ESB using OAuth that is based on Azure Active Directory or an external Identity server (Note many external identity providers like Google, Okta and Auth0 work with similar model as Identity Server, so these settings may work with any of those Identity providers). Using this page, you can configure the settings required for the Neuron ESB API token issuer. The Azure Active Directory setup is slightly different, therefore if you want to use Azure then use the first tab. For all others configure using the second tab.
For either of the above providers you need to configure the authority URL (This is the URL Management Suite will redirect the users to for logging-in when they attempt access). The Grant type, Client Id and Client Secret are required so that Management Suite can validate the users upon login. Users would have logged into the Azure AD or External Identity Server when accessing the Management Suite.
Consult the respective identity provider documentation for more details.
API Auth Tokens
API Auth tokens are used to grant temporary access tokens to Management Suite, Neuron ESB operation service API and to Neuron internal services. Normally, the Management Suite Environment setup provisions the correct tokens for Neuron ESB instances and Event Processor Instances.
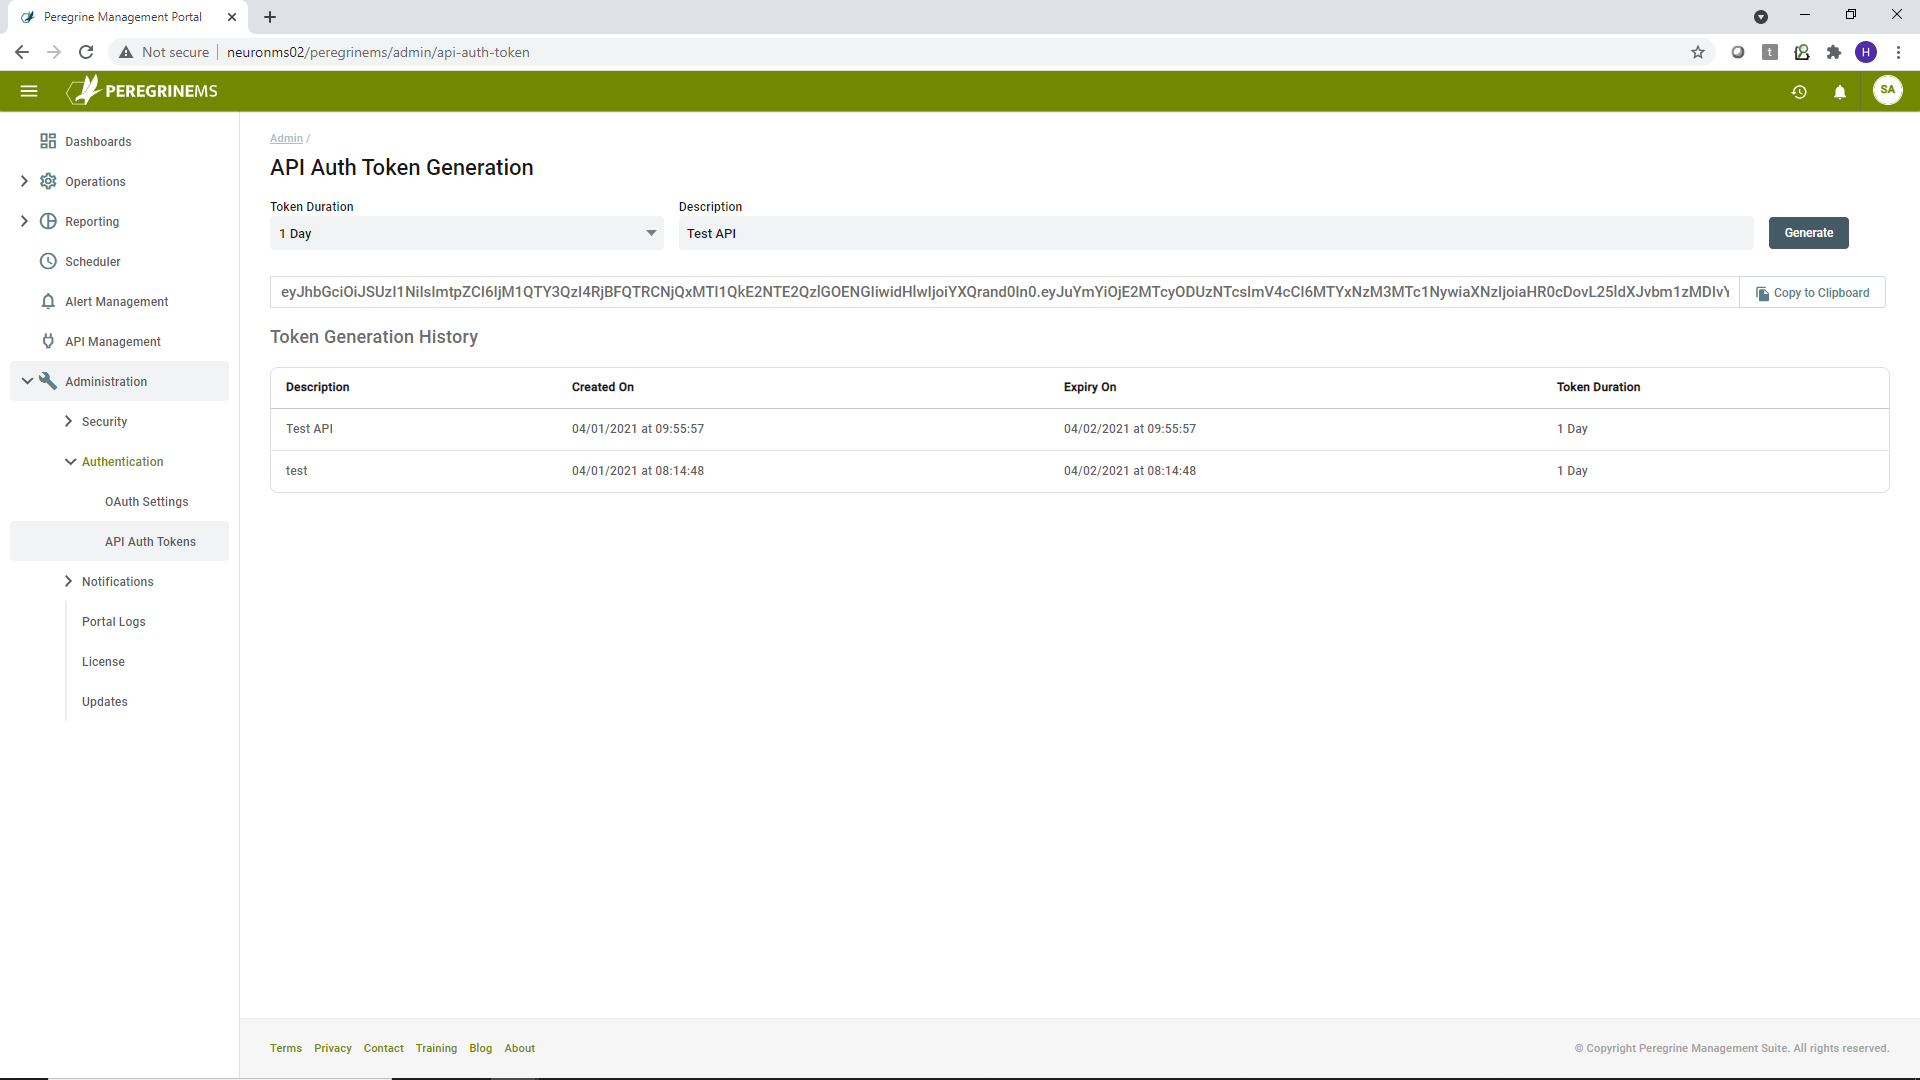
Administrators can generate temporary tokens for various durations and copy the tokens to clipboard, paste them into a file and share the token file with the caller who needs the token. This token is to be used as a Bearer <Token> in the authorization header when calling the API.
To generate token, select the duration from the drop-down box, enter token description and click Generate. The generated token is shown in the textbox below. You should copy this token and save it to a safe place because you won’t be able to see that token again.
This screen shows token generation history also. The History has following fields.
- Description – Token description you entered when generating the token.
- Created On – Date token was created.
- Expiry On – Date token expires
- Token Duration – Duration for validity of the token.
Notifications
The Management Suite can send out notifications when certain pre-defined conditions occur. These settings specify the Email server and SMS server (Twilio) settings for sending out these notifications. Refer to the Alert management section for configuring what notifications get sent and to what audience.
Get the values for these settings from the email provider and/or the SMS provider Twillio and enter them below. It is recommended to enable SSL on the email.
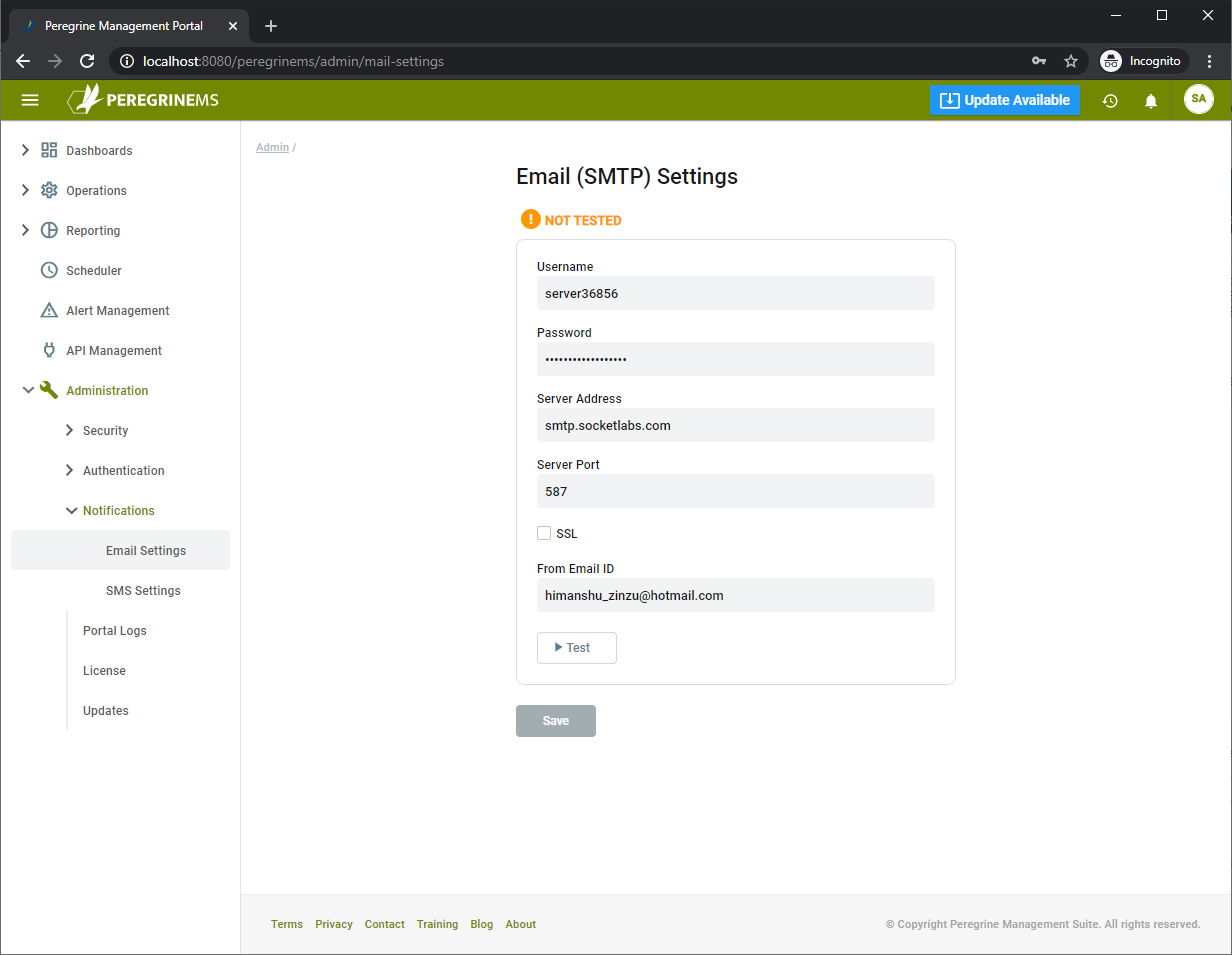
- Username – The username for the SMTP server account
- Password – The password for the SMTP server account
- Server Address – The address of your organization’s SMTP server
- Server Port – The SMTP Server port used by your organization. Note that default port is generally 25, 465 or 587.
- SSL – Check box to indicate if SSL is enabled for the SMTP server
- From Email ID – Alert Emails sent from MS will show this as a from Email Id.
- Test – User the Test button to verify the SMTP settings.
- Save – Save the Email configuration.
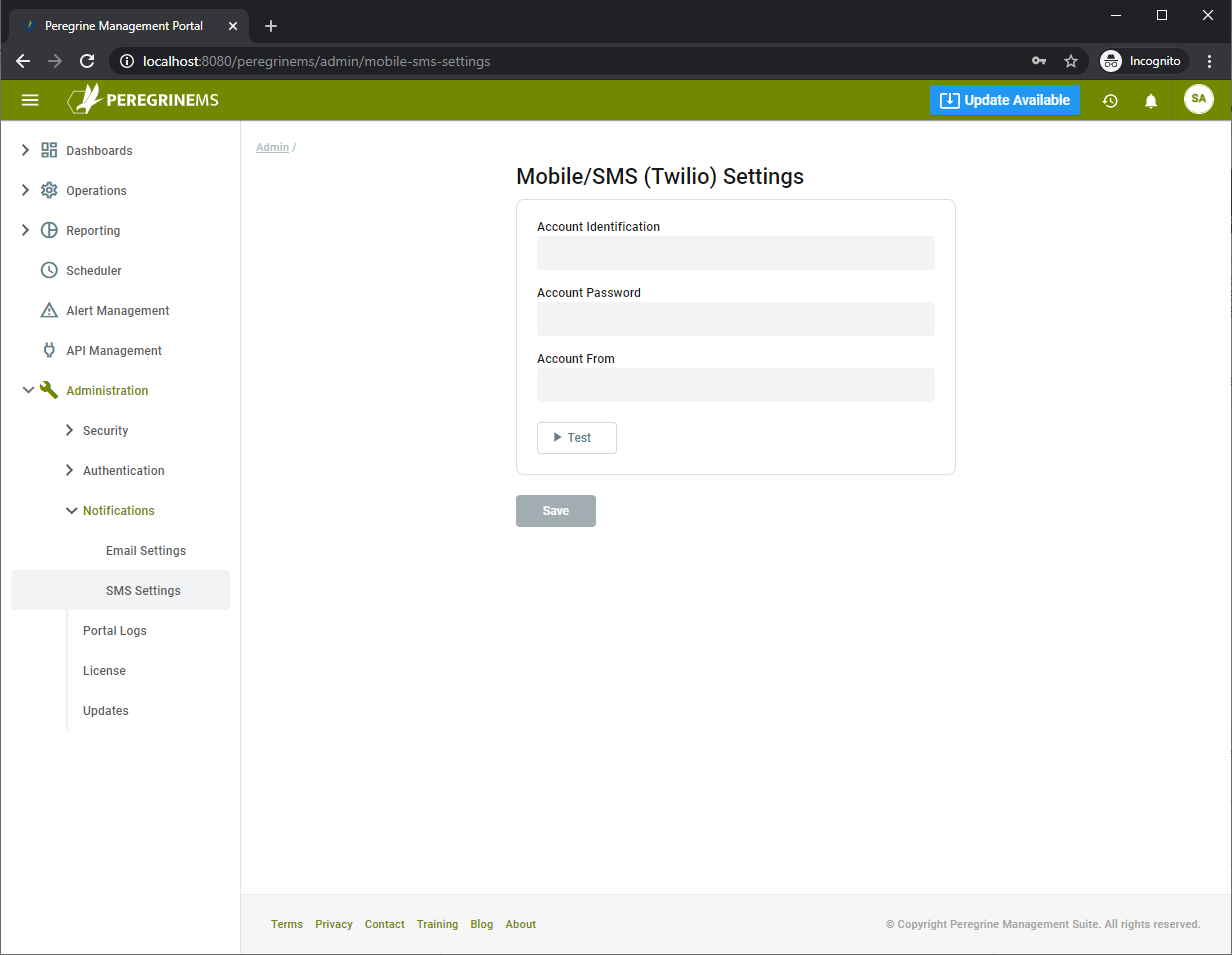
The following screen shows the SMS settings. Note that for SMS, Management Suite supports the most frequently used provider Twillio. Enter the Account Id, Password and Account From values for your Twillio configuration in the screen below. Use Test button to verify and click Save to save these settings.
Portal Logs
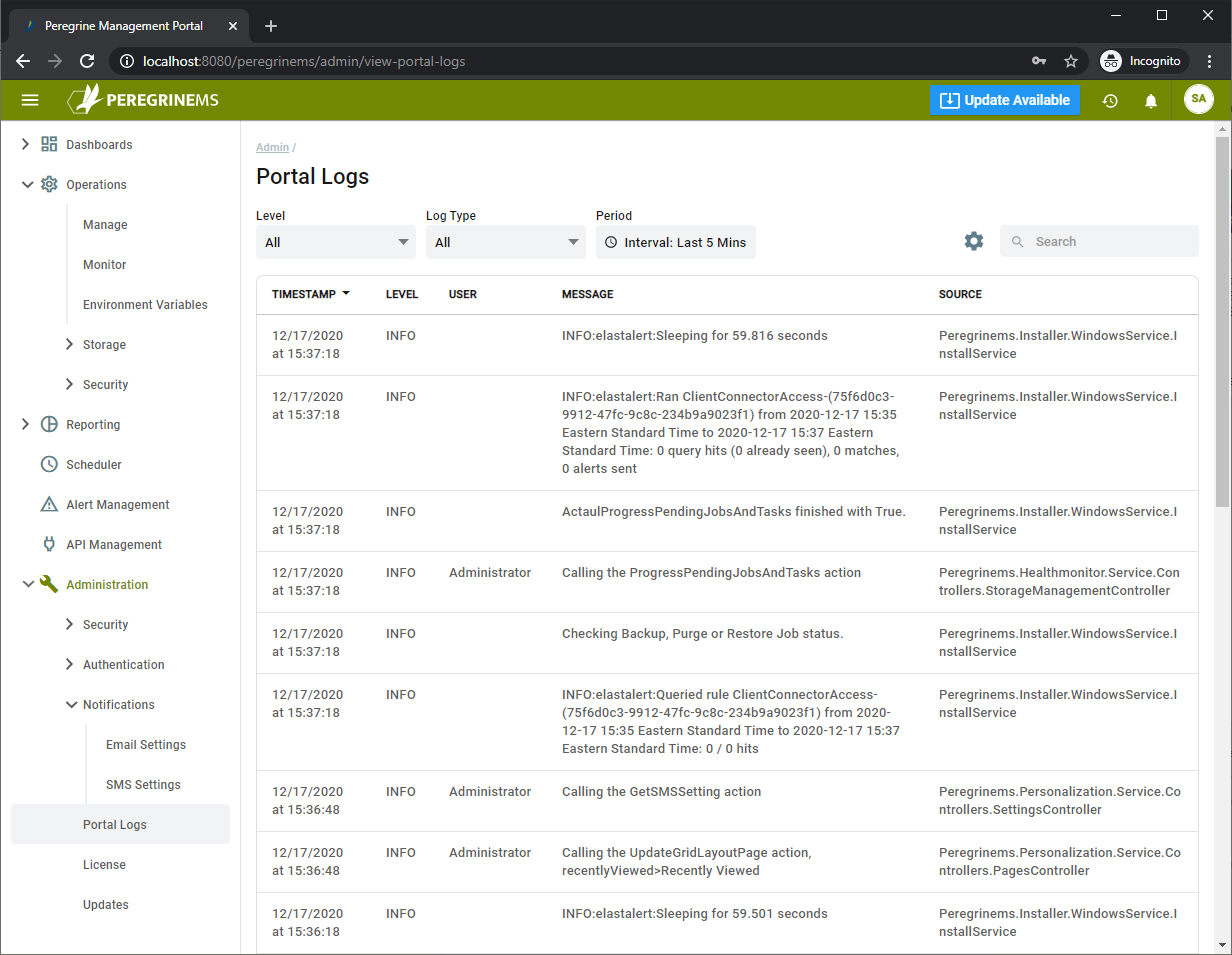
Portal logs show the various entries logged by the Management Suite to aid in debugging access issues, alerting issues and other issues where the monitoring information is delayed or missing.
You can search and filter using the dropdown and search boxes at the top.
- Timestamp – Date and Time of the event
- Level – Severity level of the event.
- User – The logged in User Id that originated message. Note that messages generated from background tasks do not have this column value.
- Message – Message showing description of the event that occurred.
- Source – The system component where the message originated.
License
This page displays Peregrine MS license information and allows you to apply updated license key for more users and features if you need.
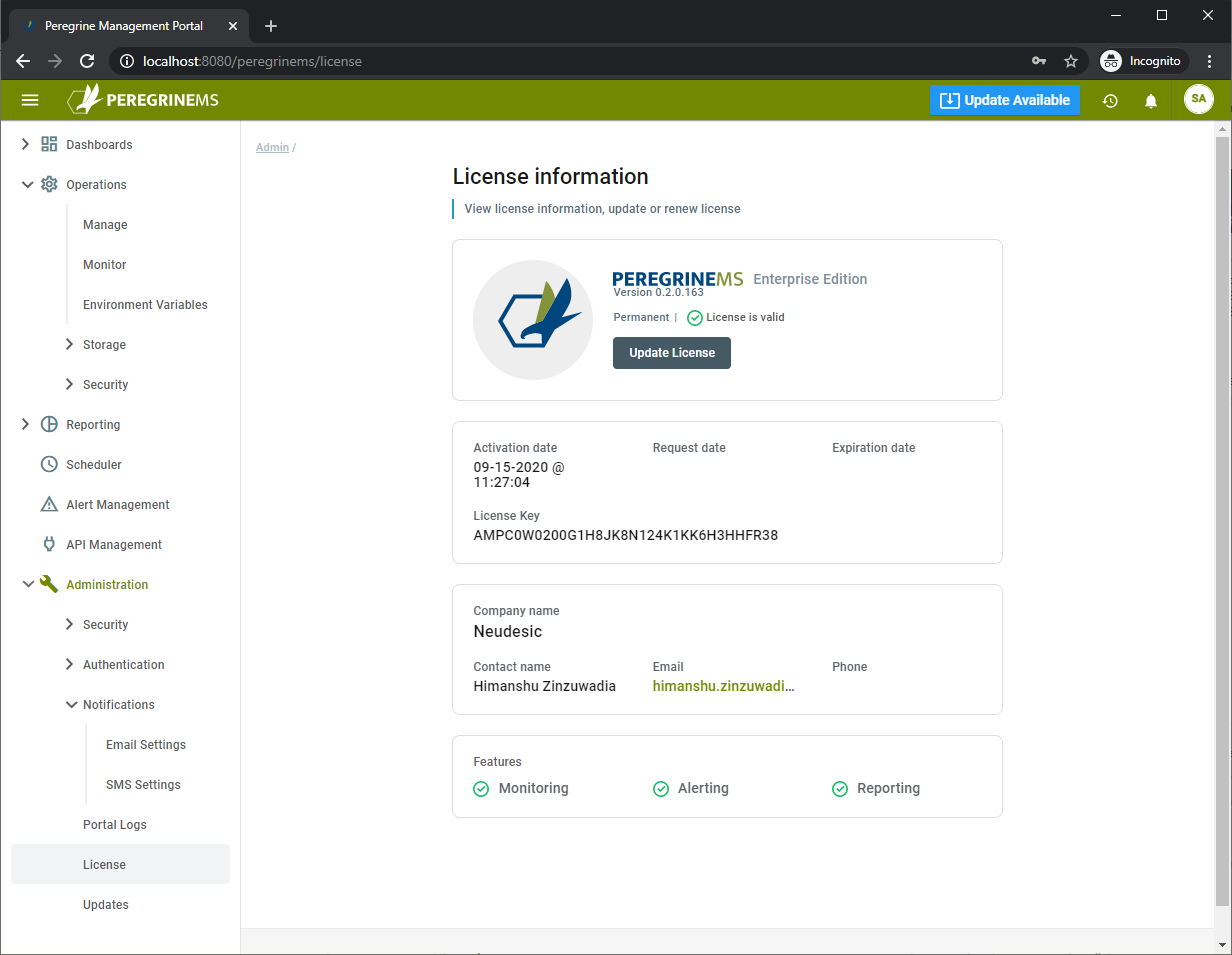
On this page you can see the exact Edition and version of the Peregrine Management Suite in the top section. Below that you can see if the license is a trial or subscription license as well as result of most recent license validation. License validation occurs every day if last validation was more than 14 hours ago.
Below that you can see the following items.
- Activation Date – This is the effective date of activation for your license.
- Request Date – This is the request date when request for the license was sent to Peregrine Connect.
- Expiration Date – This the expiration date of the license. License is generally renewable every year but depending on your contract, a three-year license can also be setup.
- License Key – This is the license key that uniquely identifies your license to Peregrine Connect licensing system. The license key is tied to machine name, features and number of licensed users.
- Registered information for the license
- Company Name – Name of the company on the license
- Contact Name – Name of the contact person for license purpose
- Email – Email address for the contact person for license purpose
- Phone – Phone number of the contact person for license purpose
- The features included as part of this license. It indicates that current license scheme includes all the features listed under this title.
Updates
This page shows available updates for downloads and update history.
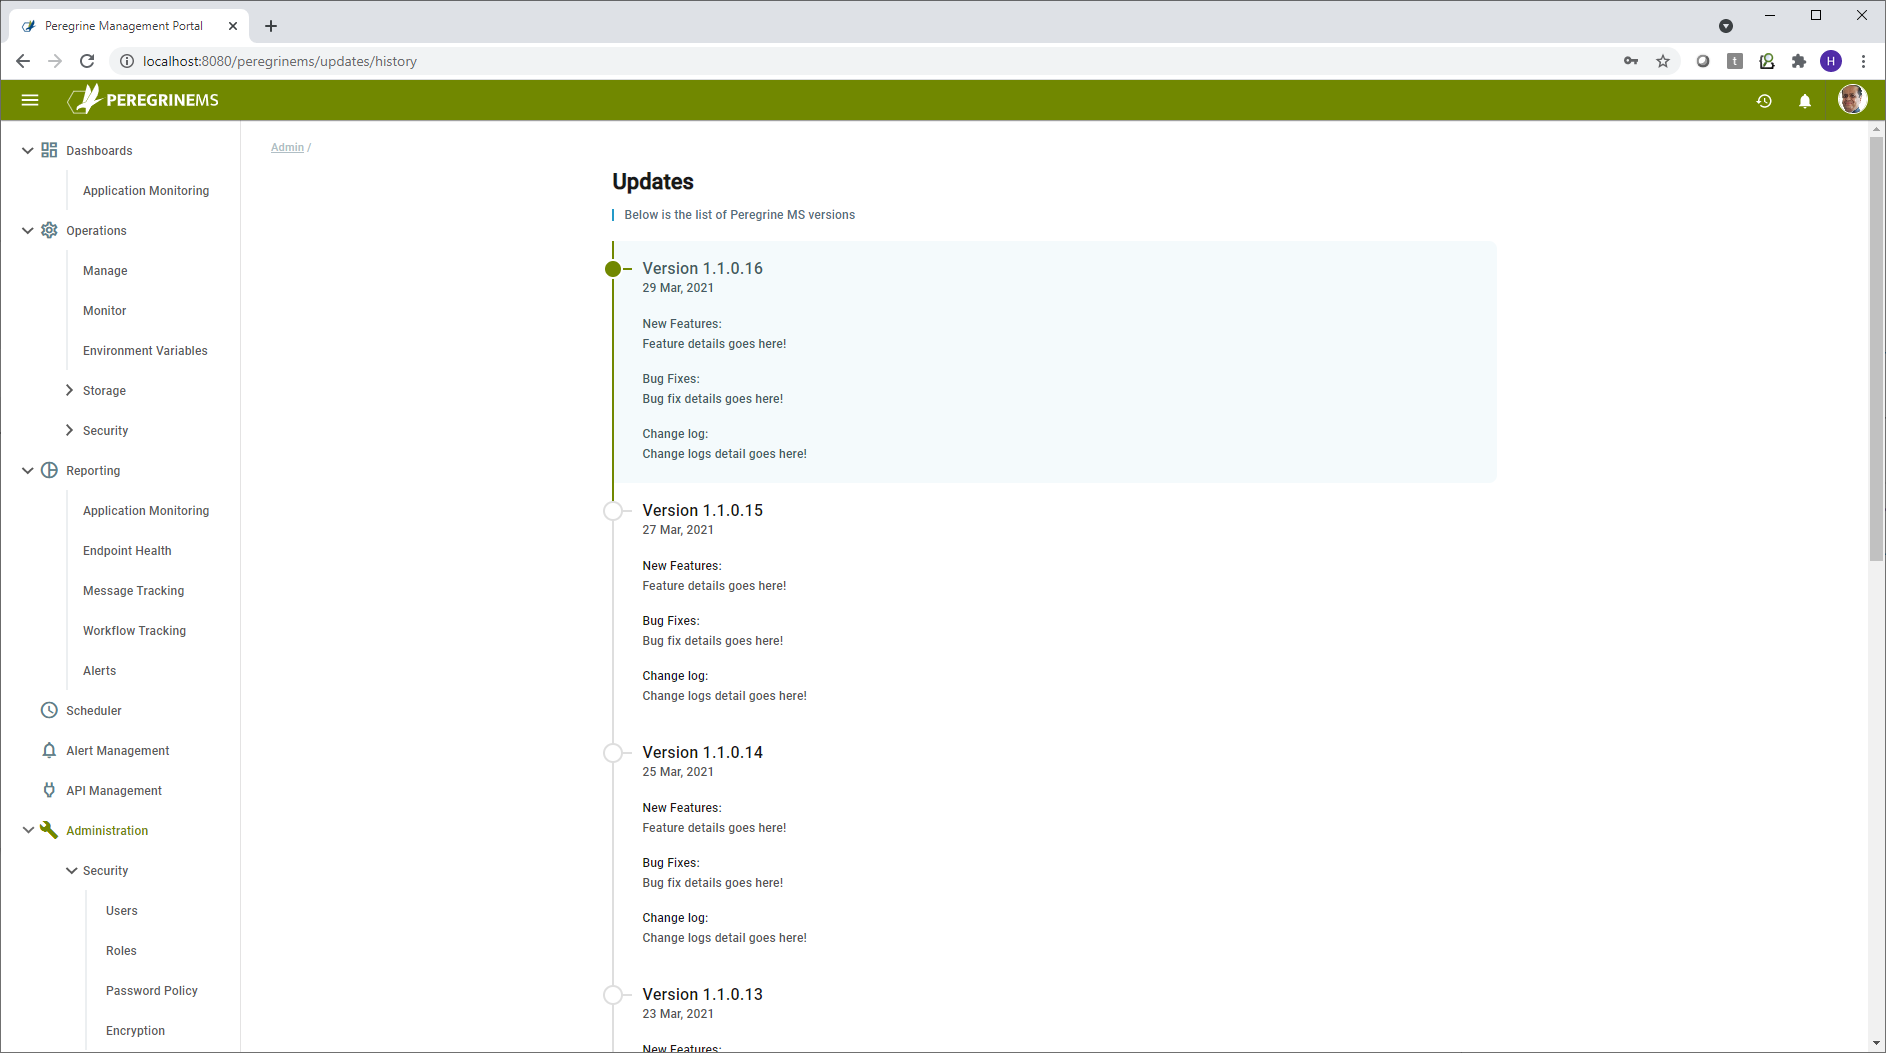
This screen shows all the updates that have been applied or pending along with Version, Date of Release and list of Features/Bug Fixes and Change Log included in that update.