API Management
OAuth and OpenId Overview
Peregrine Management Suite implements security using Identity Server 4 by default (You have option to use Azure Active Directory also). The Management Suite extends the Identity Server 4 for use by Neuron Applications. Client Connectors in Neuron applications can have authentication and authorization enabled using the API management functionality.
When configured this way, a calling application or user that accesses the configured client connector, it will have to obtain and attach a token to the request. This token will be validated at runtime by Neuron ESB platform to allow or deny requests depending on the values of Scope item in it. The content of the token can be used to further control what functionality of client connector is available to which consumer application using Scopes.
To get started with API Management, you must create at-least one API resource per application and include the client connectors in that application under this API resource. API Resource can simply be defined as a group of Client Connectors that share the same values for Scope.
To grant access to the API resource, you must create a consumer application for the API resource and assign a consumer Id and consumer secret. Alternatively, if you have added your consumers as Management Suite users or you are using Azure Active Directory and have added your consumers as Management Suite users, then the consumer users can use the same token they obtained to log in to Management Suite. The first method is called Client Credentials grant type and the second method is called PKCE or Hybrid Grant Type.
For more details on OAuth and OpenId refer to the whitepaper, “Securing Client Connectors with OAuth”. https://neudesic-my.sharepoint.com/:w:/p/himanshu_zinzuwadia/Edj4jO_0dTZIoSSYEilWxWgB1y8E-X9jXS0cuY53_pgWsA?e=bv2CEn
Also, for developers refer to “Client OAuth Provider Setup Documentation”. https://neudesic-my.sharepoint.com/:w:/p/himanshu_zinzuwadia/EZwO3jJLHfxAnZjes2VrsdcBtMVAHf1-lXlr92M2BIRzlA?e=ejS7Yg
Client Connectors and API Resources
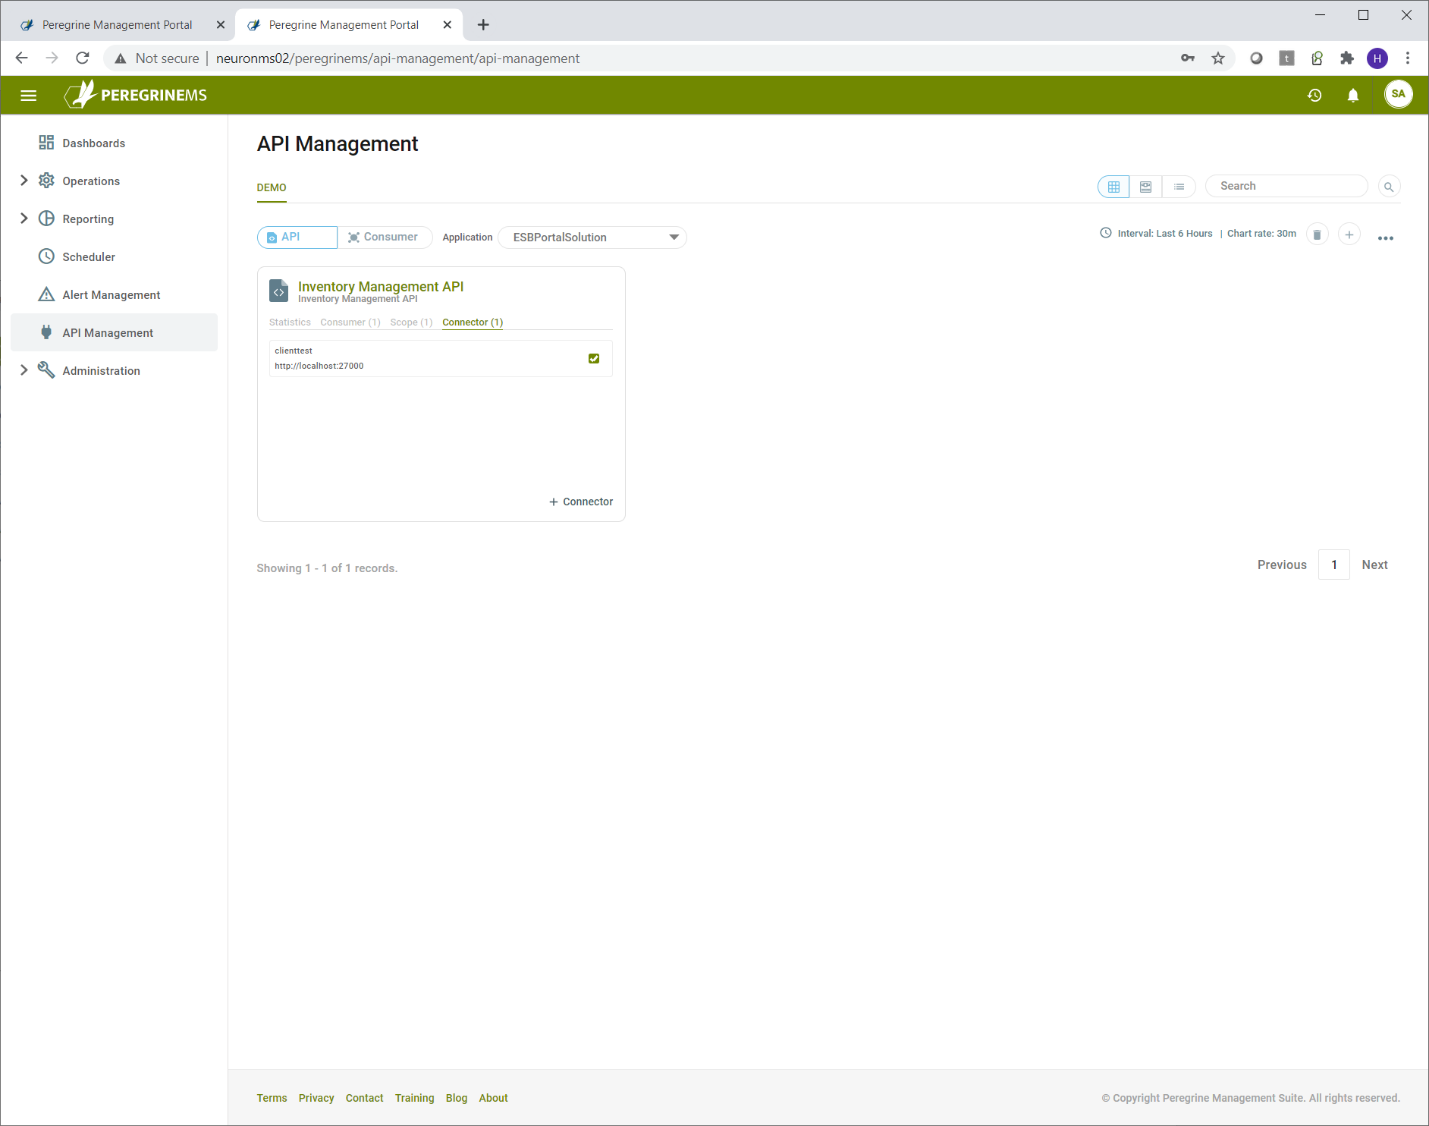
API resources can be defined using the menu option API management.
Start by selecting the API button on top bar and selecting the desired application in the application dropdown. Then click the + icon in the top right corner as shown below. You have option to switch between card view and list view by selecting the appropriate option to the left of search.
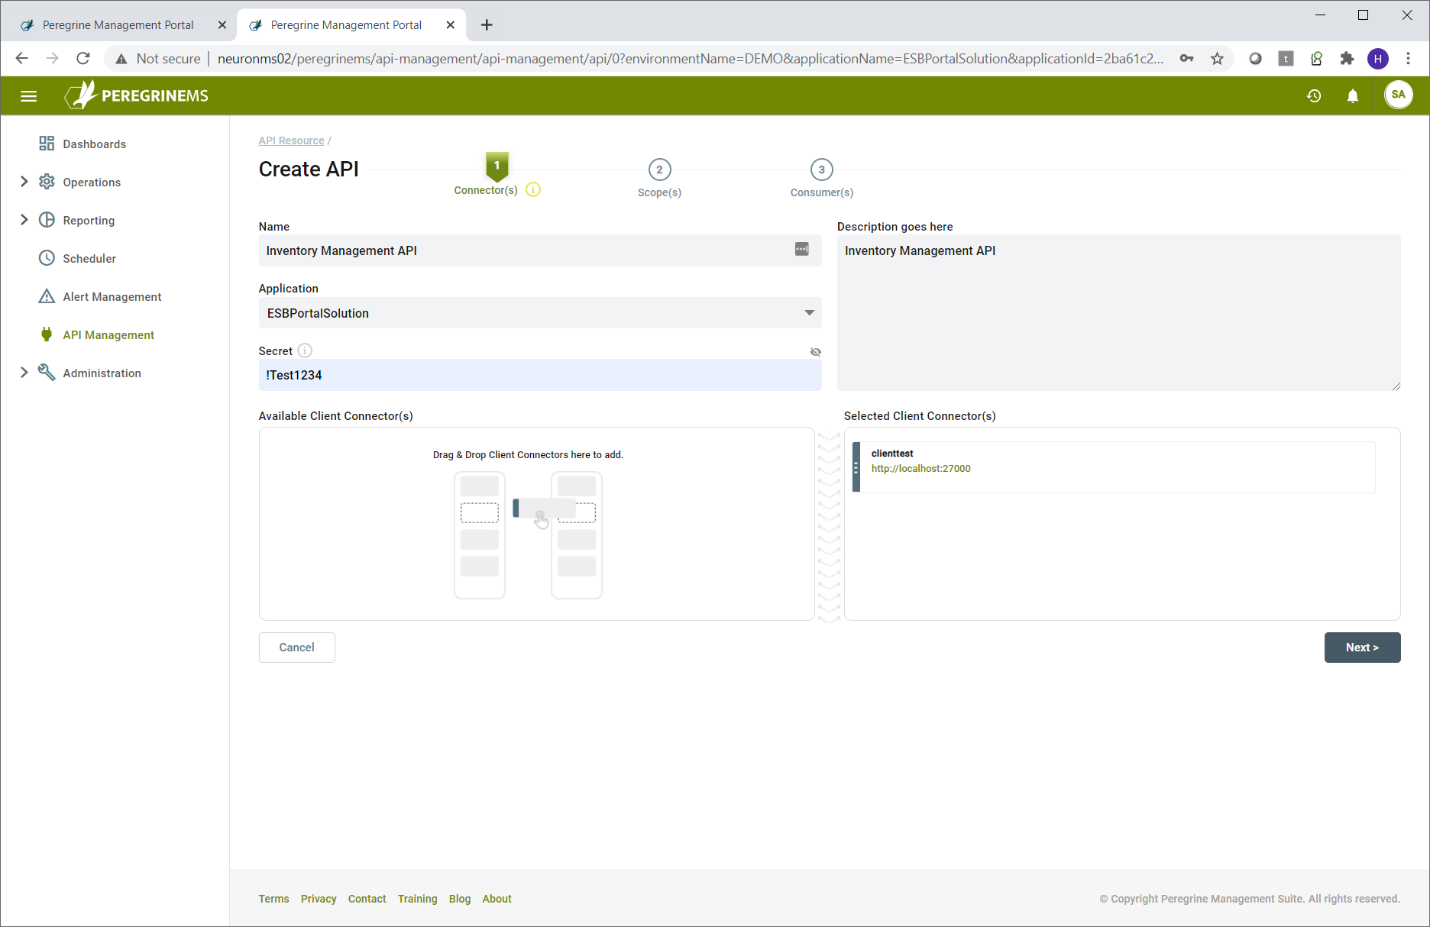
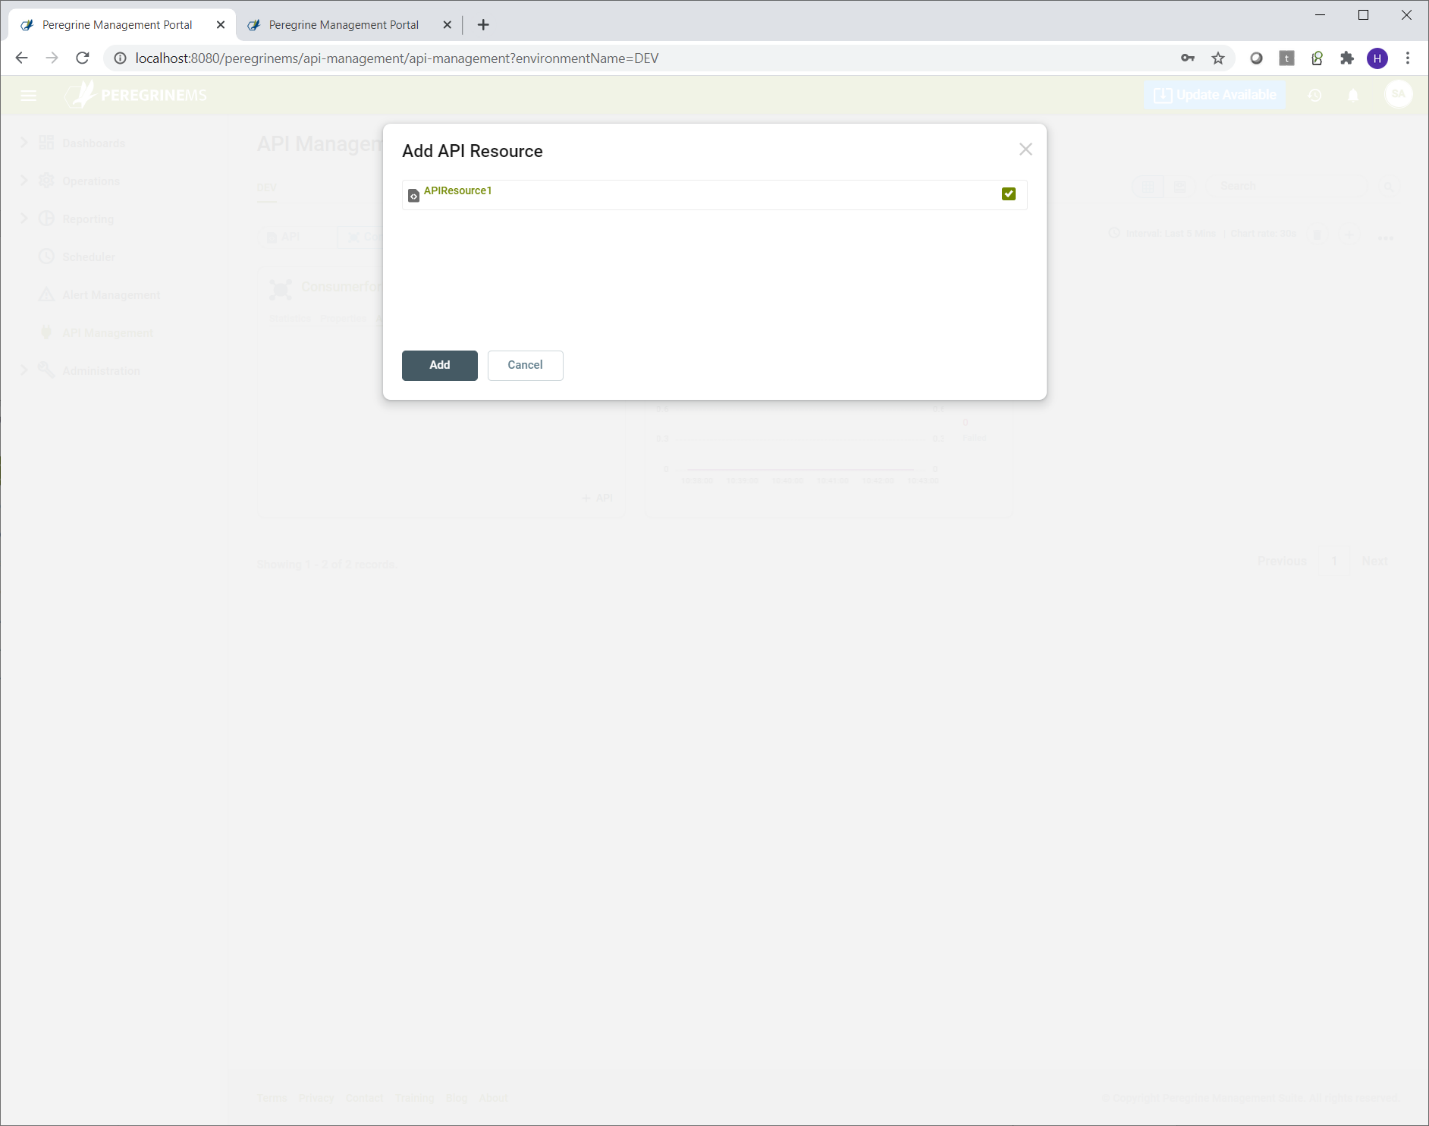
This launches a wizard and that will step through the process of setting up API resource. You need to add some client connectors, scopes and consumers to the API resource. If you have not created a consumer for the API resource, you may add consumers later.
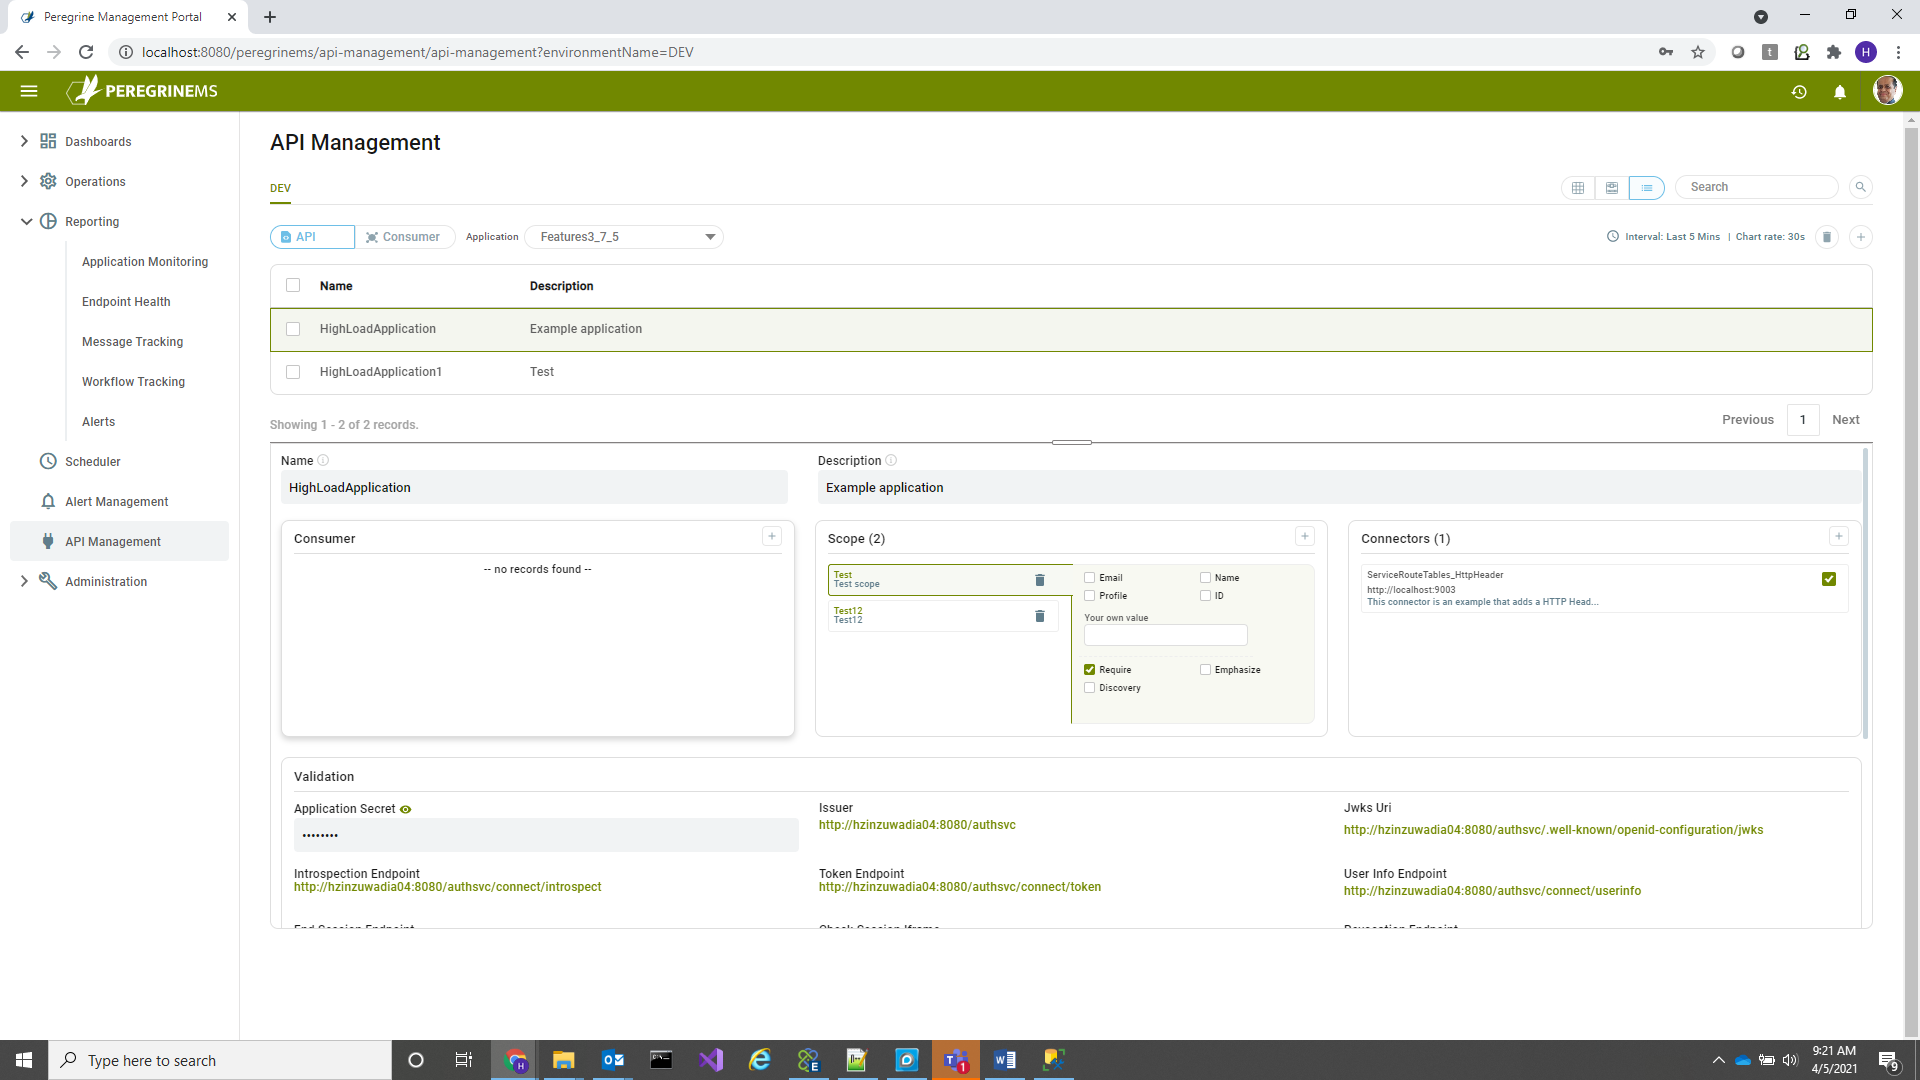
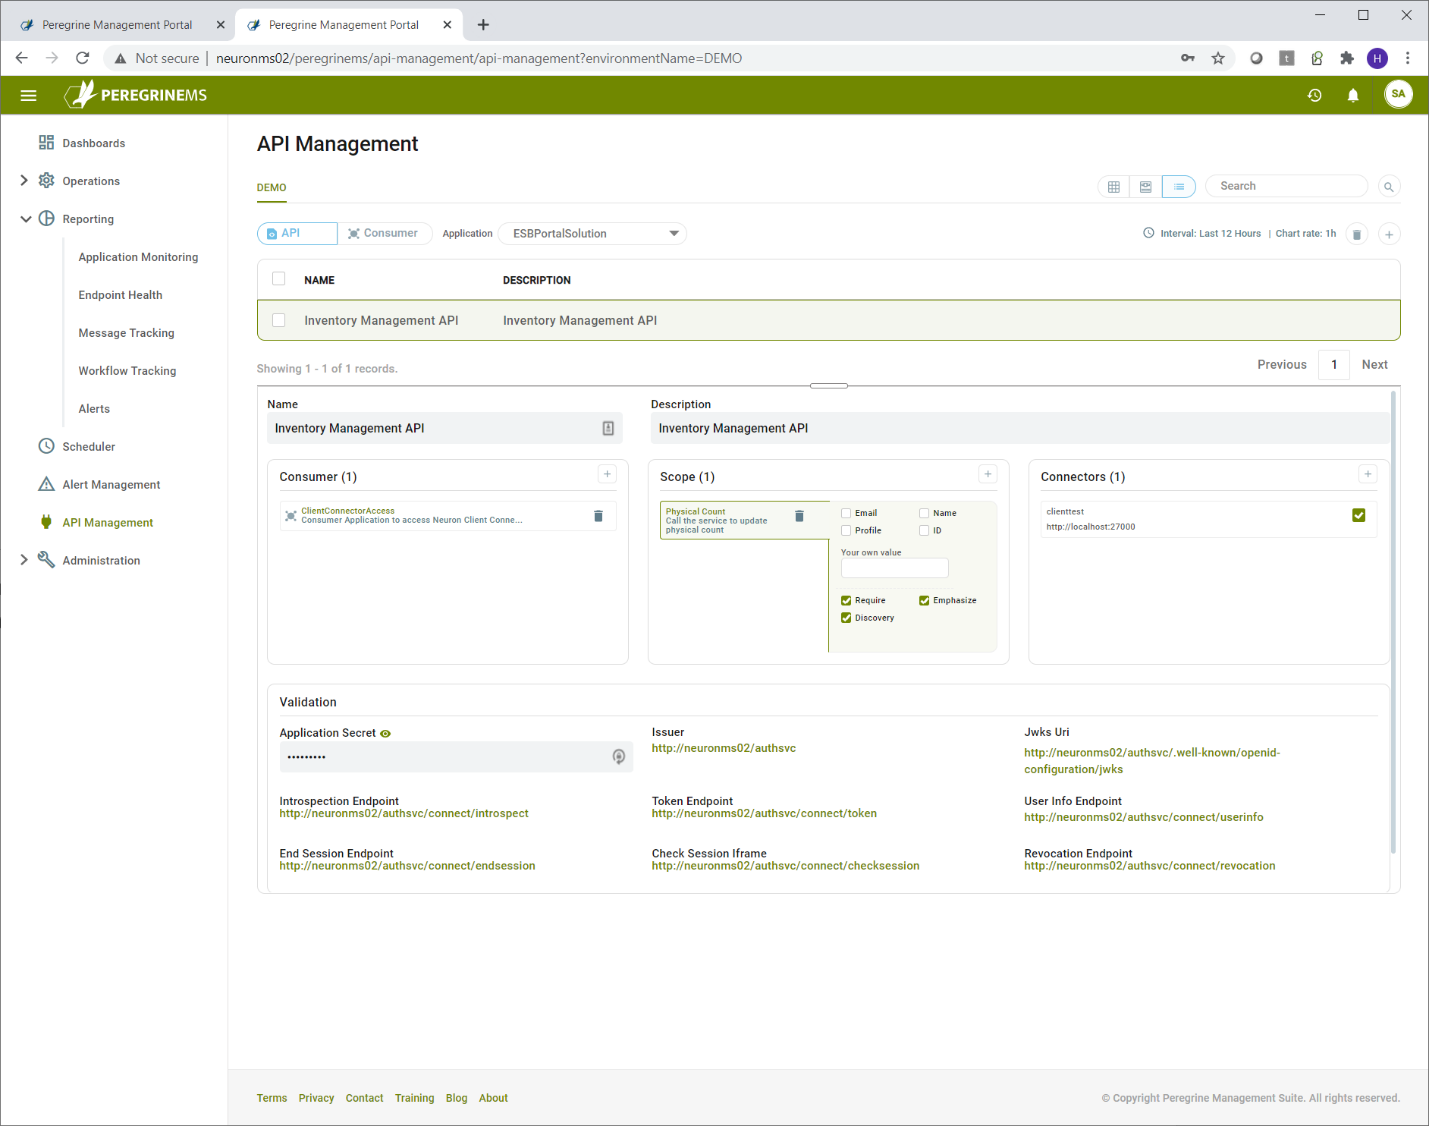
In the first tab, select the application that has the client connectors. After that you create the API Name, Description and the API secret value. The API secret value is used by Neuron ESB internally to validate the tokens presented to it. You select the client connectors you want to include in this API by dragging and dropping them to the right.
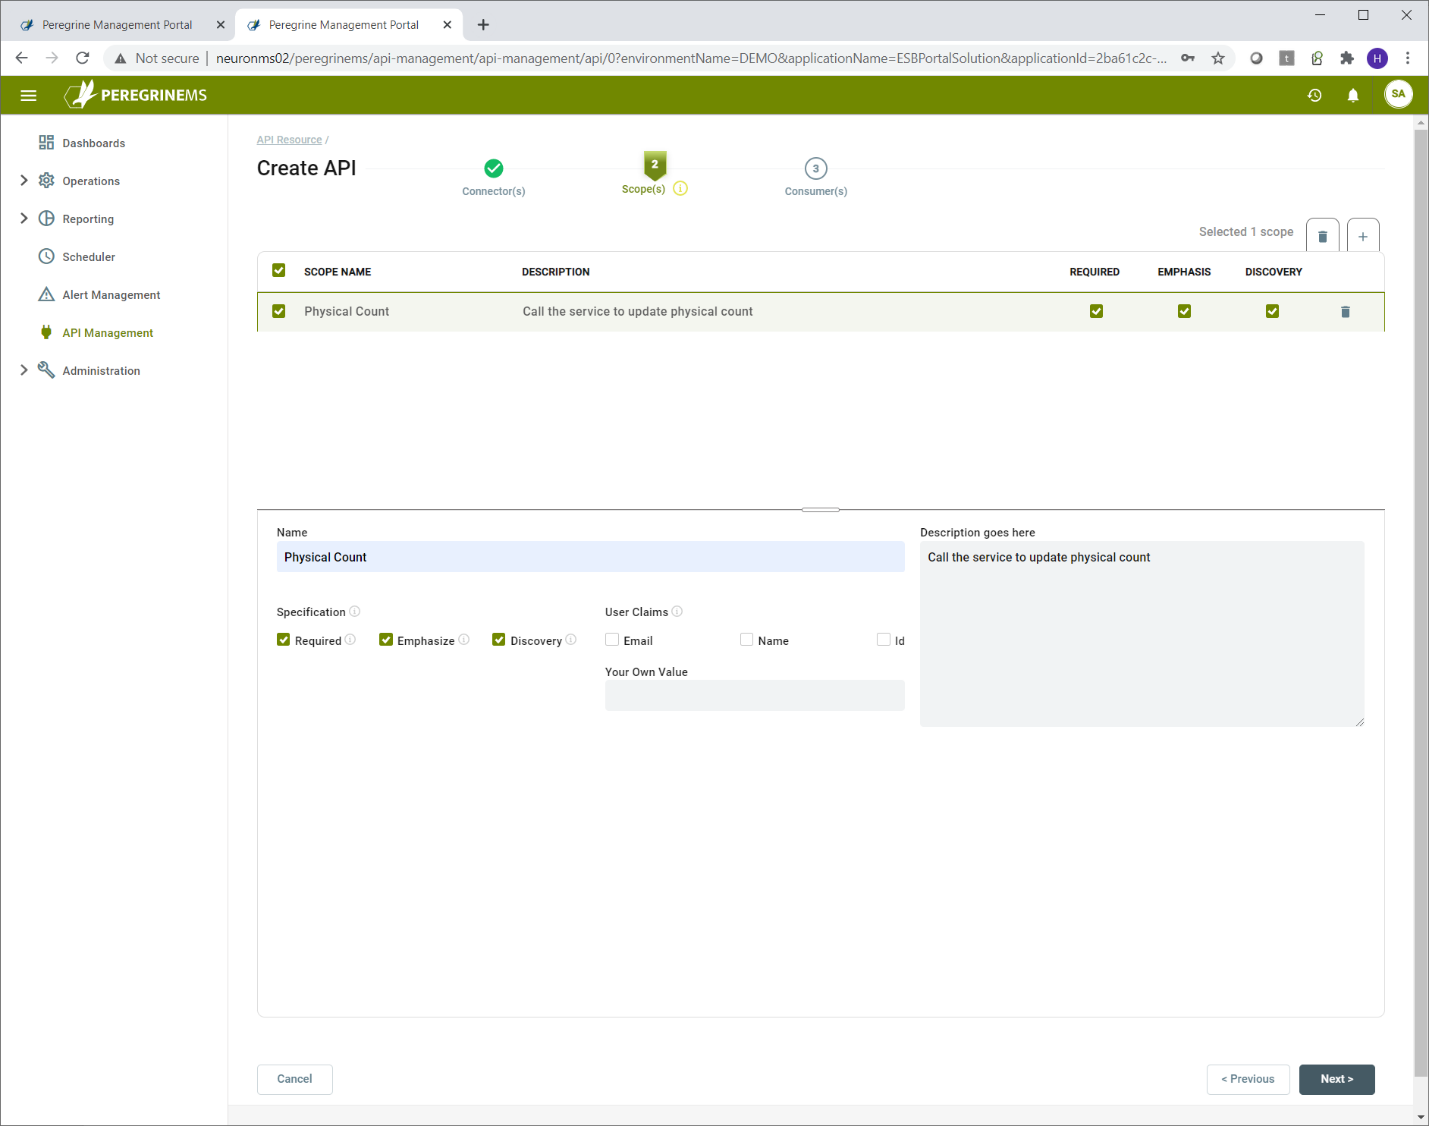
In the scopes tab, enter the name and description of the scope to be added, the checkboxes for Required, Emphasize, Discovery indicate whether the scope is a required value in the token, whether it should be emphasized when prompting user for permission and whether the scope should appear in the discovery document for the identity server.
You can add multiple scopes to the API.
User claims are applicable when the consumer grant type is Hybrid or PKCE. This indicates that the token presented by the consumer application user will make the email, name or id information available to the Neuron Client Connector. You may also enter your own value in User Claims. This value will then be included in all the user tokens issued by Identity Server 4.
In the last tab, you may assign one of the existing consumers to the API resource. If you haven’t created consumer yet, you can finish and assign the consumer later after you have created the consumer.
In the following screen, you can see that there are no applicable consumers. You can finish creating the API and come back to this after you have created a consumer. You can then assign the consumer to the API as shown in the screen following the next one.
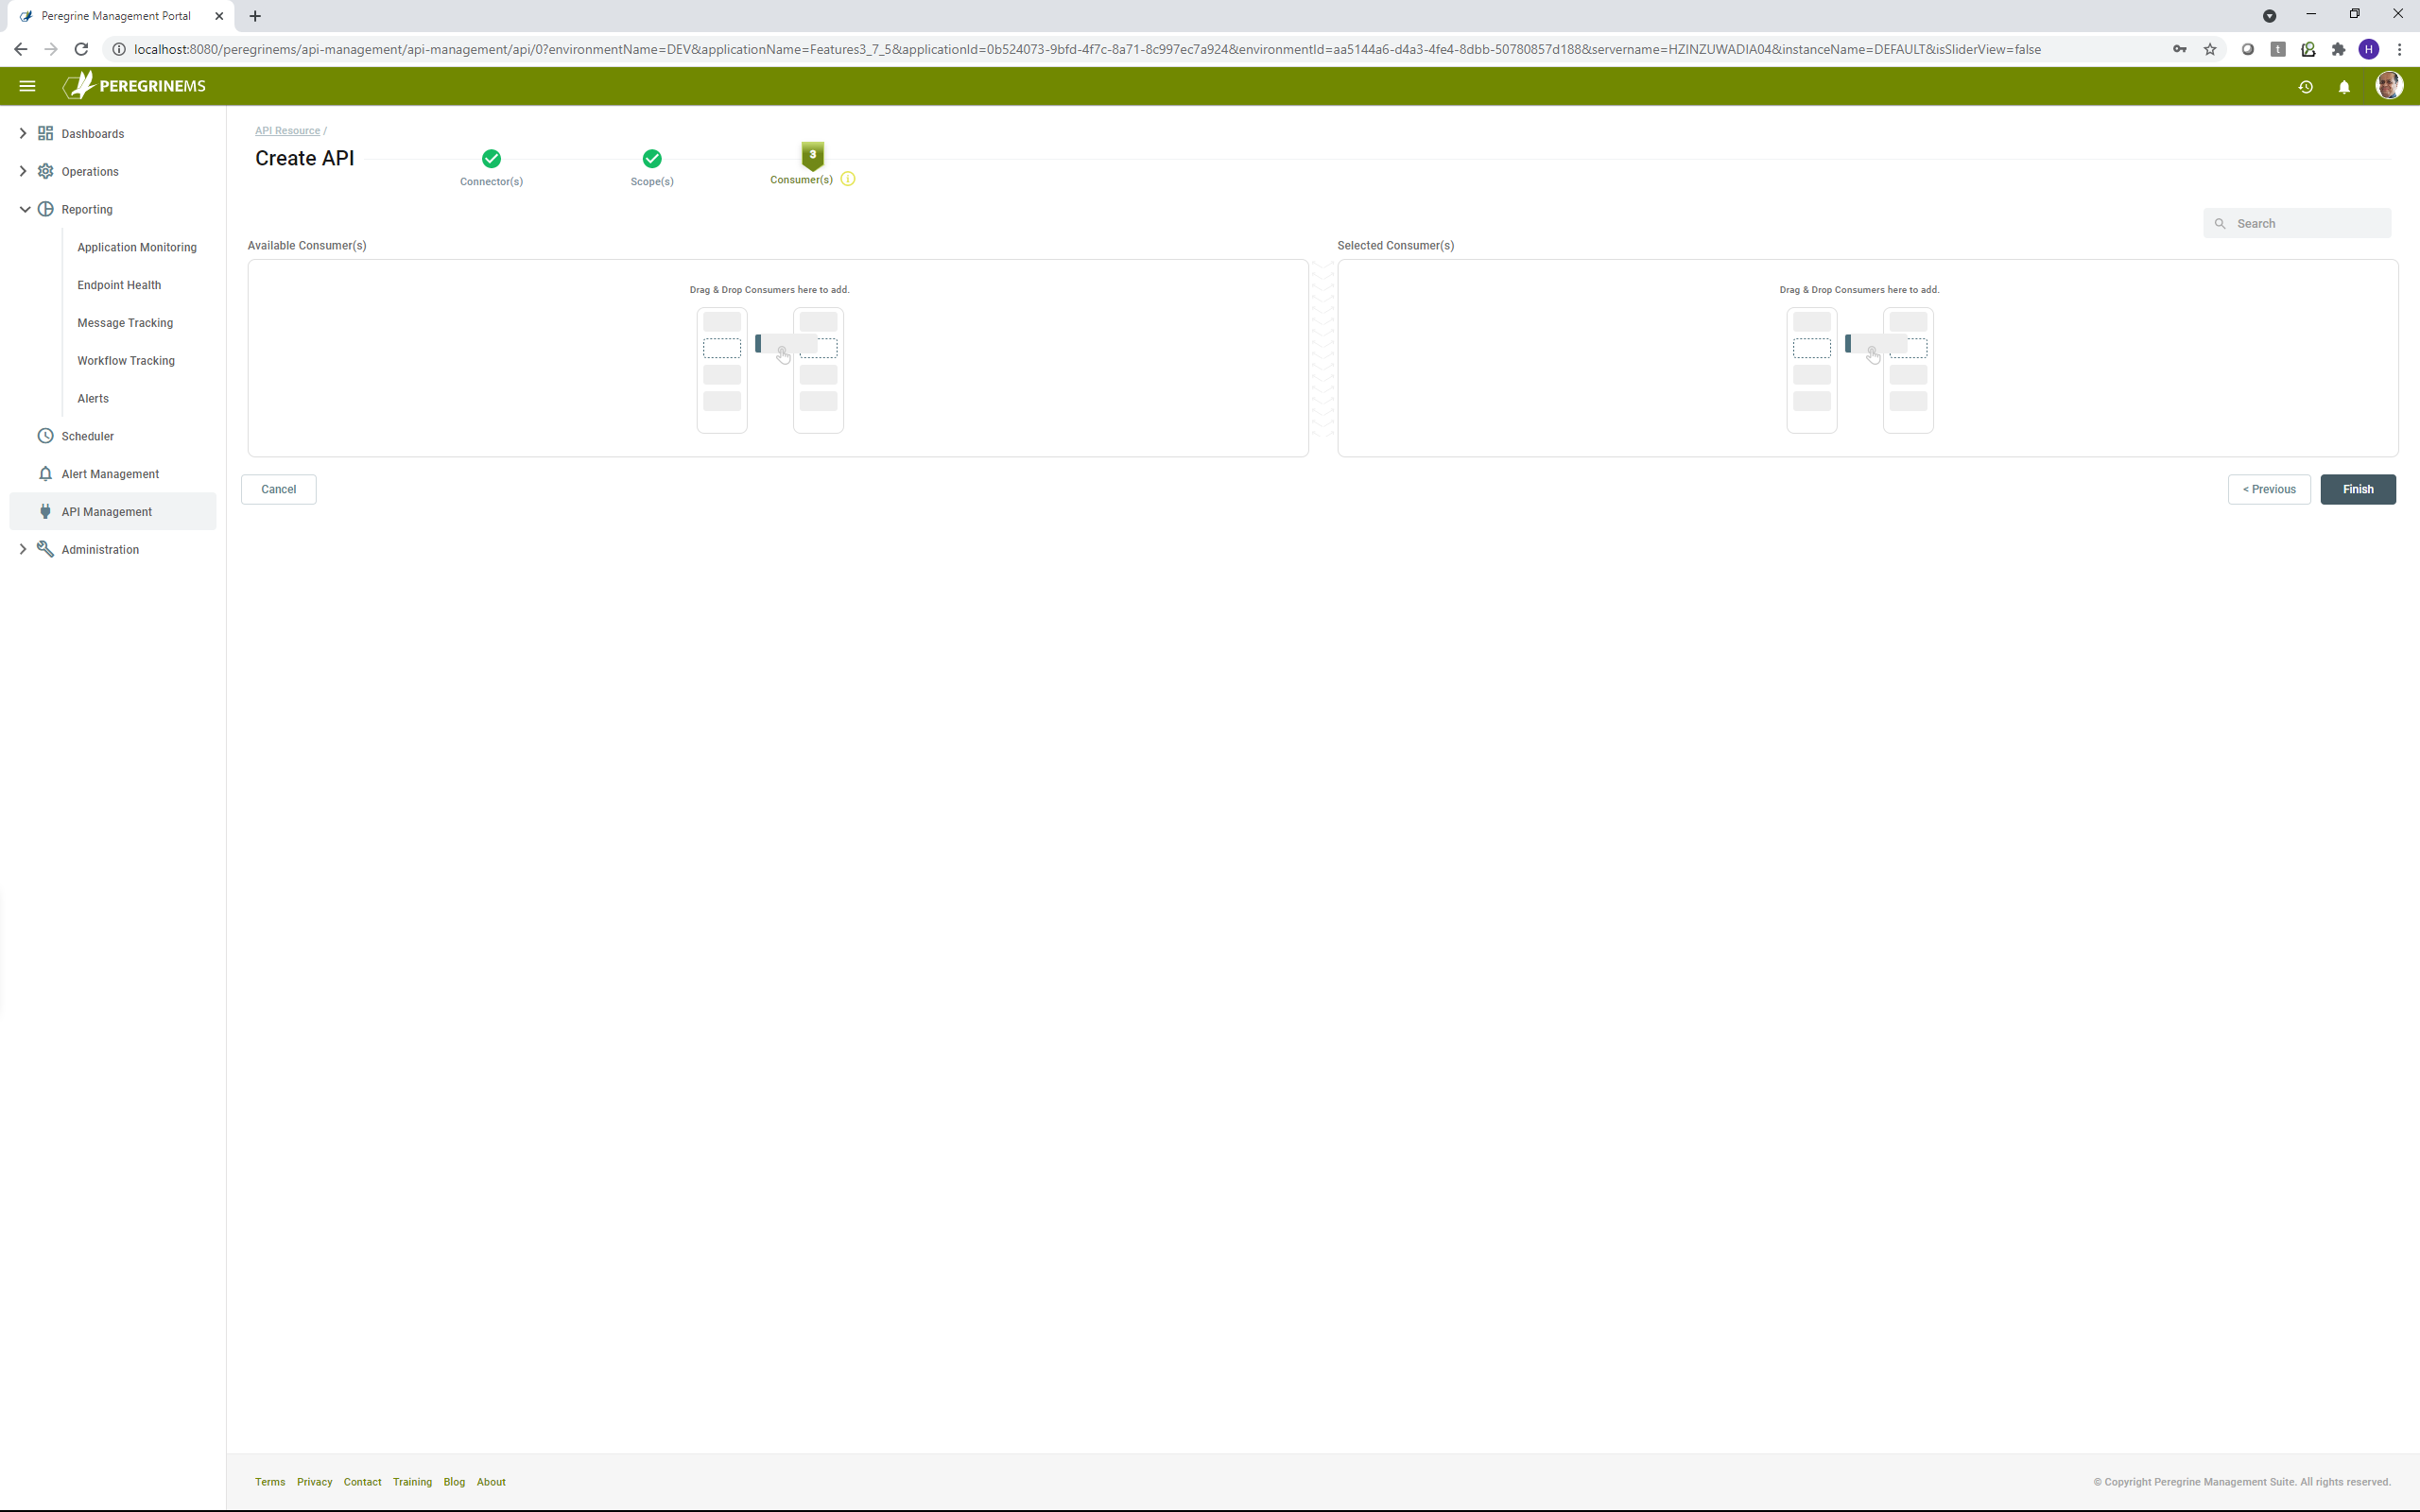
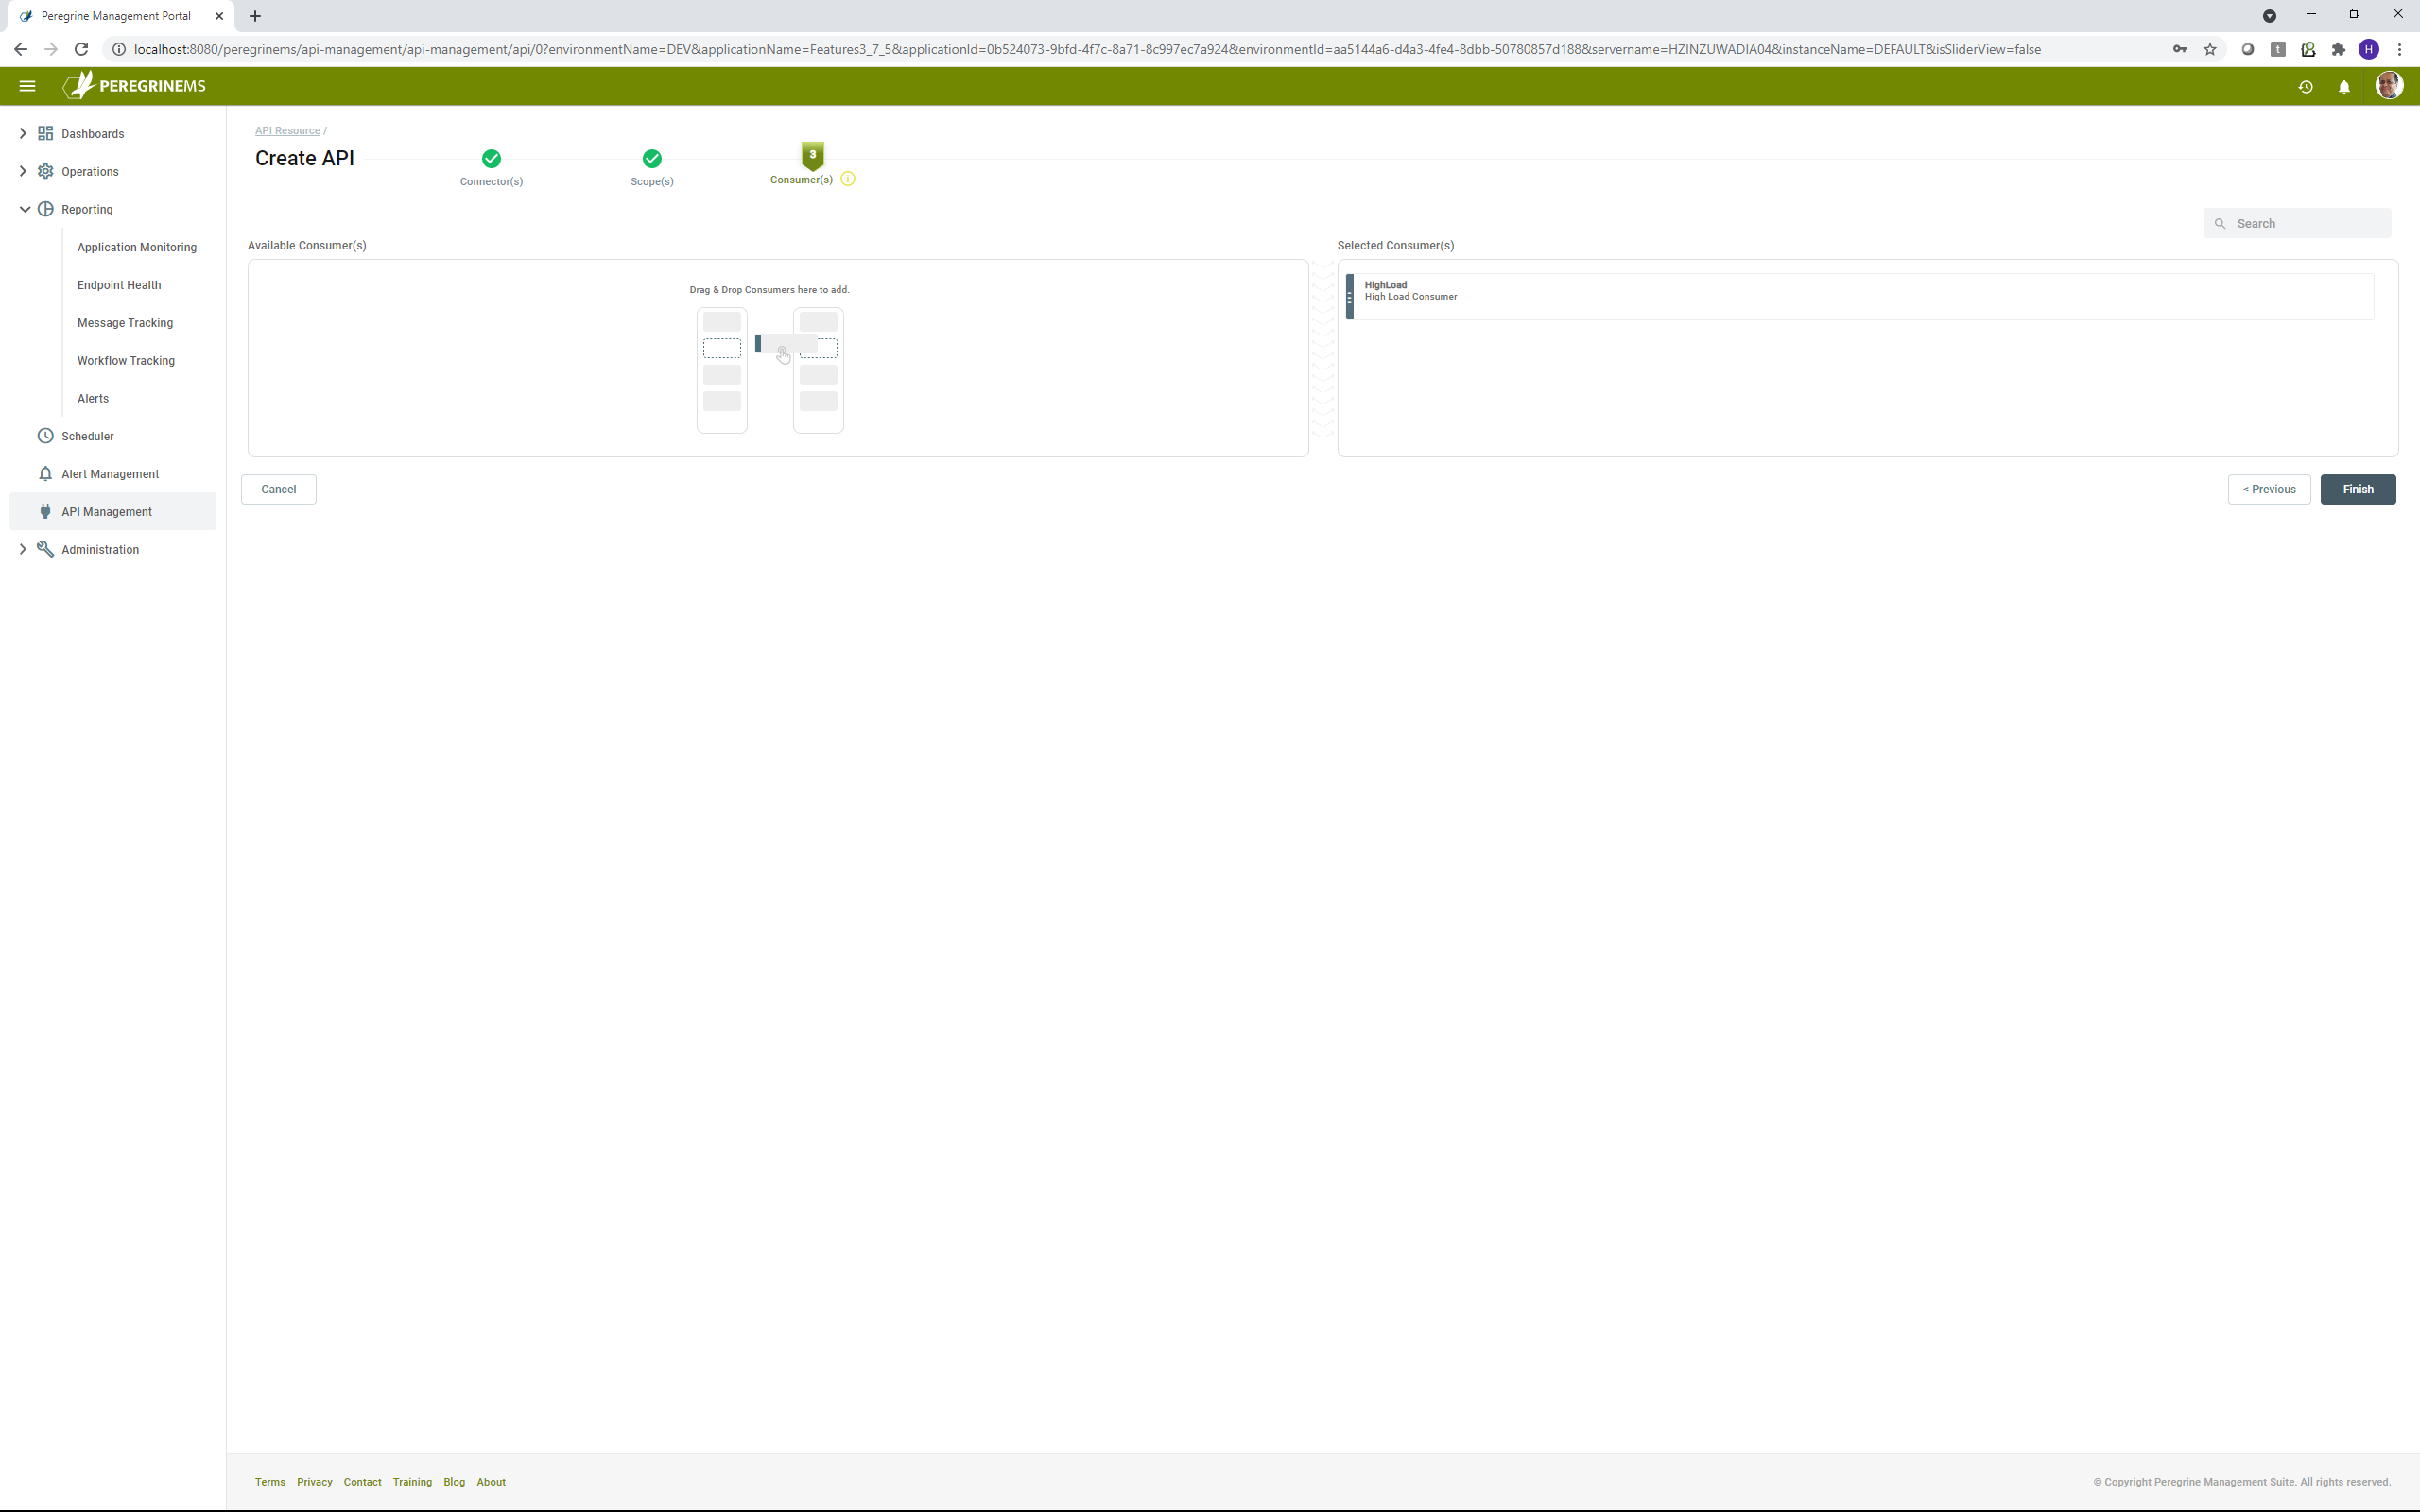
In the above screen, you can drag and drop consumer from left hand side into the selected consumers on the right-hand side to assign the API to the consumer.
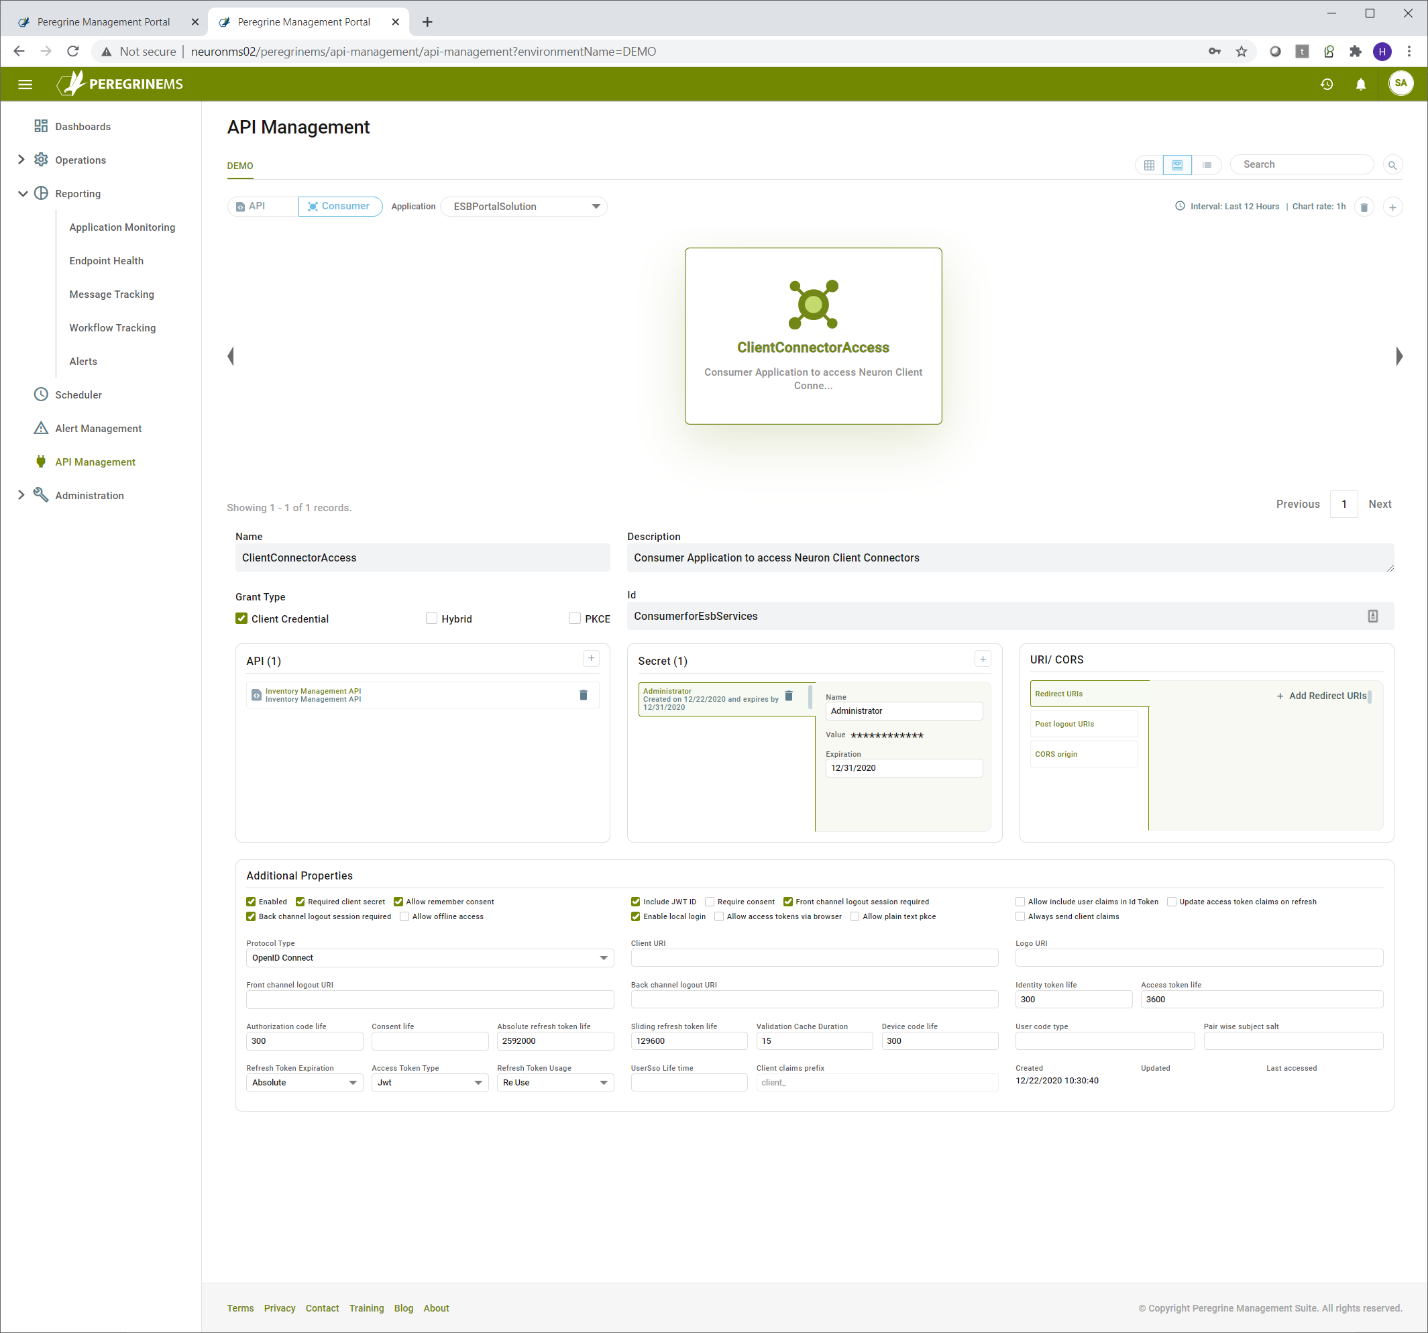
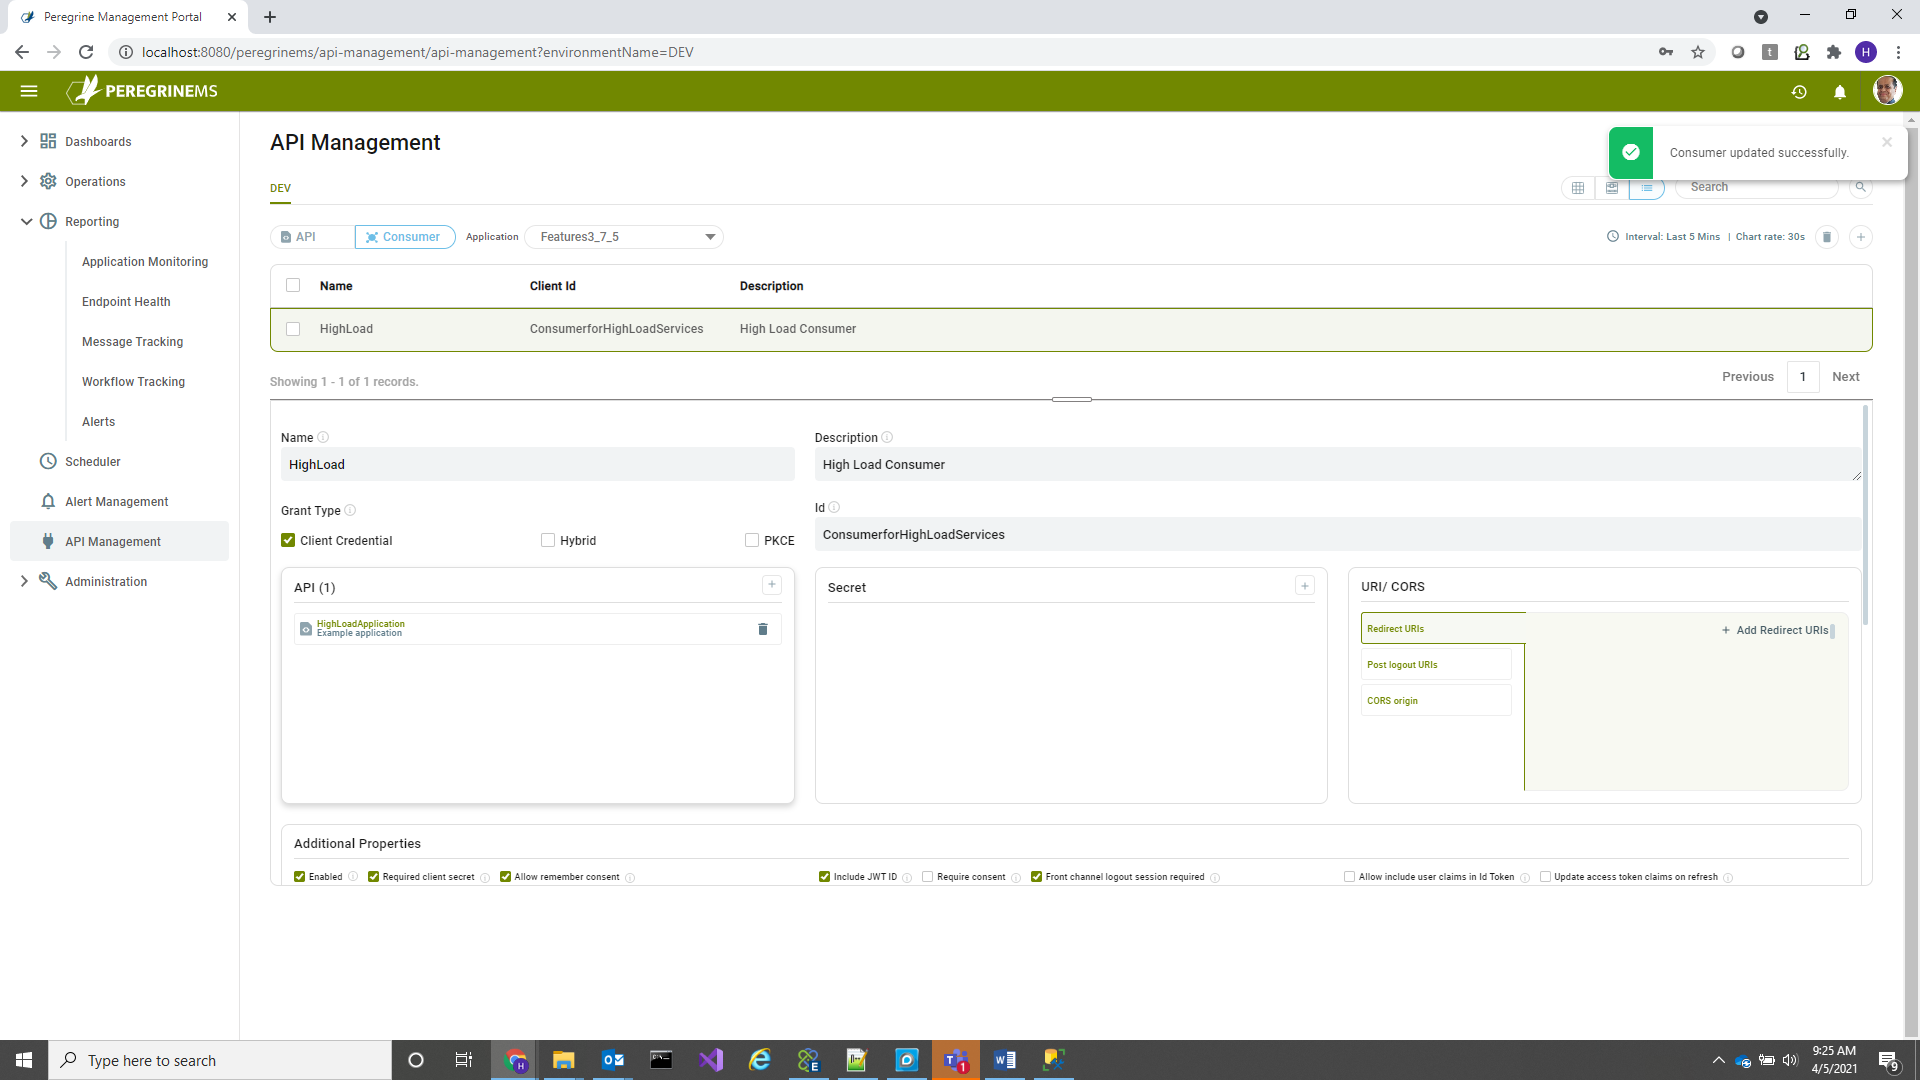
Consumer Applications
Consumer application means the application that will call the Neuron Client Connector. Consumer application can have different grant type. For a consumer application that has a backend server like ASP.NET, the grant type client credential is most common. If you need to pass specific user information, then a grant type of Hybrid or PKCE is more appropriate.
For creating a consumer, generally the consumer name, description, id, api resource and consumer secret needs to be added. API to which consumers can have access can be added from API box below by clicking the plus sign. Similarly, consumer secret can also be added. Note that you can assign consumers to API from the API screen also.
Additional properties and URIs/CORS are applicable with Hybrid or PKCE grant type. For more details on these, consult Identity Server documentation.
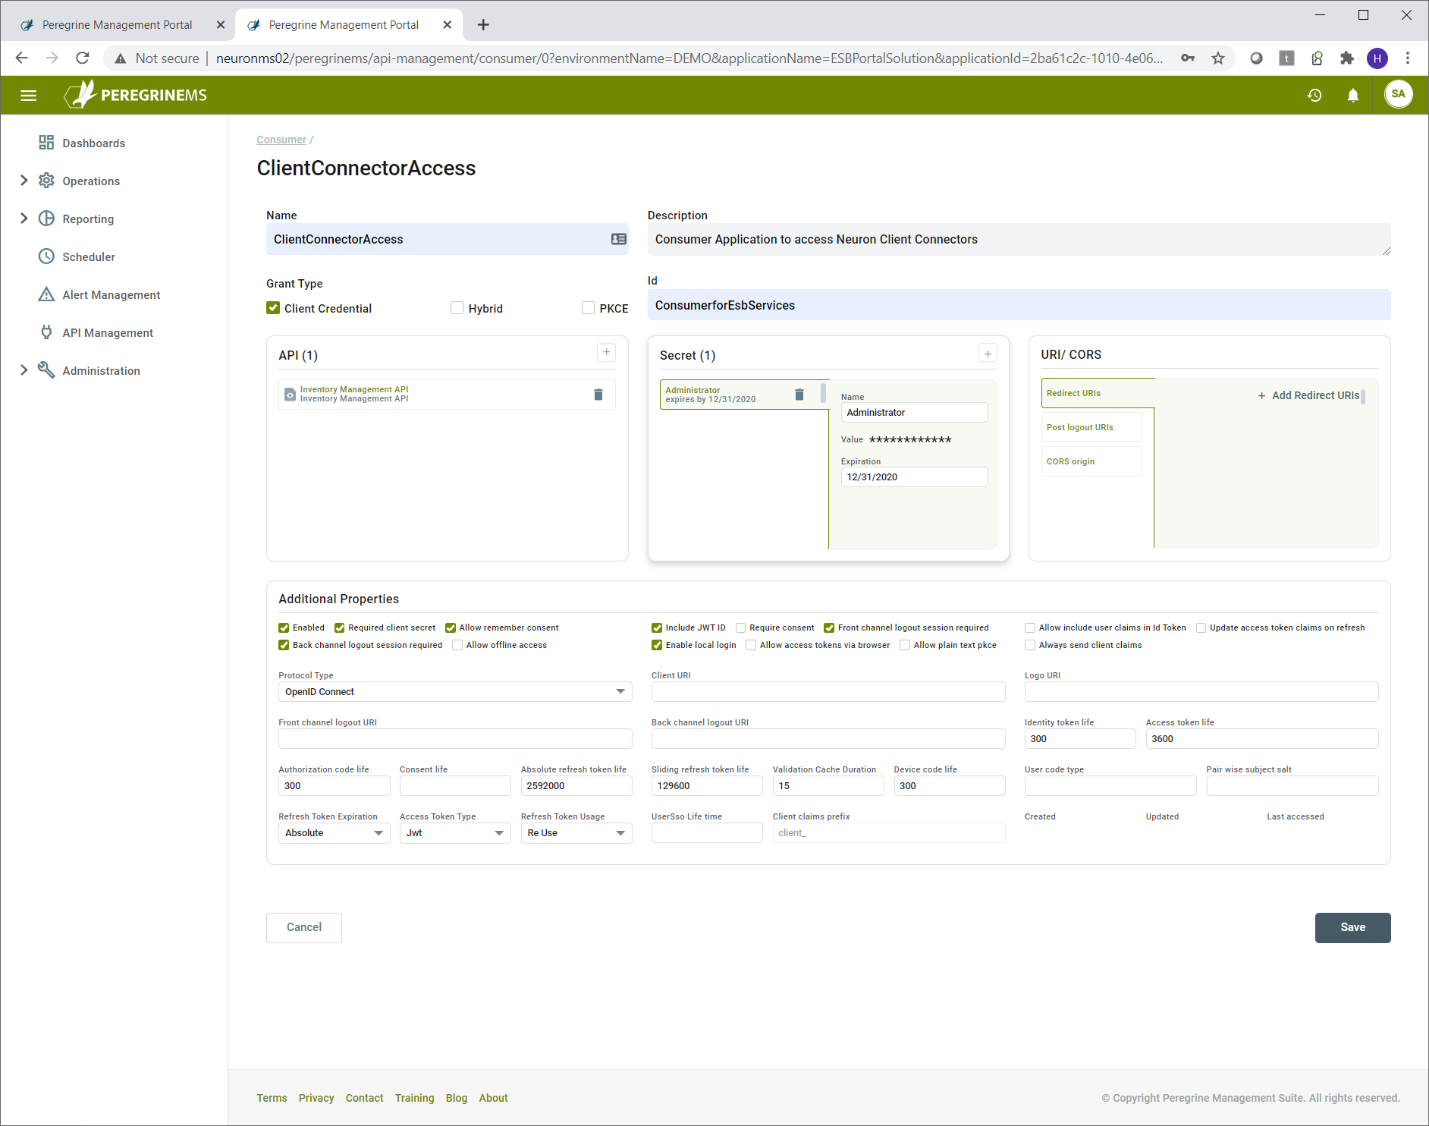
Click the plus sign under API to add access for another API.
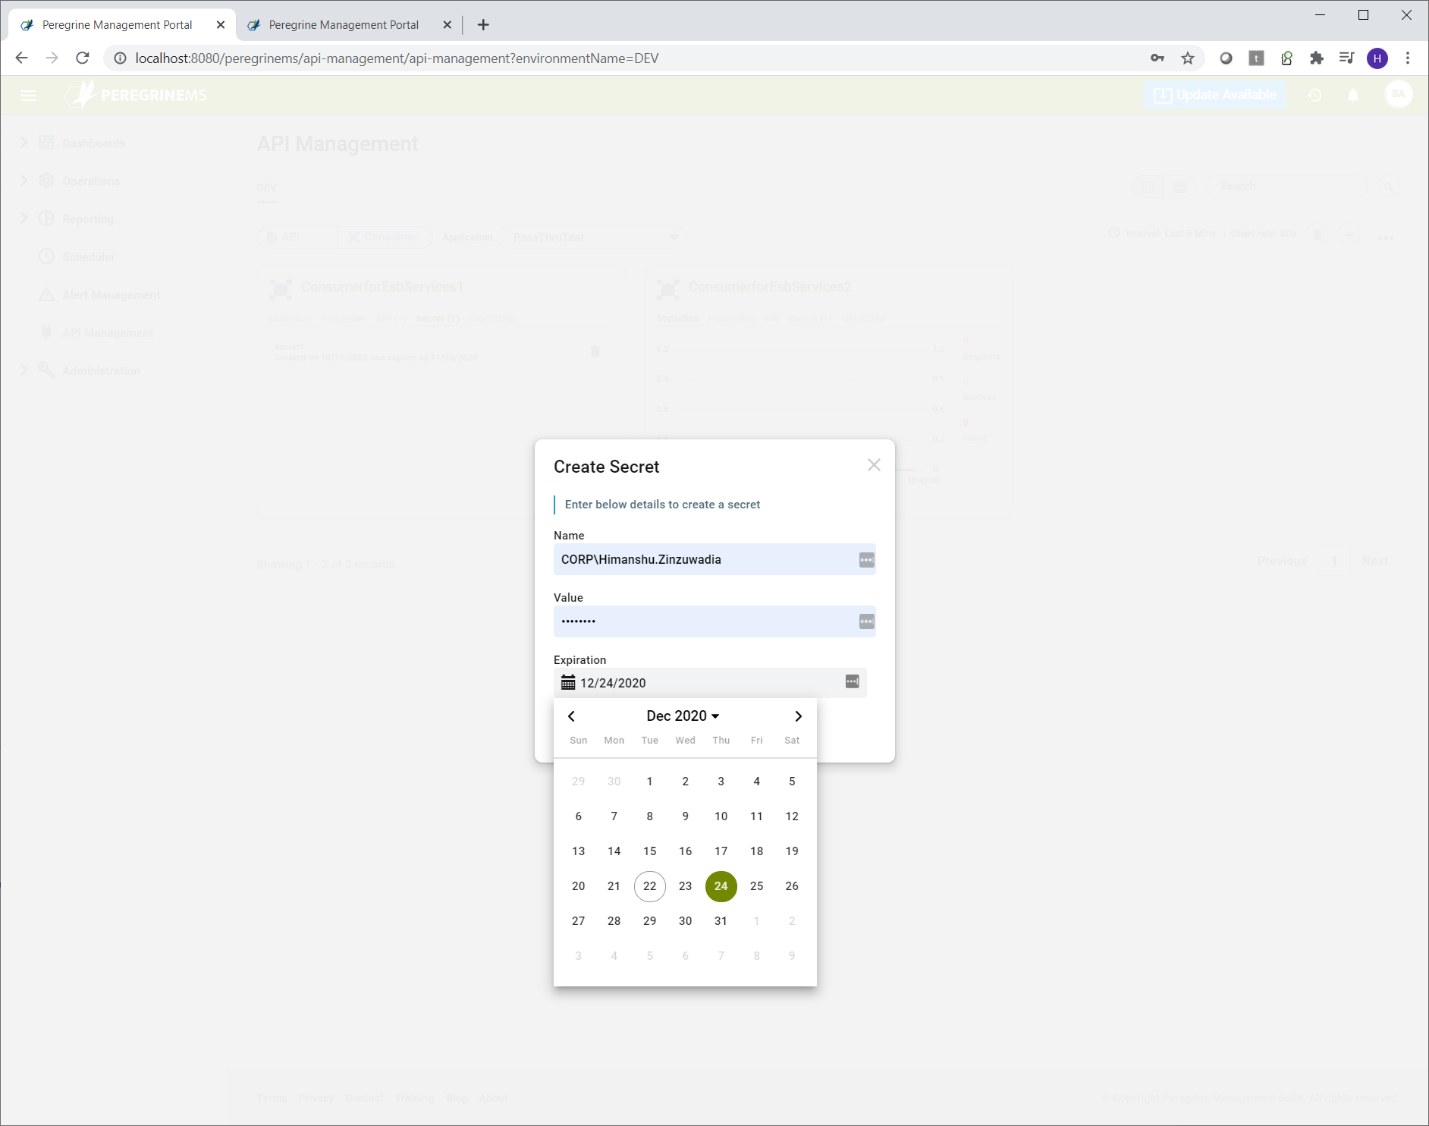
Click the plus sign under consumer secret to add another consumer secret. Consumer secret should be noted by the consumers and stored in a safe way because there is no way to retrieve existing consumer secret.
In the consumer screen, other fields that require more explanation are listed in the table below. These fields are applicable when the grant type is Hybrid or PKCE. Developers of consumer application should specify these values. This is because they control how the authorization service responds to their application requests for token and token validations. The information about these fields is taken from Identity Server Documentation. https://identityserver4.readthedocs.io/en/latest/reference/client.html
| Name | Purpose | Applies To |
| Redirect URIs | URL that specifies where to redirect the user after successful authentication | All Grant Types |
| Post Logout URIs | URL that specifies where to redirect the user after logout is completed | All Grant Types |
| CORS origin | URLs from which the token endpoint can be invoked. When using Javascript clients from URLs of a domain other than that of Authorization service can result in errors unless those URLs are listed under this section. | Hybrid and PKCE grant types with javascript clients |
| Enabled | Unless the consumer is enabled, token validation will not succeed. | All types |
| Required Client Secret | This option should always be check unless you want the consumer application to get token without needing a secret. Can be used if the consumer application is trusted. It is essentially treating the consumer application Id as the password. | Client Credentials grant type |
| Allow remember consent | In the Hybrid flow and PKCE flow, the authorization endpoint remembers the consent when this flag is set. Consent of the user is requested when the flow is invoked for the first time. It prompts the user to the effect that application x wants to access your email, id and other information, do you want to allow it.? If consent is remembered, then it doesn’t prompt for the same to user every time. | Hybrid and PKCE flow. |
| Include Jwt Id | Includes a unique id in the token. | Applies to all types. Caching of tokens depends on it, so it should be checked to keep the token cached for the specified duration. |
| Require Consent | Prompts the user for consent when the application requests for user token first time. | Hybrid and PKCE grant types |
| Front channel logout session required | Specifies if the user’s session id should be sent to the FrontChannelLogoutUri. Defaults to true. | All Grant types. |
| Allow include user claims in Id Token | When requesting both an id token and access token, should the user claims always be added to the id token instead of requiring the client to use the userinfo endpoint. Default is false. | Hybrid and PKCE grant types |
| Update access token claims on refresh | Gets or sets a value indicating whether the access token (and its claims) should be updated on a refresh token request. | All grant types |
| Back channel logout session required | Specifies if the user’s session id should be sent in the request to the BackChannelLogoutUri. Defaults to true. | All grant types. |
| Allow offline access | Specifies whether this client can request refresh tokens (be requesting the offline_access scope) | All grant types |
| Enable local login | Specifies if this client can use local accounts, or external IdPs only. Defaults to true. | All grant types |
| Allow access tokens via browser | Specifies whether this client is allowed to receive access tokens via the browser. This is useful to harden flows that allow multiple response types (e.g. by disallowing a hybrid flow client that is supposed to use code id_token to add the token response type and thus leaking the token to the browser. | Hybrid flow |
| Allow plain text pkce | Specifies whether clients using PKCE can use a plain text code challenge (not recommended – and default to false) | PKCE flow |
| Always send client claims | If set, the client claims will be sent for every flow. If not, only for client credentials flow (default is false) | All grant types. This should be set to true if using Hybrid and PKCE flow and you need to cache tokens. |
| Protocol Type | This cannot be changed. It is only there for information | All Grant types |
| Client URI | URI to further information about client (used on consent screen) | Hybrid and PKCE |
| Logo URI | URI to client logo (used on consent screen) | Hybrid and PKCE |
| Front channel logout URI | Specifies logout URI at client for HTTP based front-channel logout. See the OIDC Front-Channel spec for more details. | Hybrid and PKCE |
| Back channel logout URI | Specifies logout URI at client for HTTP based back-channel logout. See the OIDC Back-Channel spec for more details. | All grant types |
| Identity token life | Lifetime to identity token in seconds (defaults to 300 seconds / 5 minutes) | Hybrid and PKCE |
| Access token life | Lifetime of access token in seconds (defaults to 3600 seconds / 1 hour) | All grant types |
| Authorization code life | Lifetime of authorization code in seconds (defaults to 300 seconds / 5 minutes) | All grant types |
| Consent life | Lifetime of a user consent in seconds. Defaults to null (no expiration). | Hybrid and PKCE |
| Absolute refresh token life | Maximum lifetime of a refresh token in seconds. Defaults to 2592000 seconds / 30 days | All grant types |
| Sliding refresh token life | Sliding lifetime of a refresh token in seconds. Defaults to 1296000 seconds / 15 days | All grant types |
| Validation Cache Duration | This is a custom claim used to cache tokens in Neuron ESB. Its value is in minutes. Caching tokens is done to reduce latency by not validating the cached token everytime. | All grant types |
| Device code life | This is for future use. Currently we do not support Device code Grant type | Device code grant type |
| User code type | This is for future use. Currently we do not support Device Code Grant type. Specifies the type of user code to use for the client. Otherwise falls back to default. | Device code grant type |
| Pair wise subject salt | ||
| Refresh Token Expiration | Absolute or Relative the refresh token will expire on a fixed point in time (specified by the AbsoluteRefreshTokenLifetime) otherwise as per sliding refresh token lifetime | All grant types |
| Access Token Type | Specifies whether the access token is a reference token or a self contained JWT token (defaults to Jwt). | All grant types If reference token, then validation method will be introspection and that increases latency |
| Refresh Token Usage | ReUse the refresh token handle will stay the same when refreshing tokens OneTime the refresh token handle will be updated when refreshing tokens. This is the default. | All grant types |
| User Sso Life time | The maximum duration (in seconds) since the last time the user authenticated. Defaults to null. You can adjust the lifetime of a session token to control when and how often a user is required to reenter credentials instead of being silently authenticated, when using a web application. | Hybrid and PKCE |
| Client claims prefix | Cannot change this setting. It is used by Neuron ESB for some internal process | All Grant Types |
| Created | Internal use for auditing | All Grant types |
| Updated | Internal use for auditing | All Grant types |
| Last accessed | Internal use for auditing | All Grant types |
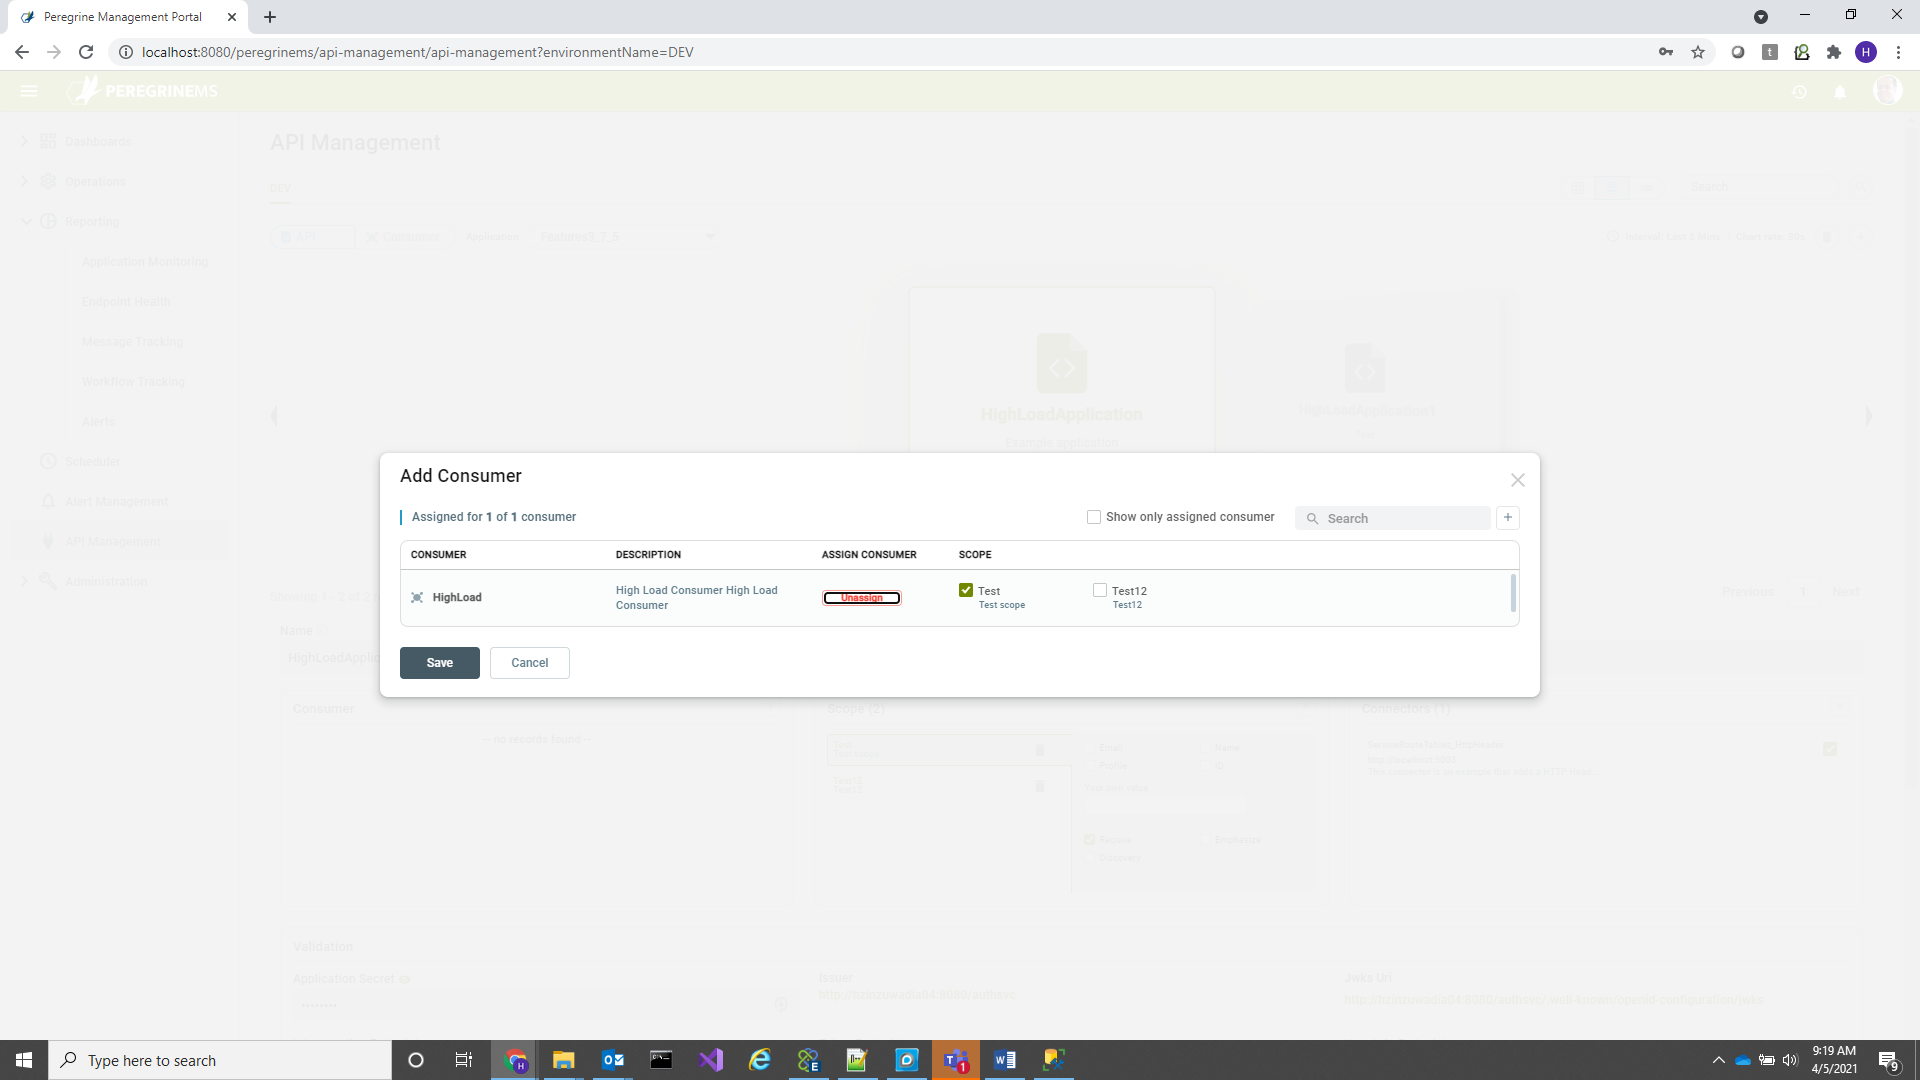
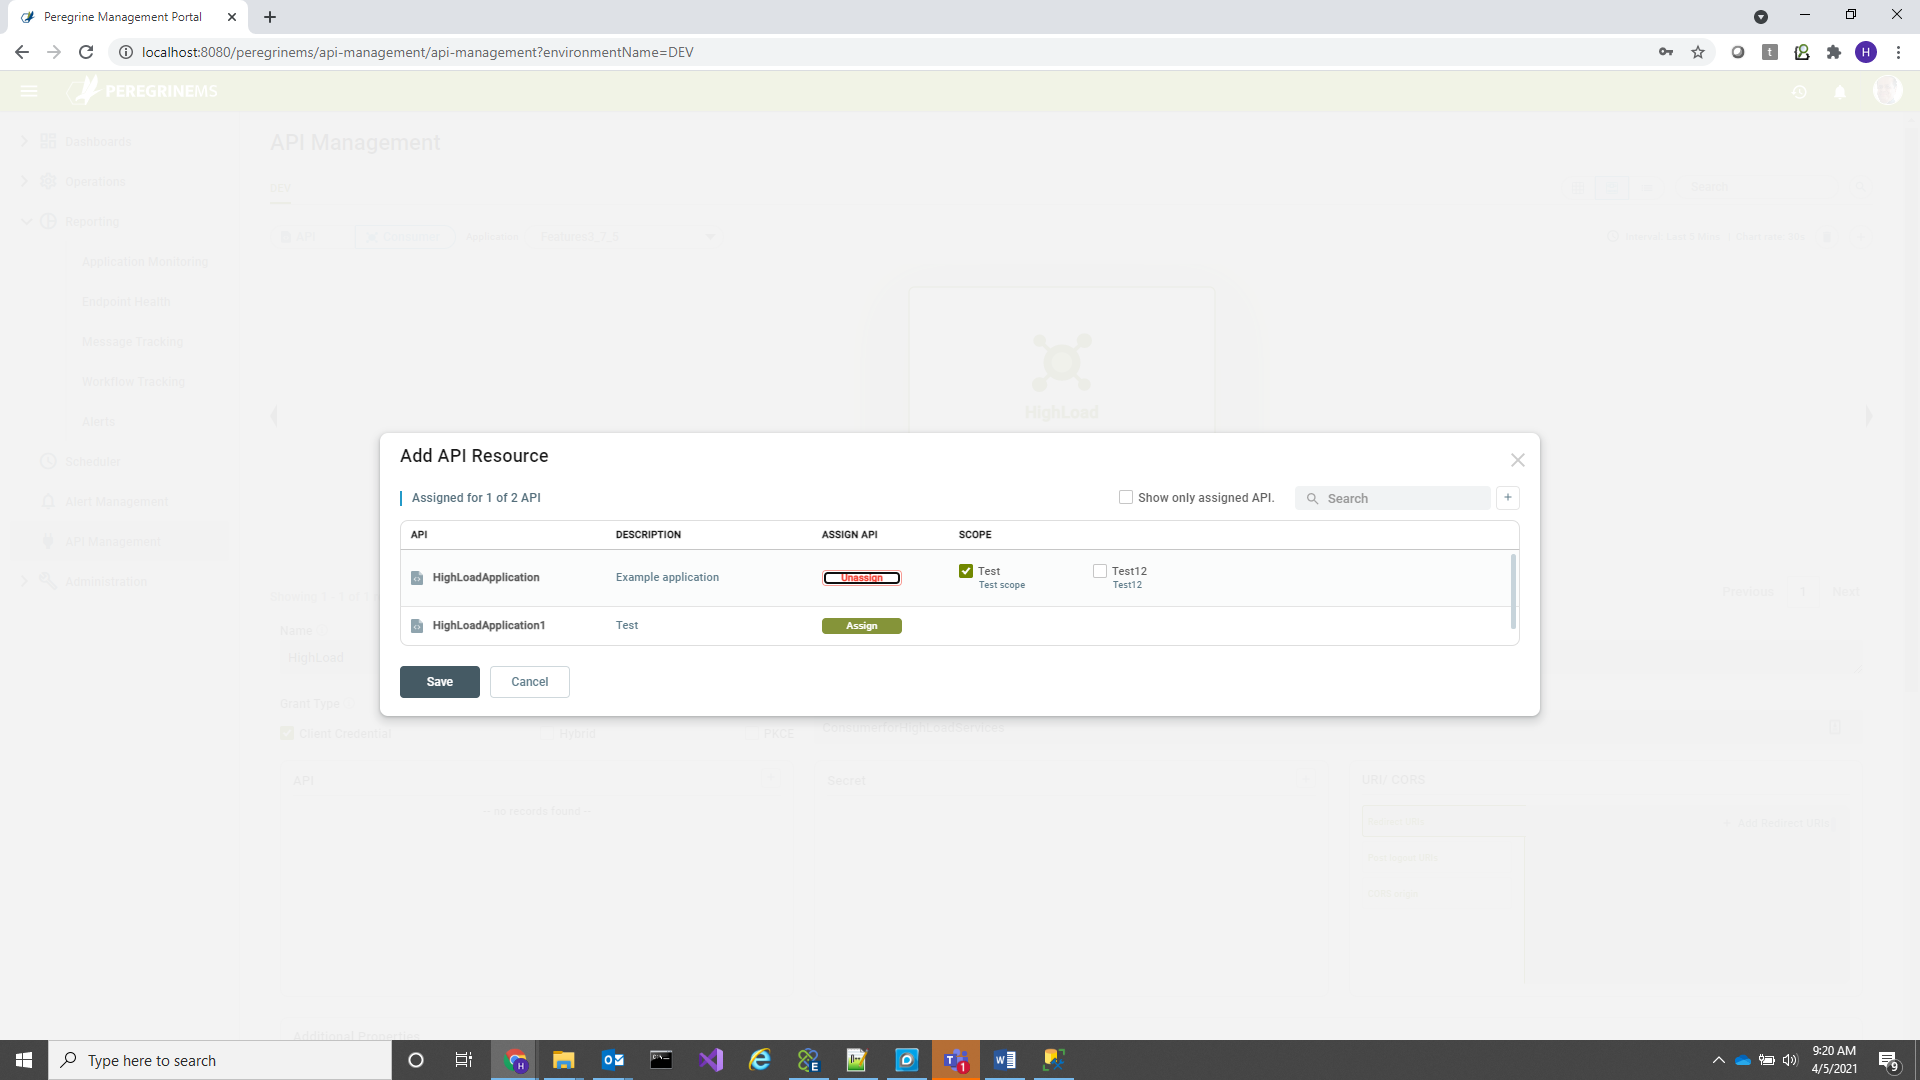
Note that by default all scopes in the API are assigned to the consumer when you add the wizard interface to assign Consumer to API or API to consumer, but you can change the consumer and API scope assignments from either the API screen or Consumer screen. When an API has three different available scopes and consumer has been assigned only two of them, the two scopes will be included in the consumer token. This mechanism can be used to enforce selective access to client connector functionality based on scope.
Following screens show how you can assign selective scopes.
In the above screen Click the + sign in the Consumer box shown, to add consumer to API, when the following pop-up appears, click assign, you can then check or uncheck scope boxes that you need assigned and then click save. If consumer is already assigned and you are not sure, delete the consumer and re-add to reassign the scopes as needed.
Similarly, when you are in Consumer view, you can remove and add API assignments with selected scopes. In this case you click the + button next to API box in the below screen. Also note that the add consumer to API or add API to consumer button also functions for editing the scope assignments. You can change scopes of existing assignments using the same pop-up that is shown when you use this option.
API Monitoring
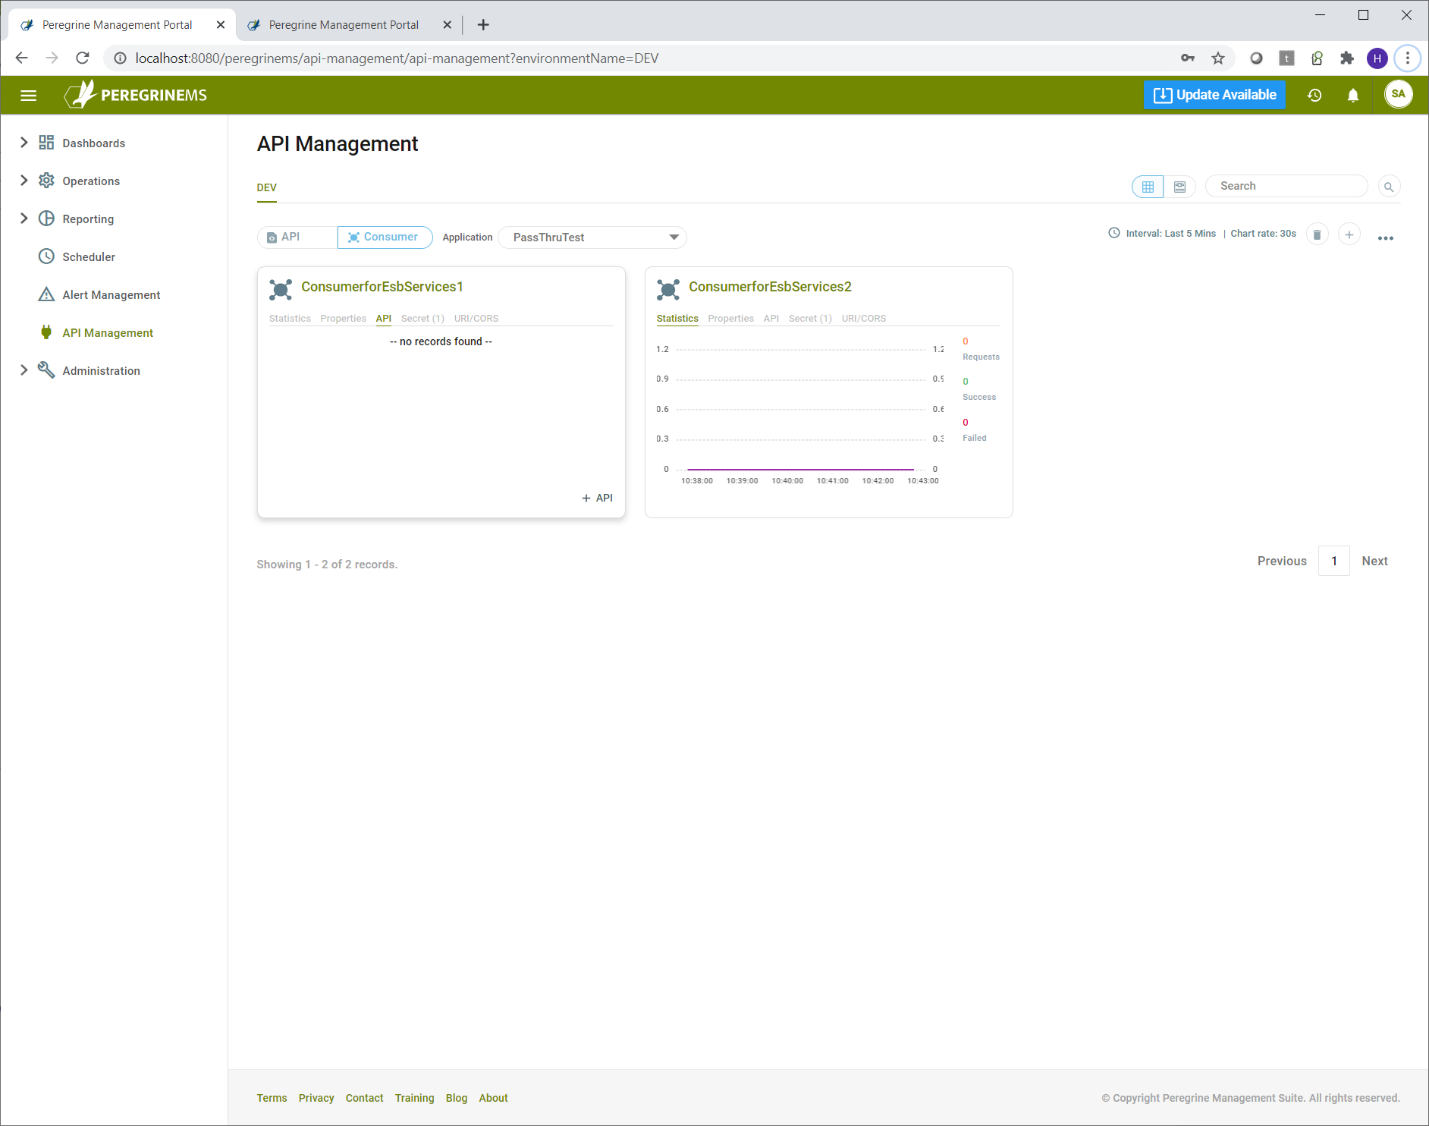
API management adds a nice capability to monitor number of requests, successes and failures by API or Consumer. In addition to overall application monitoring, this capability provides a window into how individual consumer applications and API resources are utilized and whether they are running successfully or not.
You can see the rate of requests, success and failure on the API or Consumer page card view in the first tab below.
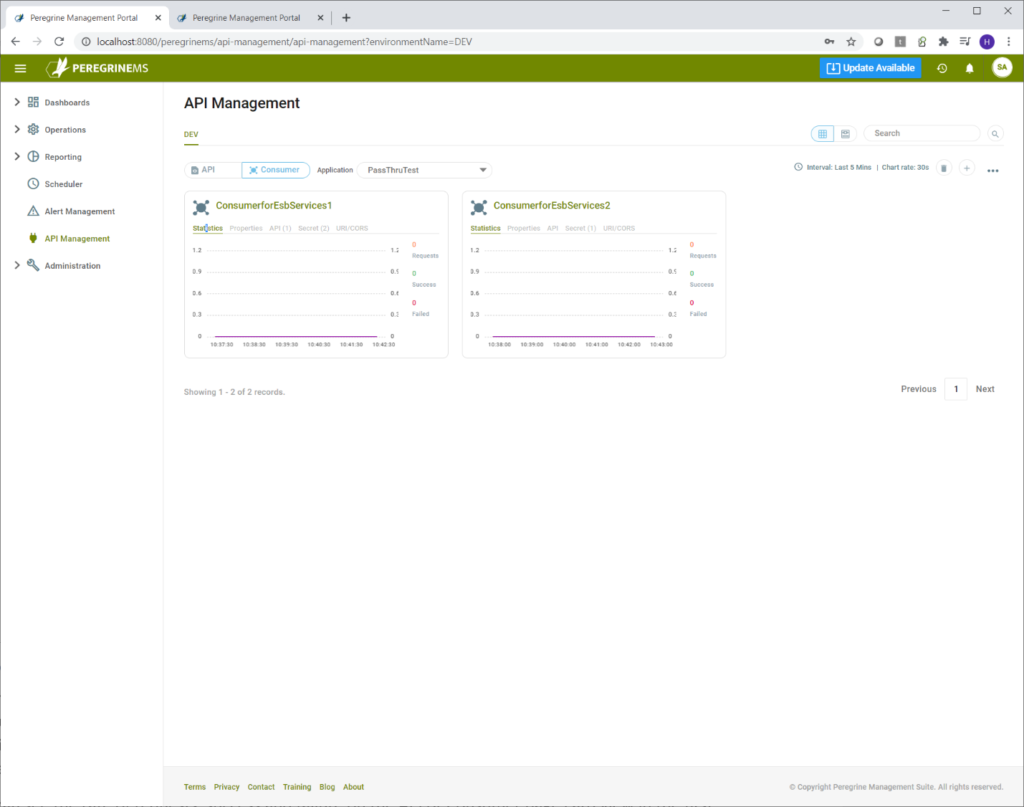

Alternate views of API Management (List view and Carousel view) show the same data in a more expanded format.
List view
Carousel view