Appendix A – Peregrine Portal Secure Setup
When using external identity provider for Peregrine Management Suite users, it’s a prerequisite to Use Https Connection.
HTTPS (Hypertext Transfer Protocol Secure) is an internet communication protocol that protects the integrity and confidentiality of data between the user’s computer and the server. Users expect a secure and private online experience when using a website. We encourage you to adopt HTTPS in order to protect your users’ connections to your website, In order to use HTTPS with Identity Server and Azure Active directory in portal, we need to create an SSL certificate on the server.
Please follow the steps to create a self-signed certificate in IIS.
Step: 1 Go to the Start menu & click on Administrative Tools > Internet Information Services (IIS) Manager
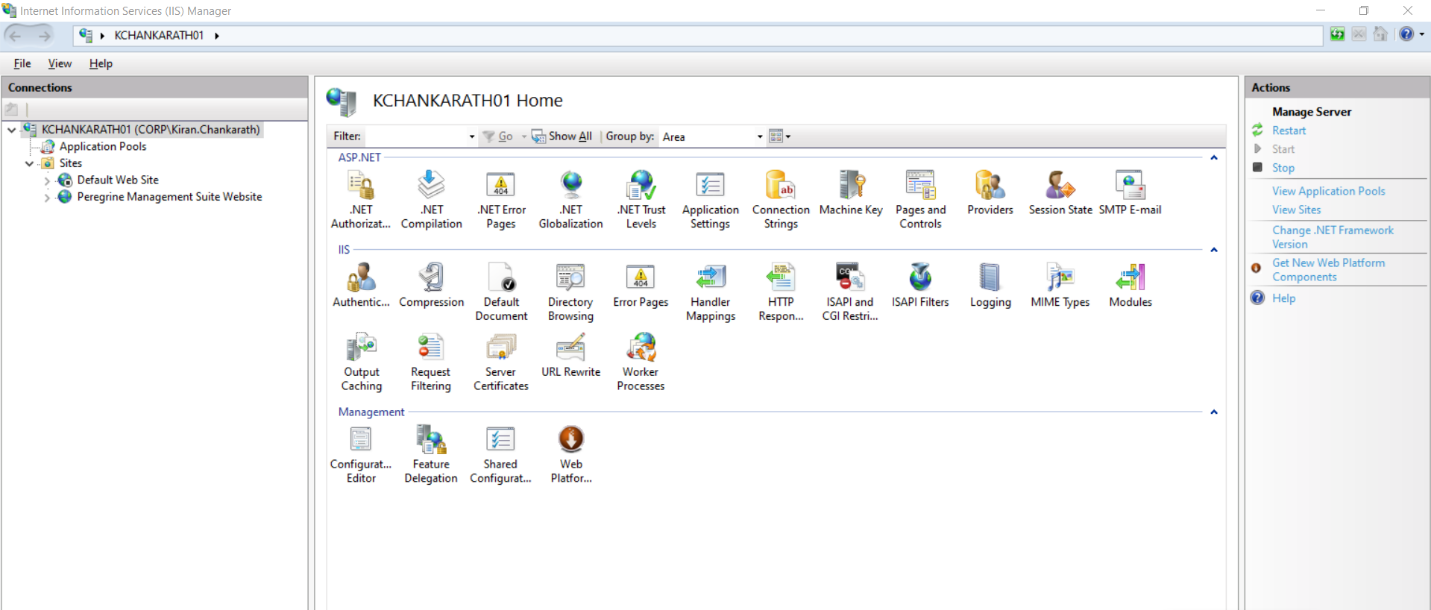
Step: 2 Click on the server name in the Connections column on the left and Double-click on Server Certificates

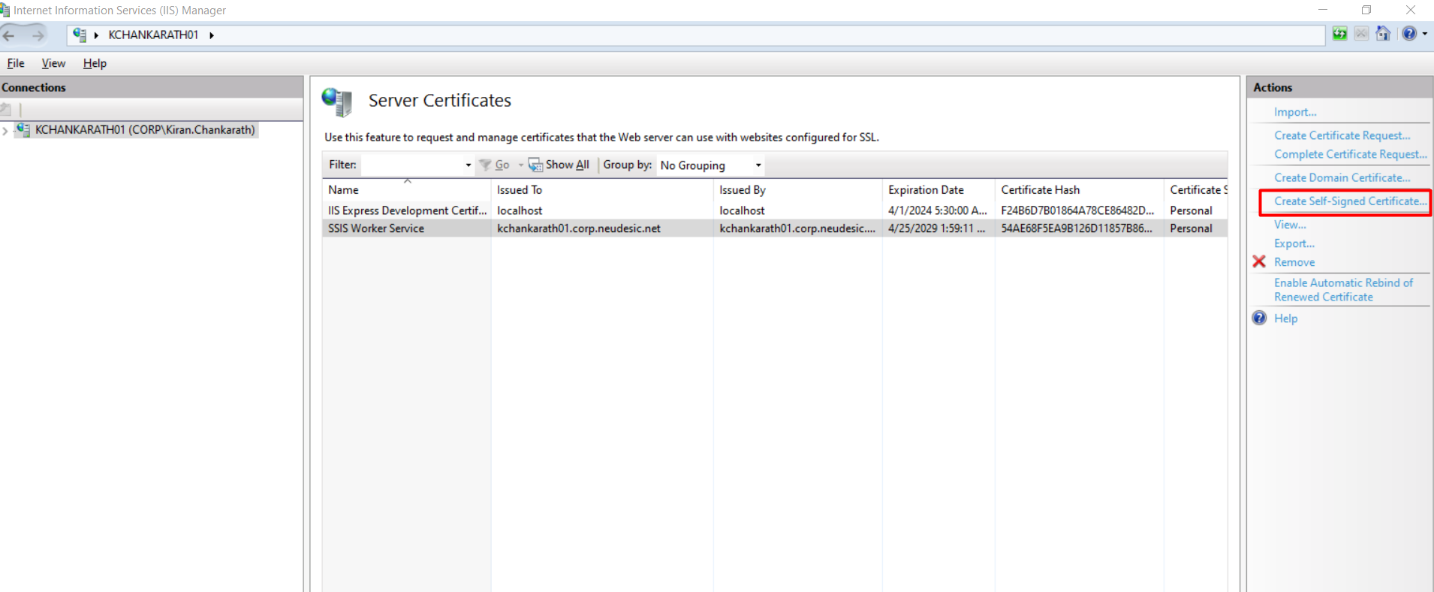
Step: 3 Click on Create Self-Signed Certificate in the Actions Column on the right.
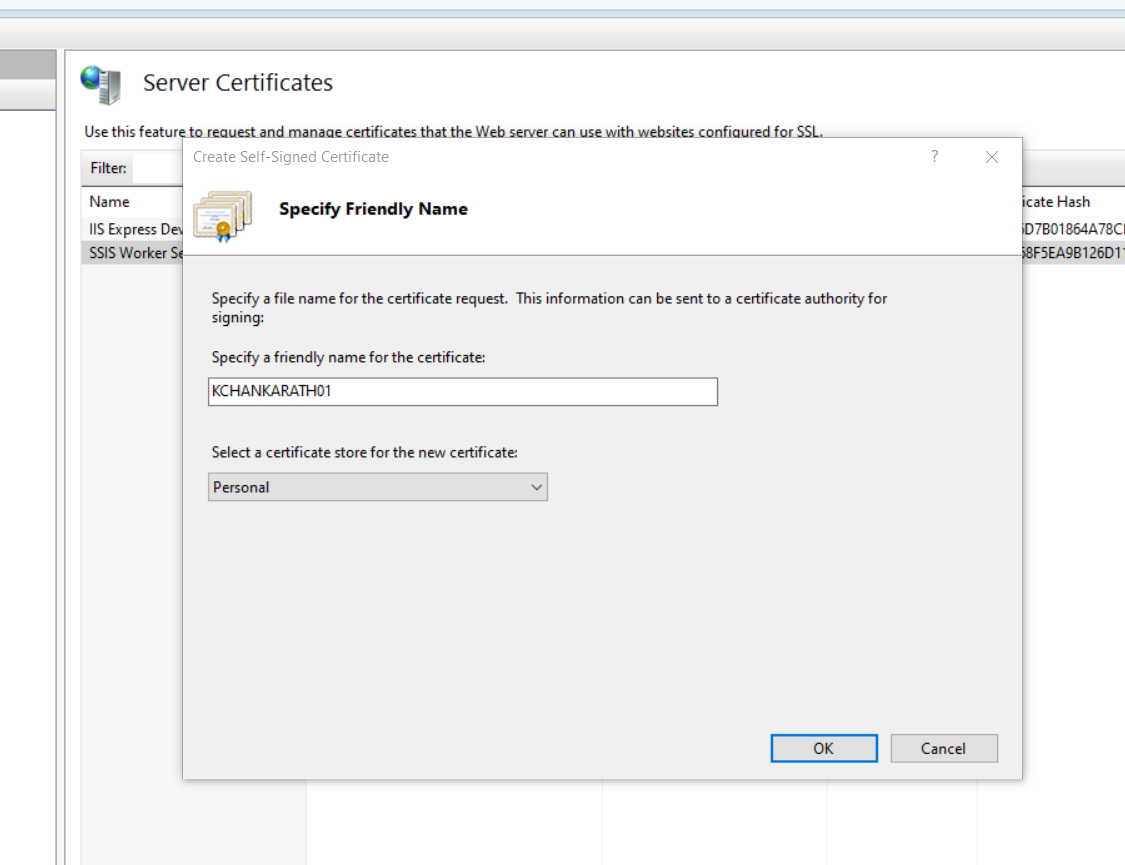
Step: 4 Type any meaningful name (e.g – Machine name) and then click OK to proceed
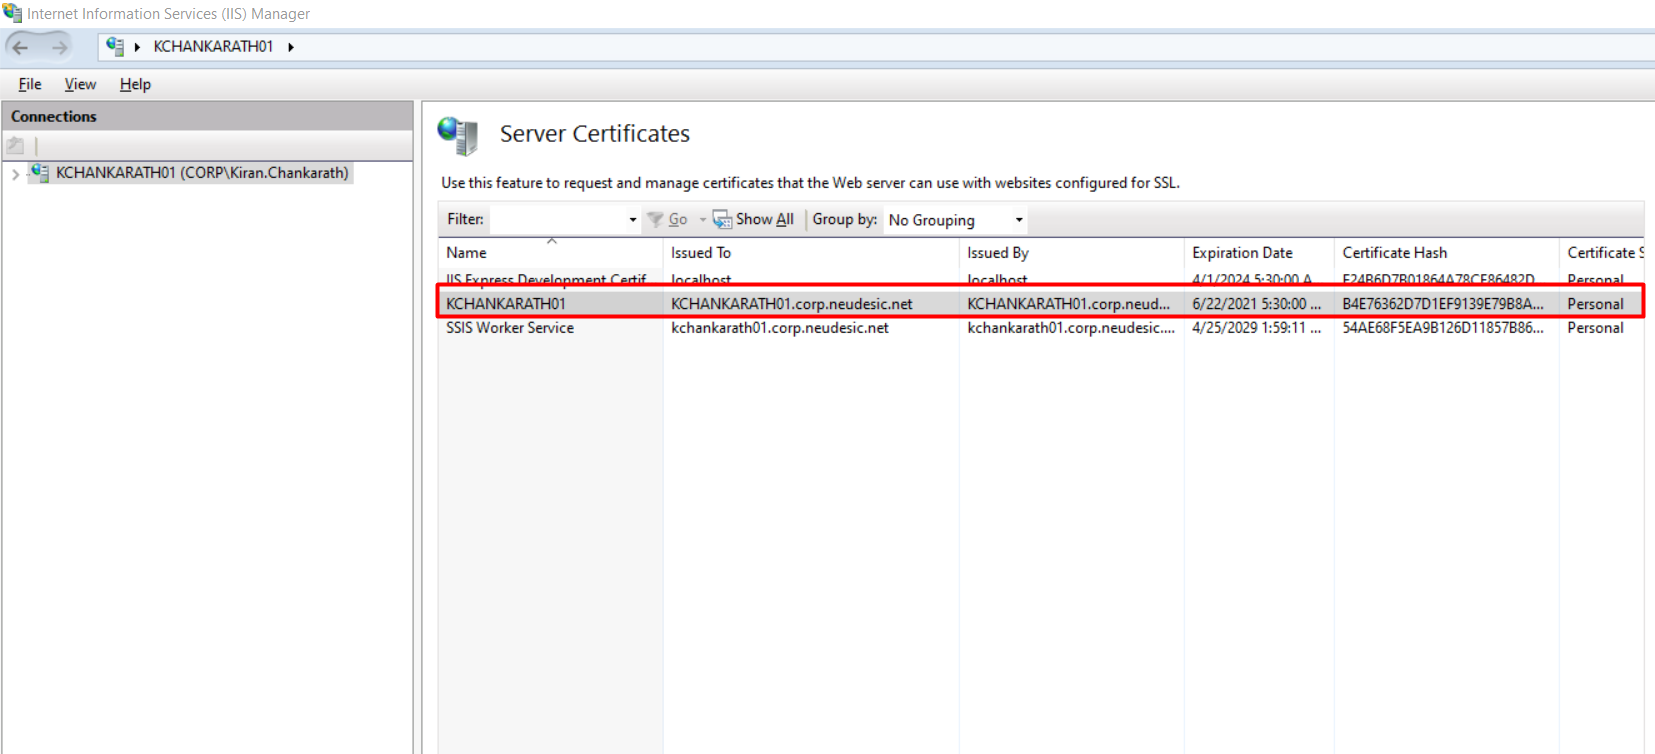
Step: 5 Click OK. Once that is complete you should now see the SSL in the list of Self-Signed certificates. Now, you have IIS Self-Signed Certificate with 1 year validation.
Step: 6 Note down the certificate issued to name. In the below screen it is – MachineName.corp.neudesic.net
Finally, by following the above step your Self-Signed Certificate is ready in the IIS. Next, to configure the certificate in the peregrine portal.
Please follow the below steps to configure the certificate in the portal: –
Step: 1 If you are already logged in to portal, do Logout
Step: 2 Go to the Start menu & click on Administrative Tools > Internet Information Services (IIS) Manager
Step: 3 Navigate to Server name -> sites -> Peregrine Management Suite Website in the Connections column on the left and Double-click on Server Certificates
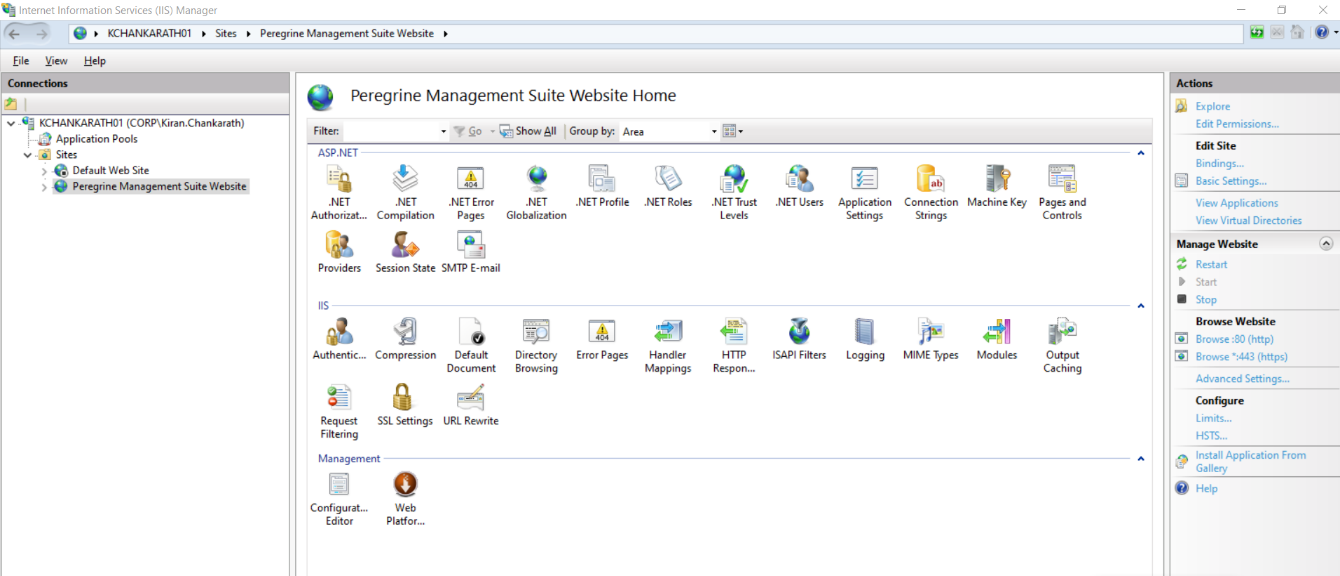
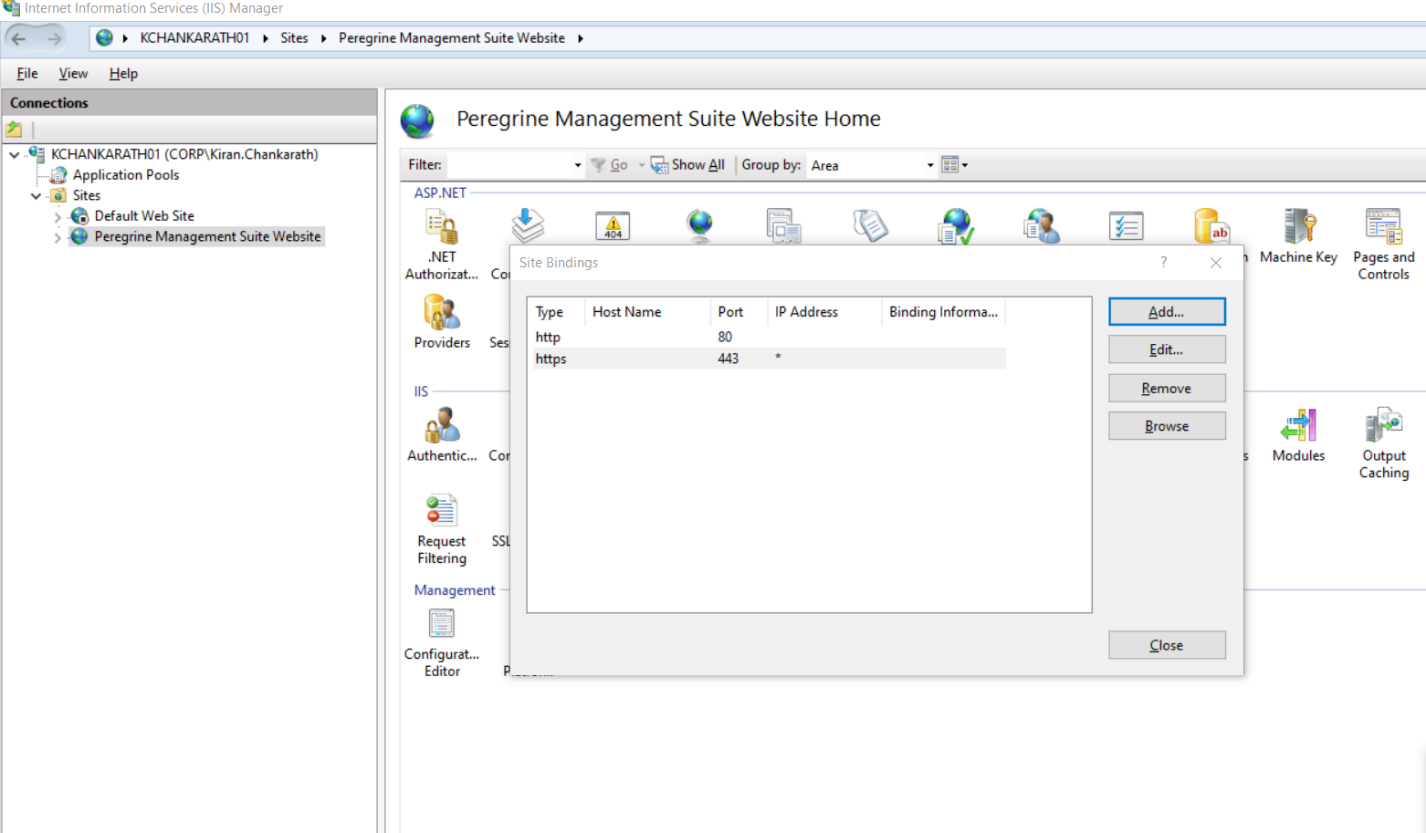
Step: 4 Click on Bindings in the Actions Column on the right.
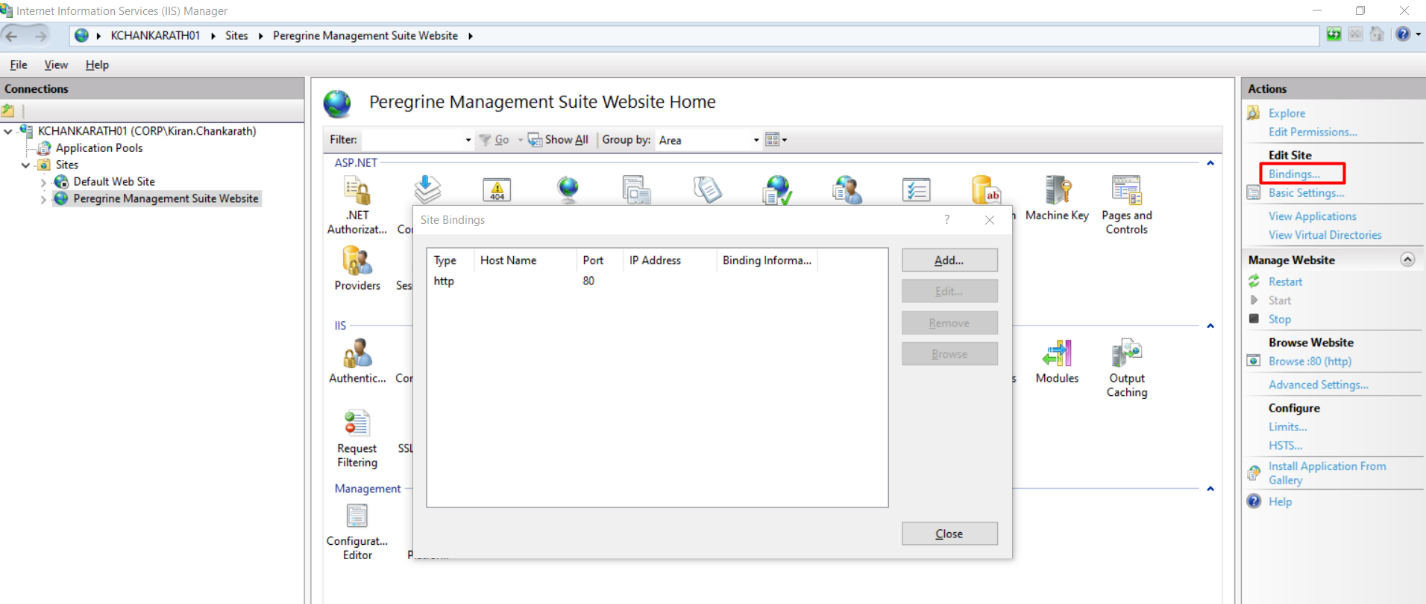
Step: 5 On the side binding dialog box, Click on Add button
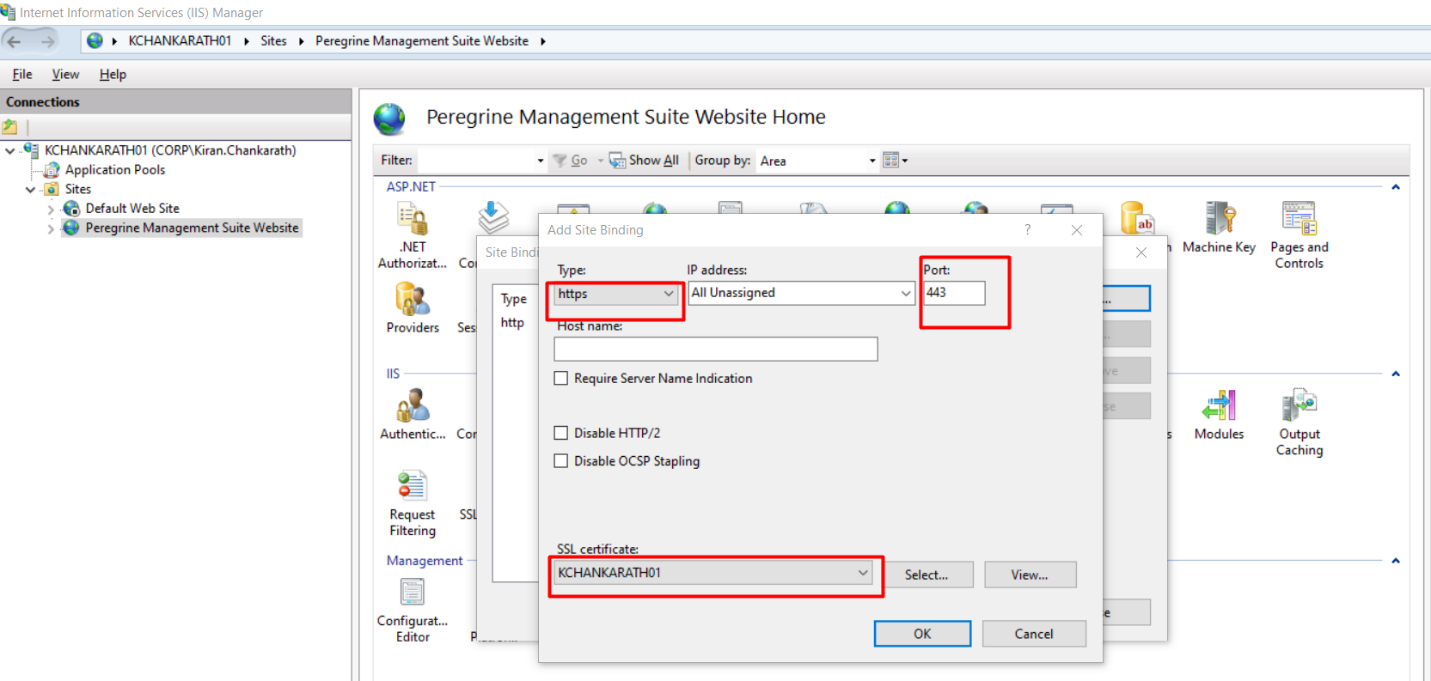
Step: 6 On the Add site bindings dialog box, Select Https as Type and Leave the default port value
Step: 7 Select the created SSL certificate from the drop down and click ok
Step: 8 On the following page, In the site binding dialog box you can see the Added Https binding
Step: 9 Click Close. Note you may delete the http binding if you don’t need it anymore.
Step: 10 Take the backup of Portal installation folder from the path in your pc: –“C:\Program Files\Peregrine\Peregrine Management Suite”
Step: 11 Do the below changes to configure the portal with https –
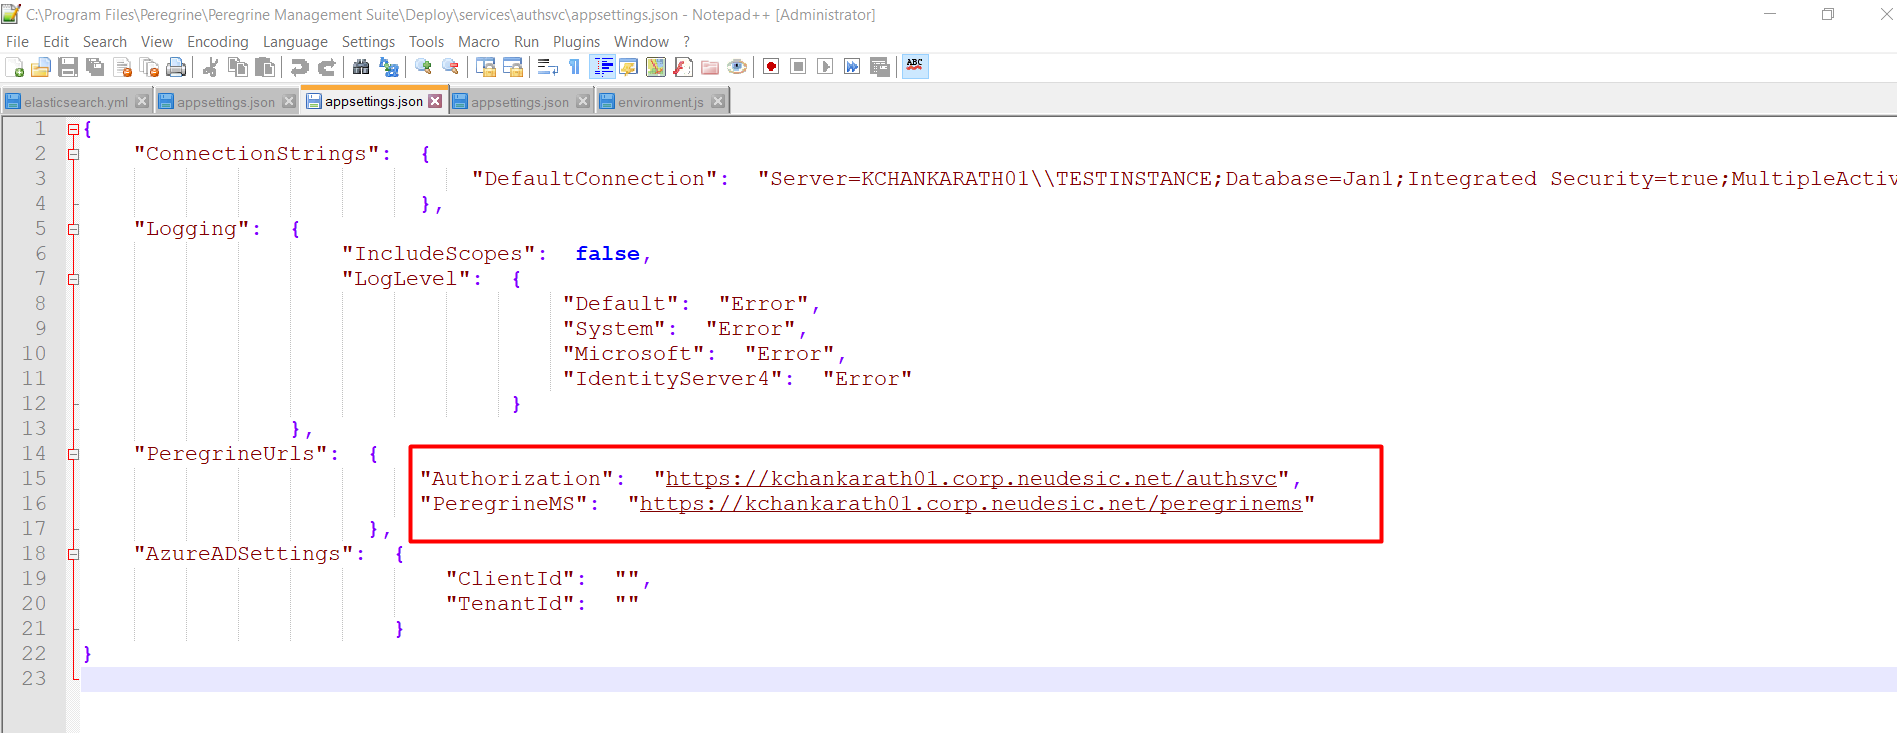
- Open the path – C:\Program Files\Peregrine\Peregrine Management Suite\Deploy\services\authsvc and find appsettings.json file
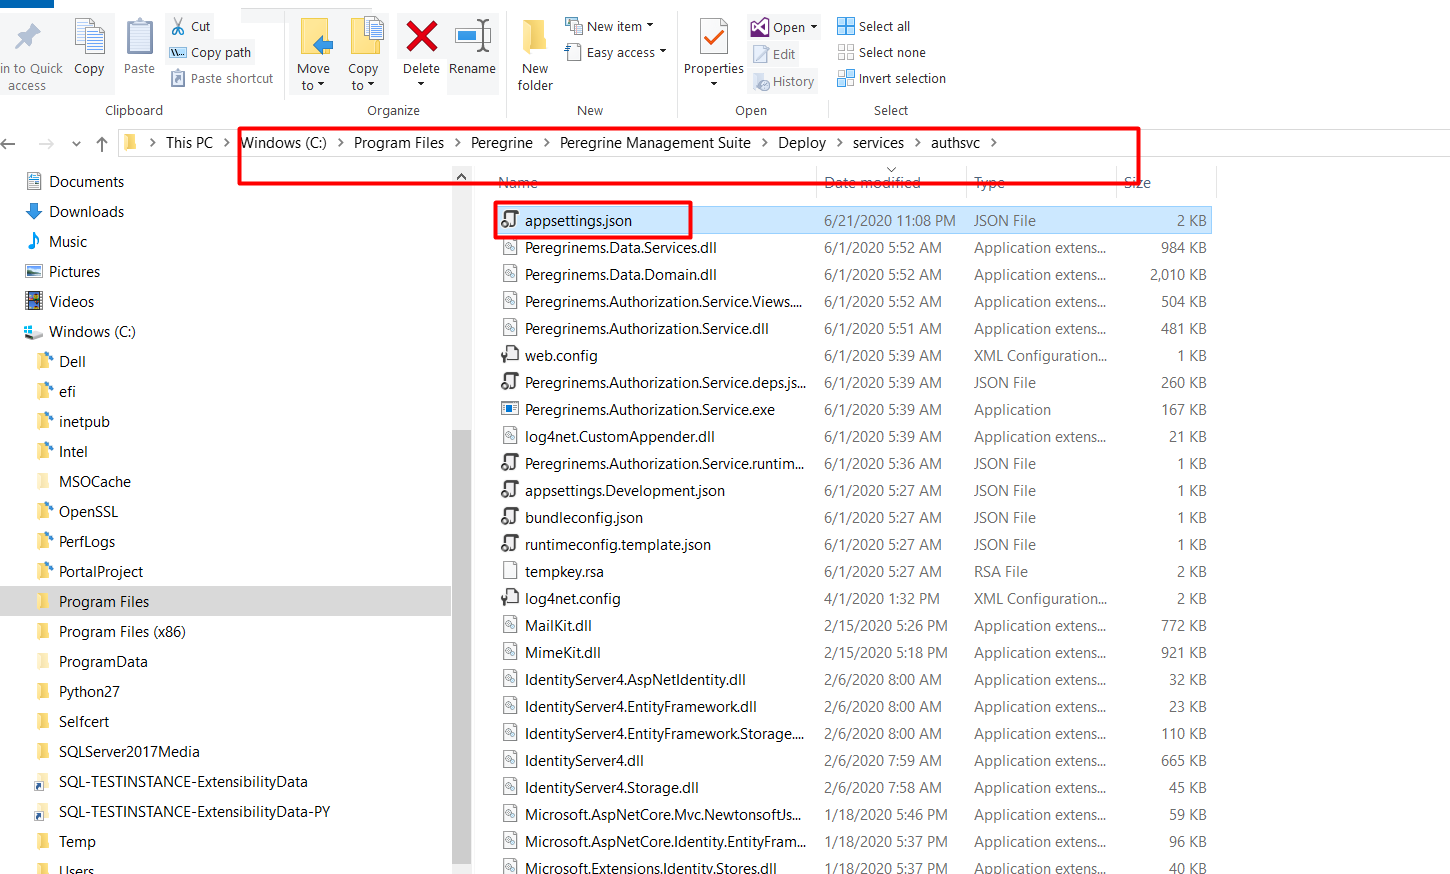
- Right click on the appsettings.json file and edit with notepad or notepad++ on admin mode
- Modify PeregrineUrls – from https://MachineName to https://<Certificate issued to name>. The name used is from created certificate – certificate issued to name. Save it
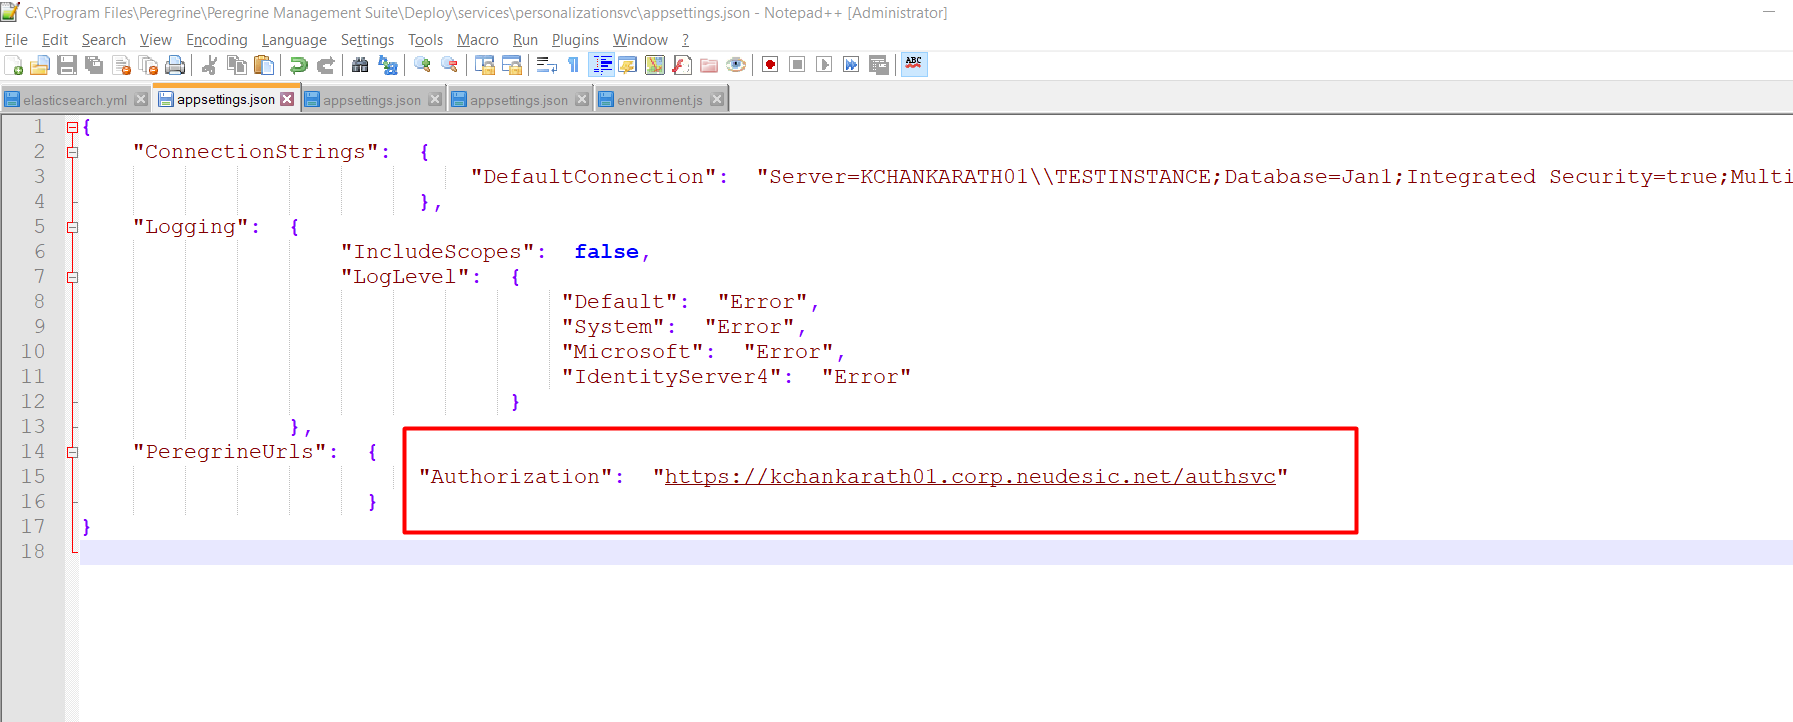
- Open the path – C:\Program Files\Peregrine\Peregrine Management Suite\Deploy\services\ personalizationsvc and find appsettings.json file
- Edit the file using notepad ++ or notepad with admin rights
- Modify the Peregrine Url’s from https://machinename to https://<your machine FQDN>
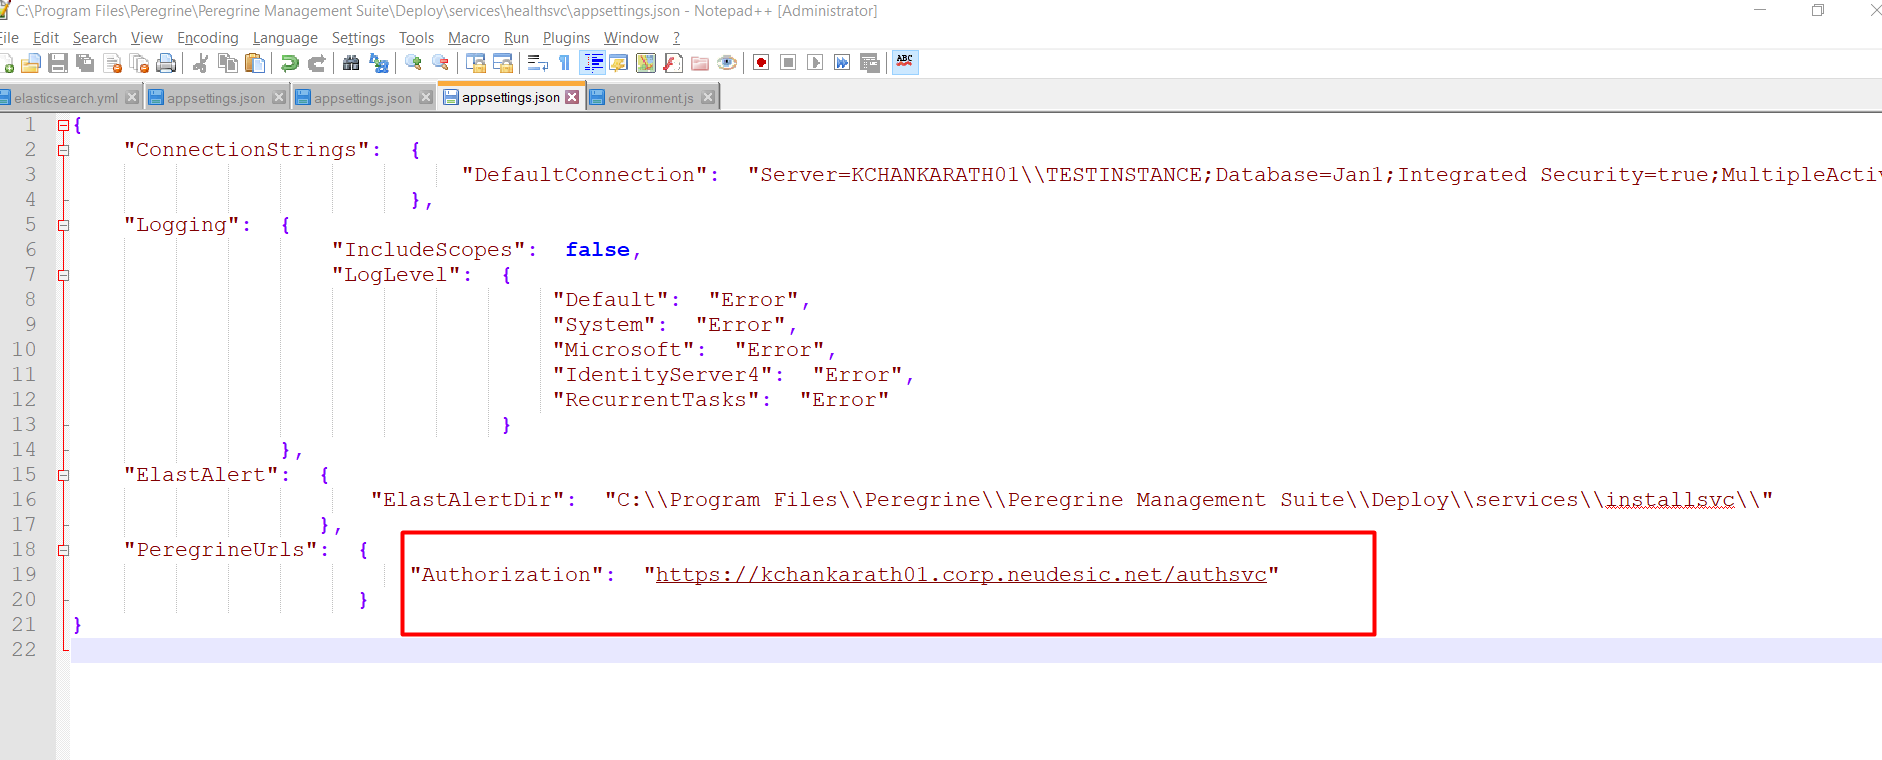
- Open the path – C:\Program Files\Peregrine\Peregrine Management Suite\Deploy\services\ healthsvc and find appsettings.json file
- Edit the file using notepad ++ or notepad (or with any editor of your choice) with admin rights
- Modify the Peregrine Url’s from https://machinename to https://<Your machine FQDN>
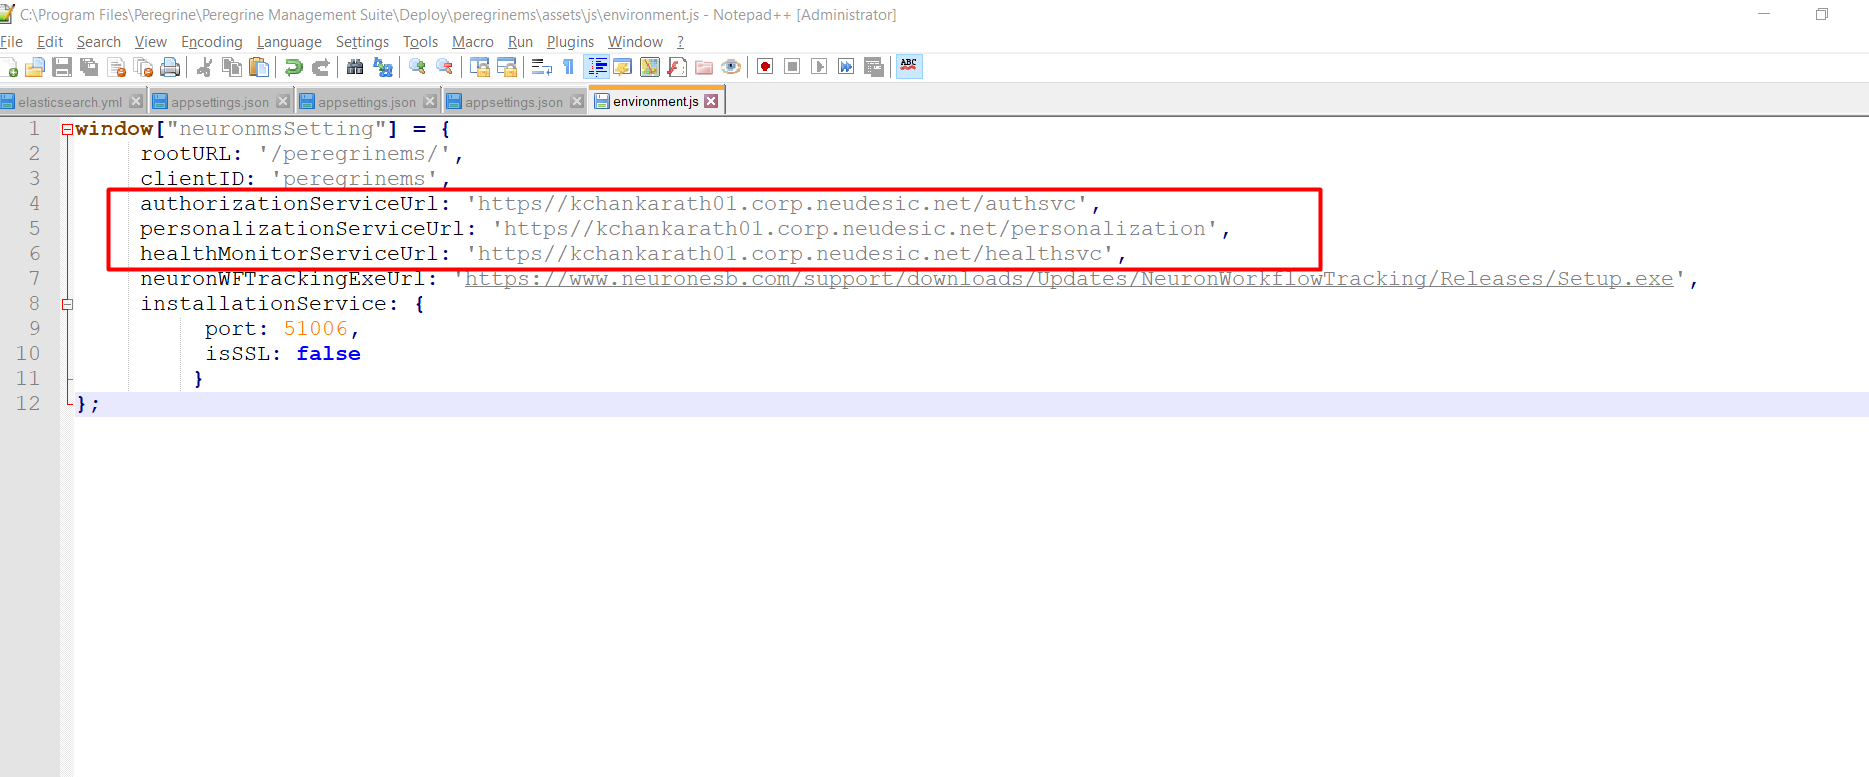
- For peregrinems web application, Open the path – C:\Program Files\Peregrine\Peregrine Management Suite\Deploy\peregrinems\assets\js and find environment.js file.
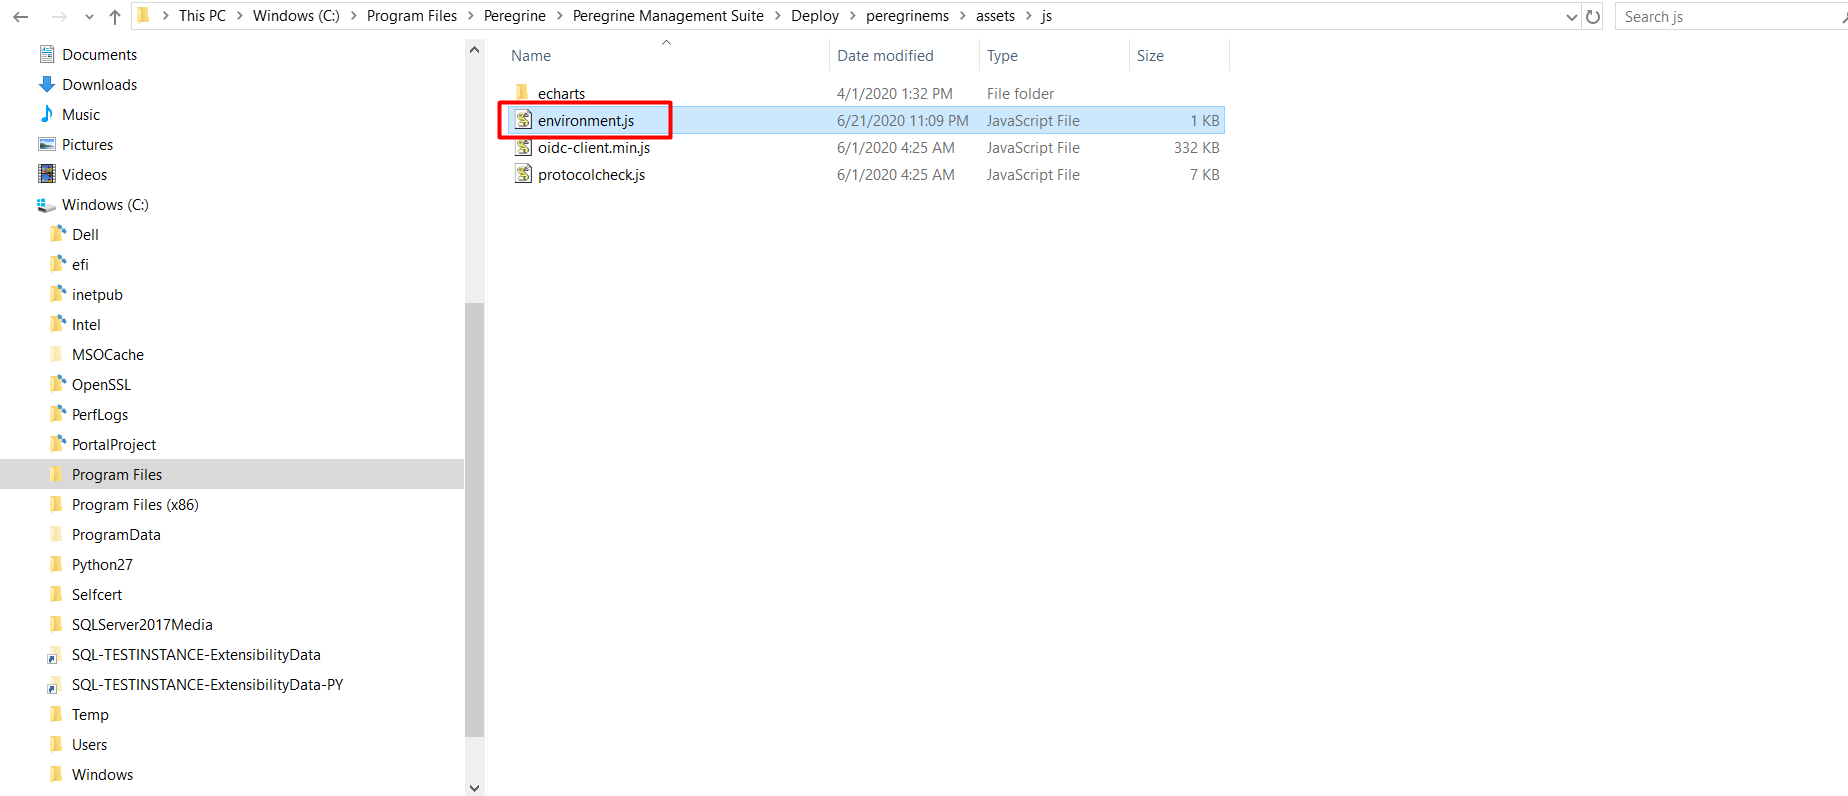
- Edit the file using notepad ++ or notepad (or with any editor of your choice) with admin rights
- Modify the authorizationserviceUrl, personalizationserviceUrl, healthmonitorserviceUrl from https://machinename to https://<Your machine FQDN> and save it.
Step: 11 Now restart the IIS, Open the Administrator command prompt and run iisreset command. The IIS will be restarted.
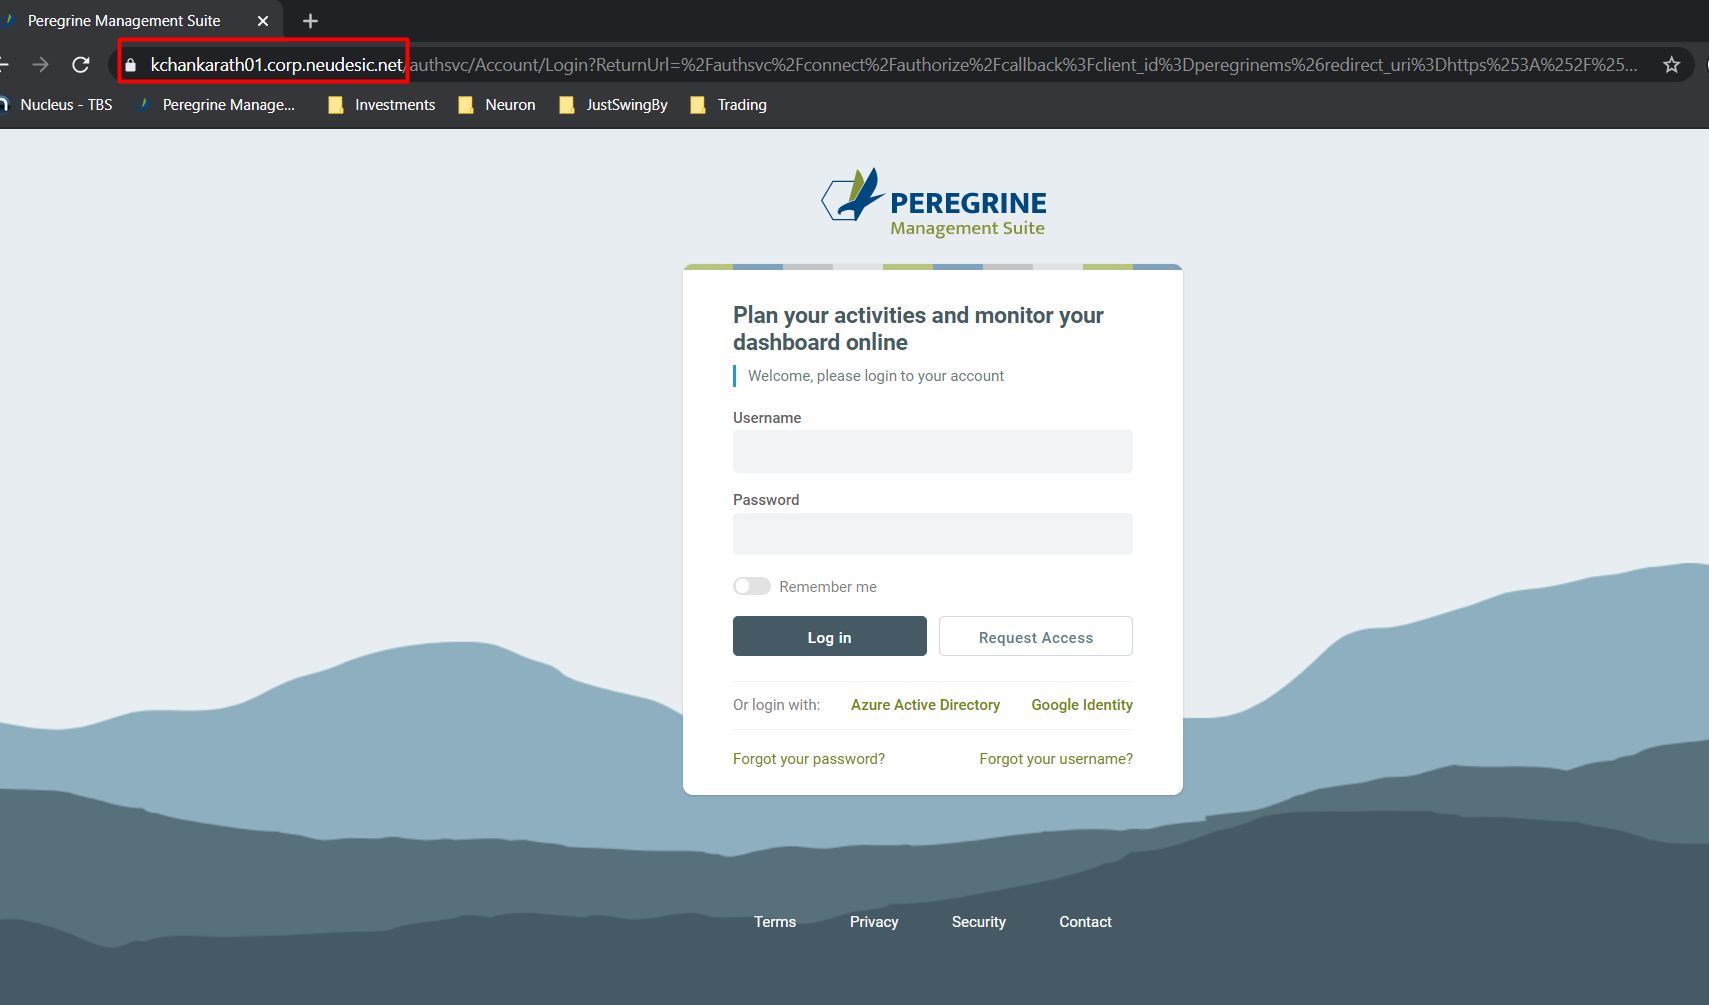
Step: 12 Open the browser and Run the portal using https://<Your machine FQDN>.
Note – Close all the browser and reopen and the launch the URL or use incognito mode to launch.
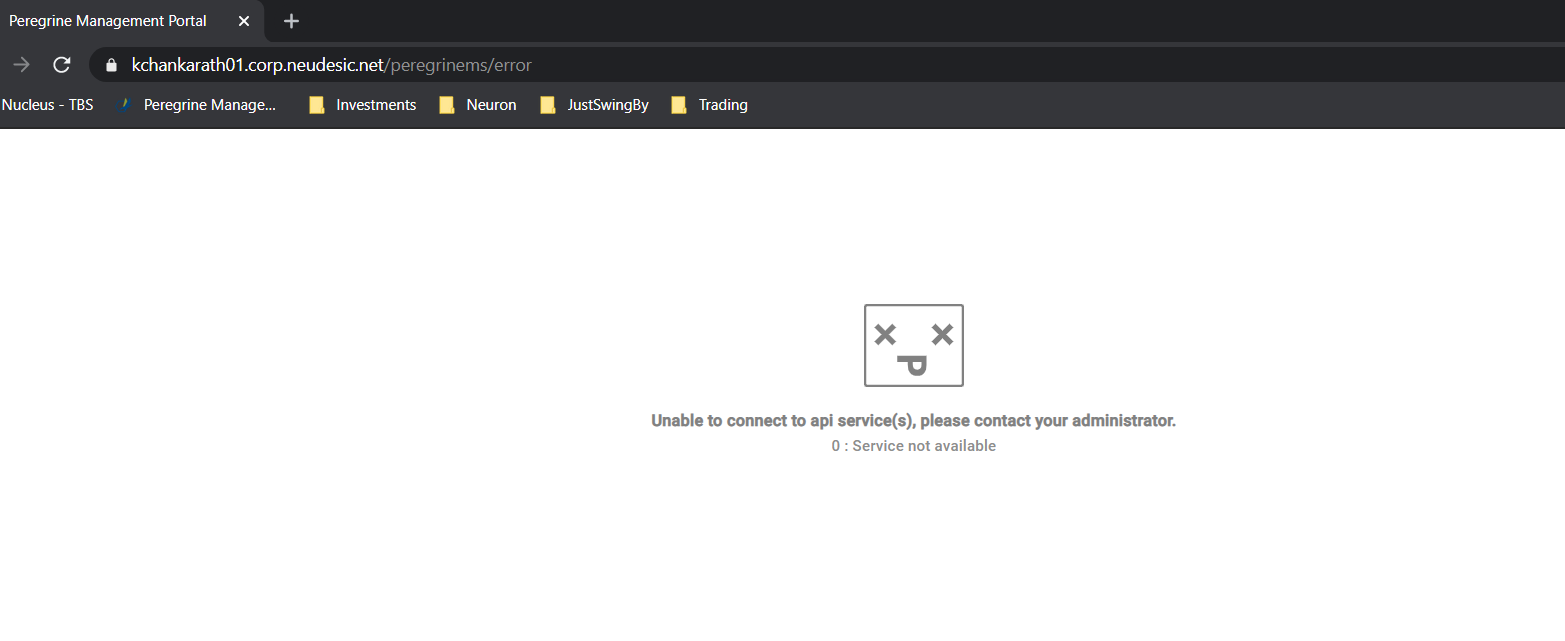
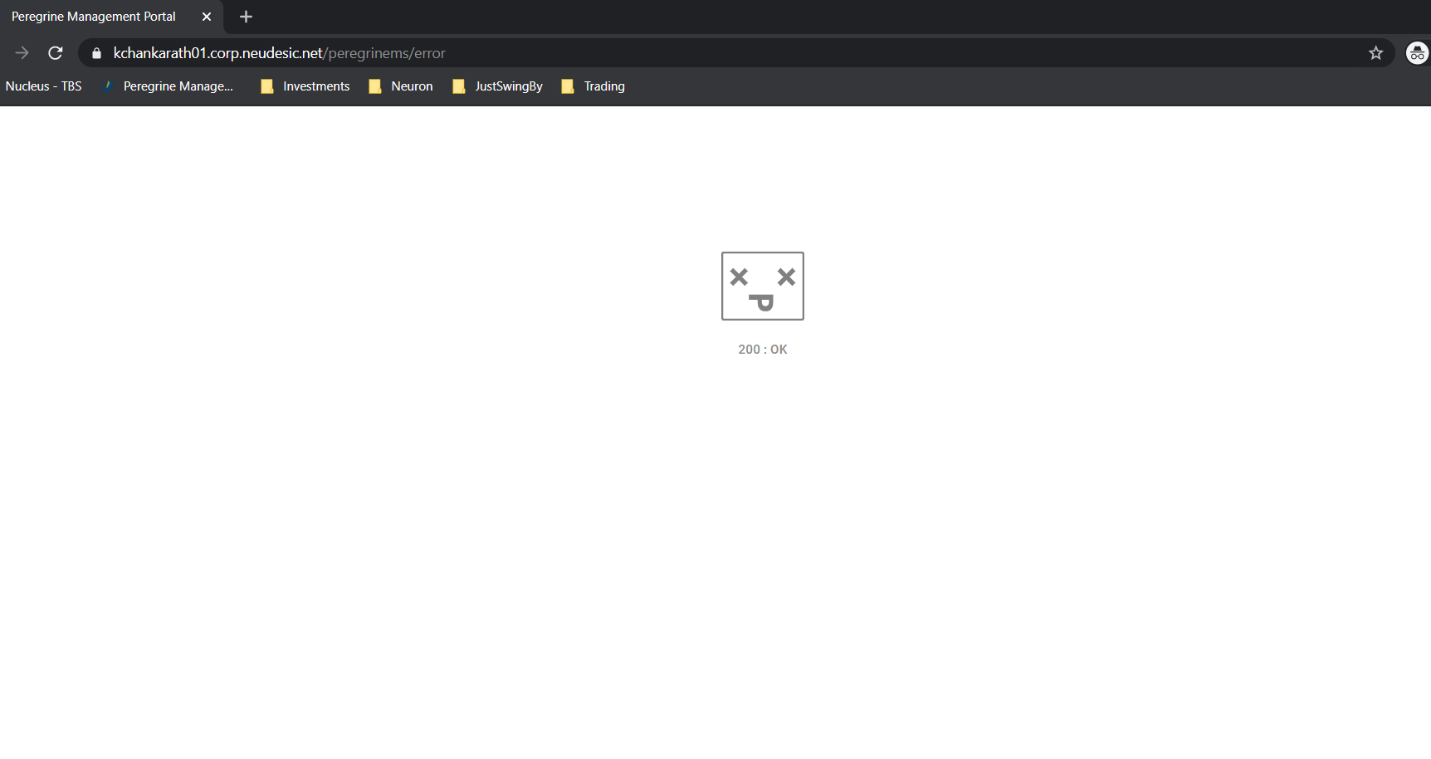
- When you launch the portal using URL https//kchankarath01.corp.neudesic.net., If you find the below error which means the certificate issued to name you used on those appsettings.json file is incorrect. You need to make sure the modified peregrineUrl’s are correct.
- When you encounter the following error, Launch IIS and Navigate to Server name -> sites -> Peregrine management suite website in the Connections column on the left
Click on Bindings in the Actions Column on the right and on the add bindings dialog box, open the Https and check the selected certificate is correct. If you have selected the wrong certificate, the below error will show up when you launch the portal.