Appendix C – Troubleshooting Installation and Startup Issues
Issue: When Installing Peregrine Management Suite, you get error in enabling IIS features.
Suggested Steps: Sometimes Peregrine MS server in corporate environment is configured for automatic updates using Group Policy and a centralized Windows Update service. Windows update service may reject changes to this feature being applied by the Peregrine MS installer. You need to temporarily suspend the windows update service using the method below.
With an administrator’s username and password, navigate to Computer Configuration > Administrative Templates > Windows Components > Windows Update > Configure Automatic Updates.
Uncheck Auto download and notify for Install to have updates downloaded
You may also temporarily bypass WSUS server using the following registry edit (requires administrator privileges).
1. Right-click Start and click Run
2. Type regedit.exe and click OK
3. Go to the following registry key:
HKEY_LOCAL_MACHINE\SOFTWARE\Policies\Microsoft\Windows\WindowsUpdate\AU
4. In the right-pane, if the value named UseWUServer exists, set its data to 0
5. Exit the Registry Editor
6. Restart Windows.
When using Server Manager on Windows Server editions, you may also configure / suspend windows update service using the methods shown in the Links below.
https://www.poweradmin.com/blog/how-to-install-and-configure-windows-server-update-service-wsus/
https://www.poweradmin.com/blog/how-to-install-configure-windows-server-update-service-wsus-part-2/
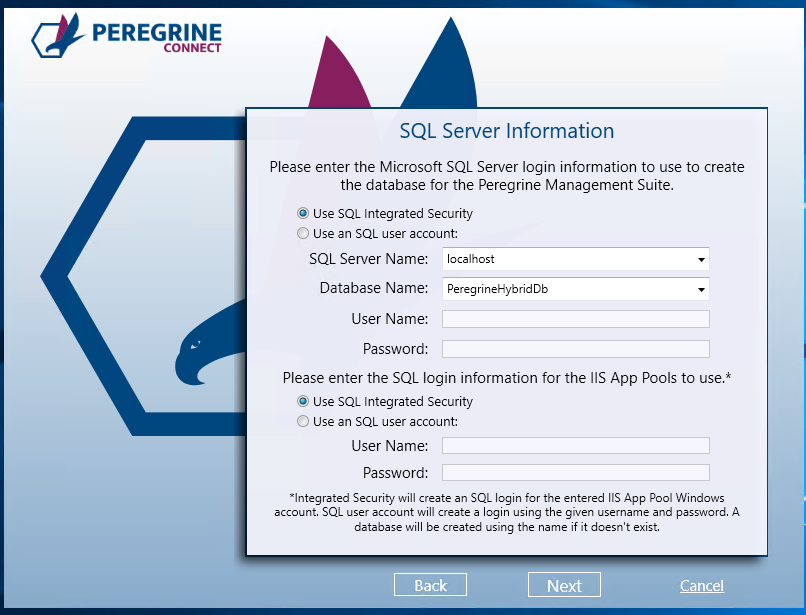
Issue: When trying to configure database in Peregrine Installation, you get SQL Server connection errors.
Suggested Steps: Try to specify sql server username and password with database creation privileges in the first box and a new username / password in the second box on the screen shown below.
The installer creates the username specified for the IIS app pool if it is sql user. If it is windows user, then it adds permissions for that existing windows user in the database.
Issue: You do not have RabbitMQ installed anywhere as a part of your Neuron Installation because prior to Management Suite, you didn’t use RabbitMQ topics in your Neuron Solution.
Suggested Steps: Rerun Neuron Installer on a new VM or existing VM to install Erlang and RabbitMQ. You may cancel out of the installer after Erlang and RabbitMQ are installed, or you may continue to install to Neuron (second Instance of Neuron if on existing VM).
Issue: RabbitMQ test from the Environment Setup fails
Steps: You may need to enable RabbitMQ management plugin as per the step below.
Open a rabbitmq command prompt as below. Run as Administrator.
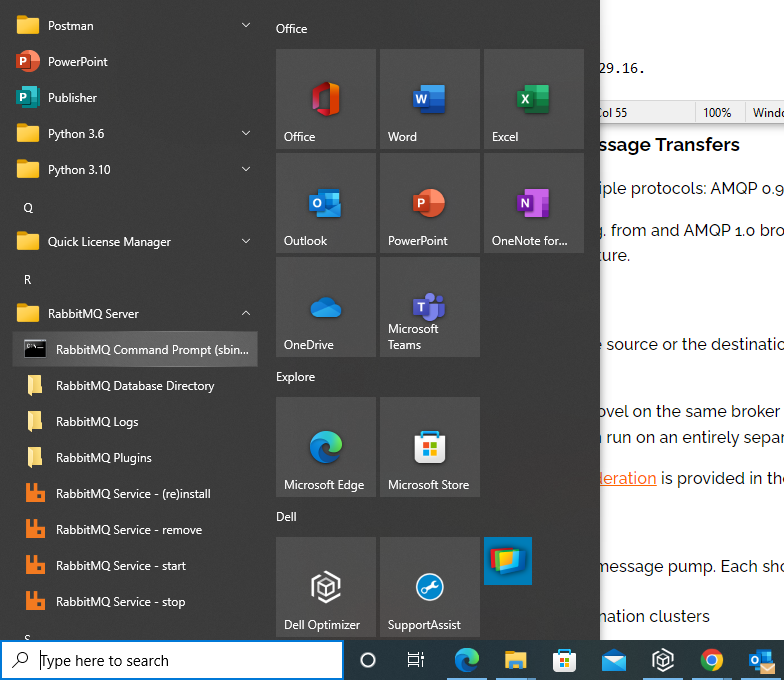
Run the following command.
rabbitmq-plugins enable rabbitmq_management
Issue: EPS is running but monitoring screens do not show any logs or service rate from the Neuron Instance or EPS.
Suggested Steps: Check if the RabbitMQ and Elastic Search services are running without any errors. These services may fail to run if there isn’t sufficient CPU, free memory or disk space.
Peregrine MS shows the status of RabbitMQ and ElasticSearch in the following page accessed by clicking on View Details for EPS server.
Default location of logs for ElasticSearch may be found in the directory that is pointed to by the Elastic Search service when you check Windows Services.
By default, the RabbitMQ logs and node’s data directory are stored in the current user’s Application Data directory e.g. C:\Documents and Settings\%USERNAME%\Application Data or C:\Users\%USERNAME%\AppData\Roaming. Execute echo %APPDATA% at a Command Prompt to find this directory.
Issue: When enabling the environment, you see Neuron and EPS log errors connecting to the Management Suite URL.
Suggested Steps: Ensure that the Neuron / EPS machine can resolve the Peregrine Management Suite URL. You may need to check the DNS settings, proxy configuration on the Neuron/EPS machine and any other firewall rules for outbound access. You may need to enter an entry in windows\system32\drivers\etc\hosts that points IP address of the Management Suite server to the DNS name of the Management Suite Server used in the appsettings.config file and the NeuronEventProcessor.exe.config files.
You may also need to ensure that the user id and password you specified when enabling the environment for the first time, has write access to the Neuron Instance Folder and the EPS service folder.