Box.com Adapter
Introduction
The Neuron ESB Box.com adapter provides direct access to the Box.com REST API (v2). Using this adapter, organizations can easily integrate their business content management requirements with Box.com. This adapter provides four modes – API, Publish, Subscribe and Solicit/Response. Publish and subscribe modes provide similar functionality as the File and FTP adapters. In publish mode, a Box.com folder is polled for documents. When a new document is found it is published to a topic as the body of the Neuron ESB message. In subscribe mode, when the Box.com adapter receives a new message, the body of the message is written to a Box.com folder as a document. Solicit/Response performs the same functionality as subscribe mode with the added functionality of receiving a file info document as the response and the ability to create a shared link for the uploaded file. The API mode provides you with access to the Box.com REST API. You can use this mode to call any of the Box.com APIs and receive a response.
When developing applications that utilize this adapter, developers will be able to use the Adapter Metadata Generation Wizard to provide JSON samples that describe the request and/or response documents that can be used when using the Box.com adapter in API mode.
Before reading this document
If you are not familiar with Neuron ESB Adapters, take a moment to consult the Adapter Overview. This document assumes you have the following knowledge:
- What adapters are and how they are leveraged in Neuron ESB
- Register a Neuron ESB Adapter within a Neuron ESB Solution
- Create an Adapter Endpoint in a Neuron ESB Solution
- Set a Neuron ESB Adapter Endpoint Properties
- Invoke a Neuron ESB Adapter Endpoint
Supported Modes
The Box.com Adapter supports Publish, Subscribe, Solicit/Response and API modes. Publish and subscribe are both one-way calls. The solicit/response and API modes send request-reply calls to the Box.com API.
Properties
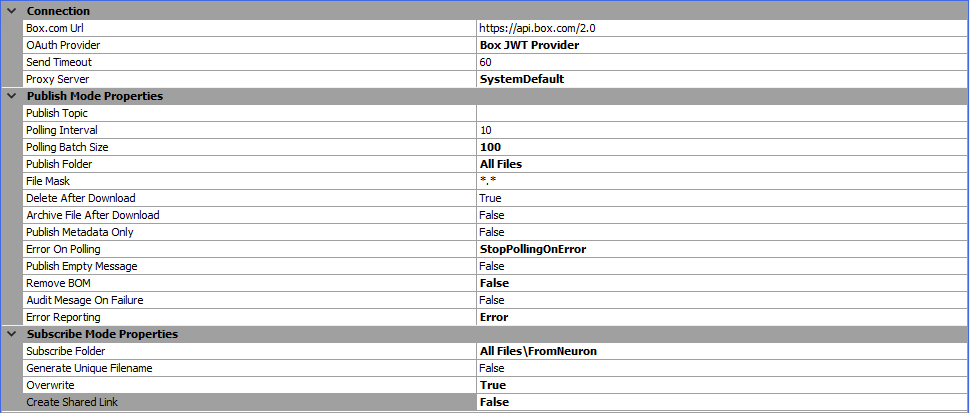
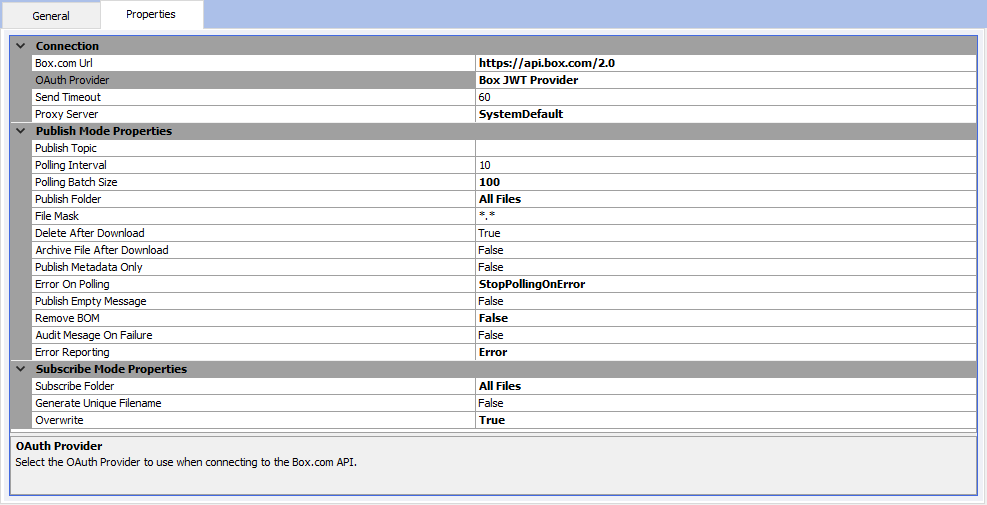
Every Neuron ESB Adapter has design time properties that can configured within a standard Microsoft property grid (as shown below). These properties are used to determine the behavior of the adapter at runtime. The group of Connection properties is used to configure the Box.com API URL and the OAuth Provider used for authorization.
Box.com Url
The base Url used when making calls to Box.com. This should always be https://api.box.com/2.0. When using API mode, when making calls to a specific API you would set the ESB Message’s local path, which will be appended to this Url.
OAuth Provider
This is the pre-configured OAuth Provider that will be used when making calls to Box.com. See the section titled Box.com OAuth Provider for details on how to create an OAuth connection.
Send Timeout
This is the amount of time in seconds the Box.com adapter will wait to upload a file when in subscribe or solicit/response mode, or for a reply when in API mode. The default value is 60 seconds and should be long enough for most calls. However, if you performing complex queries you may want to extend the timeout.
Proxy Server
Allows you connect to Box.com via a proxy server. By default this value is set to System Default. Changing the value to custom will expose additional properties:
- Address – The URL address to the proxy server
- Port – The port for the proxy server address
- Use Custom Credentials – By default this is set to false and will use the credentials that the Neuron ESB instance is running under. Changing this value to True will allow you to select a stored credential from Neuron ESB.

Publish Mode Properties
In publish mode, the Box.com adapter will poll a Box.com folder and publish documents to a topic. The content of the document found in Box.com will become the content of the Neuron ESB Message body.
Publish Topic
The Neuron ESB topic that messages will be published to.
Polling Interval
The amount of time between each polling attempt to see if there are any files to download from Box.com.
Polling Batch Size
The maximum number of files to download during each polling attempt. Valid values are 1-1000. This property should be set based on the sizes of files being downloaded. The smaller the file, the higher you can set this number. For very large files you should set this value to a lower value.
Publish Folder
The relative path of the Box.com folder to poll for files. This can be a single folder, i.e. “All Files”, or a path, i.e. “All Files\Subfolder”.
File Mask
File spec for retrieving files from Box.com. Must be in the form of “*.*”. This also supports wild characters like “*” and “?”. Masks can be used for file name as well as extension i.e. “my?name.*”. Example: “*.log”. If all files should be returned use ‘*’ or “*.*”. Multiple search filters can be supplied if separated by a comma or semicolon i.e. “*.txt;*.doc”.
Delete After Download
Deletes the file on Box.com after it is retrieved. Default value is True. Setting this to False will display the properties Enable Timestamp Comparison and Check Window.
Enable Timestamp Comparison
If True, compares the last write timestamp of the Box.com file to retrieve, with the timestamp of the previously retrieved file of same name. If timestamps are the same, the file is not retrieved again unless the Check Window property has been exceeded. If False, the file will be downloaded with every polling interval. This property is only enabled when Delete After Download is set to False.
Check Window
The timespan range from the current date time which the file will be considered a duplicate and not be downloaded if Timestamp Comparison is enabled. Format is “d:hh:mm:ss”. For example, if the file is downloaded at 8:00 AM, and the check window is 12:00:00, then file will automatically be downloaded again at 8:00 PM even if the file has not changed. This property is only enabled when Delete After Download is set to False.
Archive File After Download
When set to True, the adapter will archive the file on Box.com after it is retrieved. Default is False. This will override the ‘Delete After Download’ property. Setting this to True will display the property Archive Folder.
Archive Folder
The relative path of the Folder to archive the downloaded files to. Can be a single folder, or a path i.e. “RootFolder\SubFolder”. This is only enabled when Archive File After Download is set to True.
Publish Metadata Only
Publishes the metadata of the file, not the actual data. The file will be moved to the specified Archive Folder. This is useful when you only want to pass a pointer to the file to another system (i.e. a link to the file in a SharePoint site). When setting this to True, the Archive File After Download property will also be set to true and you will be required to set an archive folder.
Publish Empty Message
Publishes an empty message if a zero byte file is returned from Box.com.
Remove BOM
Provides the option for the adapter to remove the Byte Order Characters (BOM) preceding data in UTF8/UTF16 and other web formatted files.
Audit Message on Failure
When set to true, a message that has been received from Box.com but fails publishing to a topic will be audited to the failed messages table.
Error Reporting
Determines how all errors are reported in Event Log and Neuron Logs. Either as Errors, Warnings or Informationals.
Error On Polling
Determines if polling of the folder will continue when an error occurs and if consecutive errors are reported. If StopPollingOnError is selected, when an error occurs the adapter endpoint will go into the Failed state. If SuppressConsecutiveErrors is selected, when an error occurs the adapter endpoint will continue to poll at the next polling interval. If the same error is encountered it will not be logged. If ReportAllError is selected, when an error occurs the adapter endpoint will continue to poll at the next polling interval. All errors will be logged.
Subscribe Mode Properties
In subscribe mode, the Box.com adapter will create or overwrite a document in a Box.com folder. The content of the Neuron ESB Message body will be saved as the content of the document created in Box.com.
Subscribe Folder
The relative path of the Box.com folder to send files to. This can be a single folder, i.e. “All Files”, or a path, i.e. “All Files\Subfolder”.
Generate Unique File Names
Setting this to true will automatically generate a unique file name based on a Guid on Box.com for the uploaded file. When set to false, the filename will be determined in this order:
- The value of the Neuron ESB Message property box.Filename (this would have to be set by a user in a process or workflow)
- If #1 does not return a file name, the value of the Neuron ESB Message property file_in.Filename (this would be set if the file was published to the bus by a file adapter)
- If #1 & #2 do not return a file name, the internal Neuron ESB Message ID + the numerical value of DateTime.UtcNow.Month + the numerical value of DateTime.UtcNow.Ticks + .txt
Overwrite
When set to True, if the file already exists on Box.com the adapter will attempt to overwrite it. When set to false and the filename exists in the Box.com folder, the file will not be uploaded and an error will be logged.
Create Shared Link
When set to true, once a file is uploaded to Box.com a shared link will be created for the file. Setting this property to true will display the properties Require Password, Set Expiration and Access Level. In solicit/response mode, the URL for the shared link will be returned as the message property box.FileUrl.
Require Password
When set to true, the shared link will require a password before it can be downloaded. Setting this property to true will display the property Password.
Password
The password to use when creating a shared link that requires a password for download. This property can also be set per message using the message property box.SharedLinkPassword.
Set Expiration
If you want the link to expire in a certain amount of time, set this to true. Setting this property to true will display to property Expires In.
Expires In
The timespan in which the share link will remain active. This timespan is added to the date and time the file is uploaded. The format is d.hh:mm:ss.
Access
The level of access for the shared link. This can be restricted to anyone with the link (open), only people within the company (company) and only those who have been invited to the file (collaborators). If not set, this field defaults to the access level specified by the enterprise admin. If open or company is selected, the property Allow Download becomes visible.
Allow Download
Flag whether or not to allow the file to be downloaded. This is only available if the Access Level is set to open or company. When it’s set to collaborators or defaults to the previously set permissions, this is always true.
Using the Box.com Adapter
The Box.com Adapter has four modes:
- Publish
- Subscribe
- Solicit/Response
- API
Publish and subscribe modes operate in the same manner as the file and FTP adapters. The Neuron ESB message body contains the file to be uploaded or downloaded from Box.com. Solicit/Response mode will provide you with a file info response. The API mode allows you to call the Box.com API directly. The message formats for the APIs can be retrieved using the Metadata Generation Wizard.
For more information about the Box.com API, log into your Box.com developer account and visit the Box.com API Reference.
Integrating with Box.com can be done in many different ways. Using publish, subscribe and solicit/response modes you can directly download and upload files to Box.com. Using API mode you can integrate with any of the Box.com APIs. The request messages can be created in a C# or C# Class step in a process or workflow. You can also use the Transform – XSLT process step. You can also pass-thru a REST request received by a client connector and route it to a Box.com Adapter endpoint. This document focuses on creating the requests with a C# step in a process.
Security
As noted previously, the adapter supports OAuth 2.0 when integrating with Box.com. The adapter handles all the security requirements at runtime. When you’re constructing a request message to send to Box.com you do not need to worry about setting credentials.
Request and Response Message Formats
The Box.com adapter only supports JSON content for request and response messages. The request and response message formats depend on the API being called. You can retrieve JSON samples using the Metadata Generation Wizard described below.
Dynamic Message Properties
The Box.com adapter supports several message properties that can be used to dynamically change the behavior of the adapter at runtime. All the message properties have the prefix “box”. For example, if you want to set the filename that will be used when uploading a file to Box.com on a per-message basis, you could use the following code in a C# step:
context.Data.SetProperty(“box”, “Filename”, “test.xml”);
Subscribe Mode Message Properties
These message properties can control the behavior when uploading files to Box.com:
| Folder | Name of the Box.com folder that the file will be written to |
| Filename | The name that will be used when uploading |
| SharedLinkPassword | This password that will be required when download a file from a newly created shared link |
| FileUrl | The URL of the file uploaded to Box.com |
Publish Mode Message Properties
These message properties are set when downloading files from Box.com:
| Folder | Name of the Box.com folder from which the file was retrieved |
| Filename | Name of the file received from Box.com |
| Length | Length of the file in bytes |
| Timestamp | The date time stamp of the file on Box.com |
| Mode | Represents the configured Adapter Mode for the endpoint |
| Description | The file description of the file on Box.com |
| DownloadUrl | The direct URL to download the file on Box.com |
| ArchiveFileInfo | The full file info of the downloaded file after it has been archived |
| ArchiveFolder | The folder the downloaded file has been archived to after it has been archived |
| ArchiveUrl | The direct URL to download the archived file on Box.com |
API Mode Properties
There are no dynamic message properties used in API mode.
Create a Box.com Account
If you don’t already have one, you will need to sign-up for a Box.com developer account. You can get a free account from https://developer.box.com. Click the Get Started button to join. After completing the sign-up details and confirming your account, you will need to perform some setup in your account before you can use the adapter.
Box.com Application Setup
The Box.com adapter uses OAuth 2 with JSON Web Tokens (JWT) to authenticate users. You will need to create and configure a JWT application in Box.com for your enterprise. This section will provide high-level details of how to create an application. For a the most current guide on creating a JWT application in Box.com, go to Setup with JWT.
- Create and configure a JWT application – Follow the steps for creating a JWT application. On step 2, select Custom App as the type of application. For step 3, select select Server Authentication (with JWT) and click Create App.
- Generate a Public/Private Keypair – There are two ways to generate the public/private keypair – either through an application config file or manually. The Box.com adapter supports both methods. The easiest method would be to follow the steps for using an application config file. Once completed, an application config file is automatically downloaded to your computer. You will use this config file when creating the OAuth provider that will be used by the Box.com adapter.
- Grant Access for the Application in Your Enterprise – This step walks you through authorizing your new application to your Box.com account.
Create Folders in Box.com
By default, your JWT Application in Box.com does not have access to other users’ folders. What that means is that when you upload and download from Box.com using the Neuron adapter, it will be from your JWT Application’s content area and not with the username you normally sign-in with.
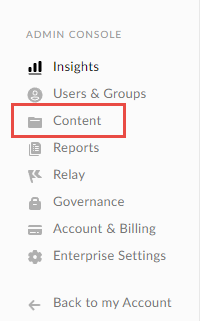
To see the application’s content, log-into Box.com with the same credentials you created the application with. Then navigate to the Admin Console, then click on Content in the left-hand navigation:
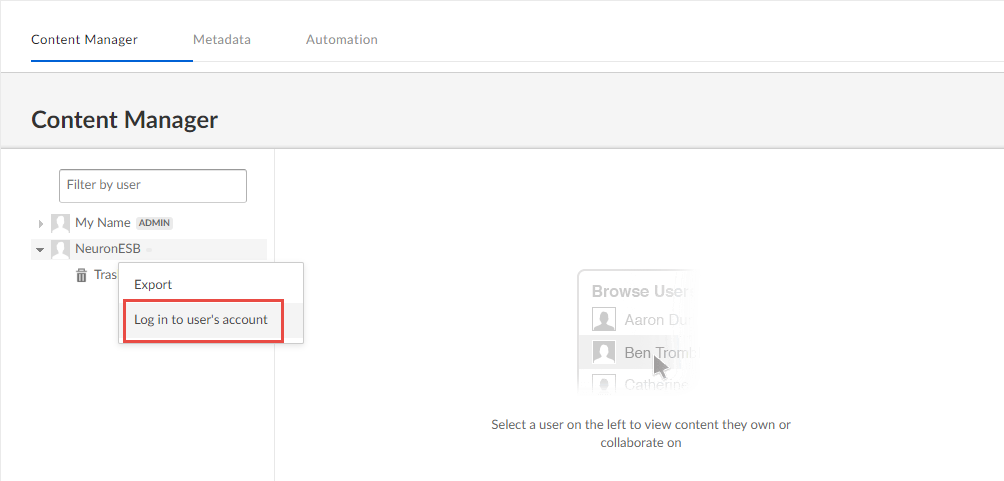
In the Content Manager you will see the name of the JWT Application you previously created. You can right-click on the application and then select Log in to user’s account:
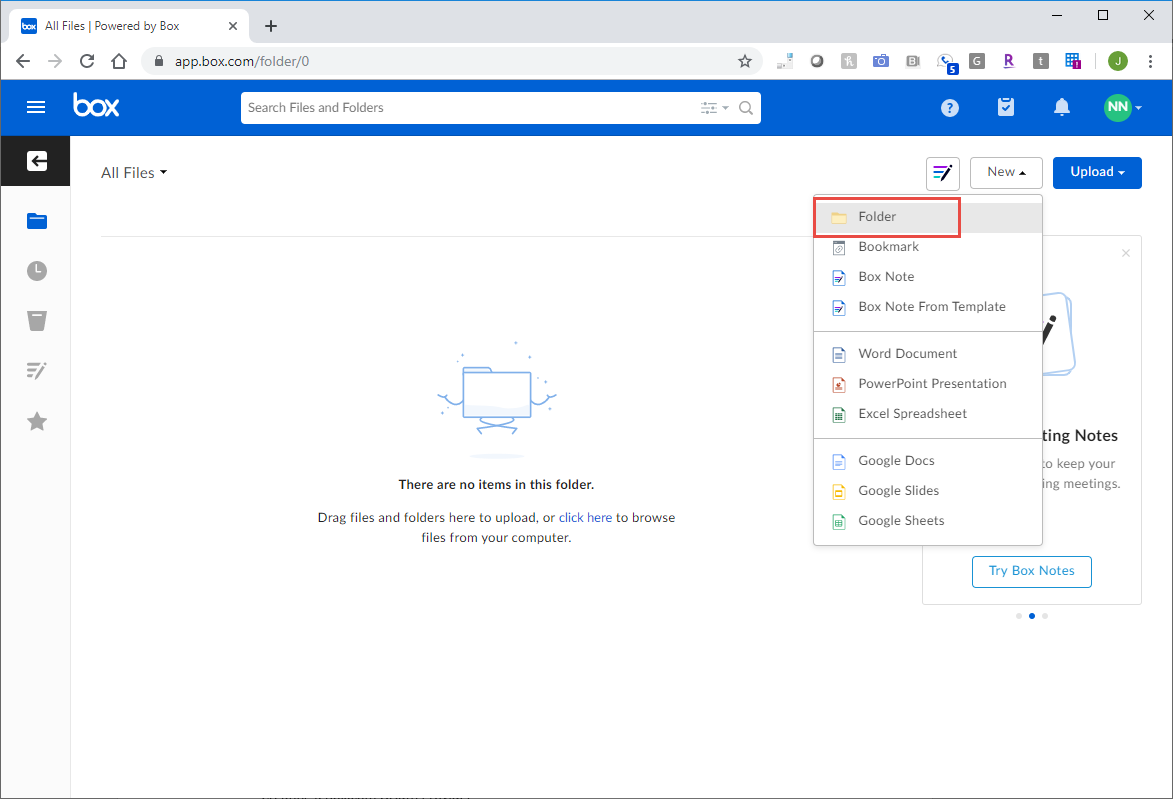
The default file view will be “All Files”. From here you can create folders that the adapter will use for uploading and downloading files. In the upper-right corner, click New->Folder:
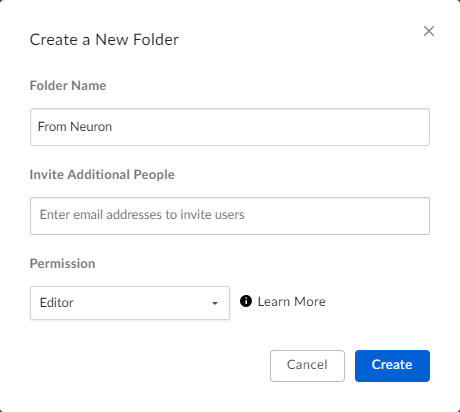
Create a folder called From Neuron. You don’t need to invite additional people, and leave the permission set to Editor:
Repeat the above steps and create a second folder called “To Neuron” and a third folder called “Neuron API”. All three of these folders will be used in the tutorials.
Tutorial
This tutorial is broken down into three parts:
- Creating a Box.com OAuth Provider
- Uploading files to Box.com
- Downloading files from Box.com
- Directly calling the Box.com APIs
Each section will describe the Neuron configuration that needs to be created in order to complete that part of the tutorial. It is expected that the reader of this document is familiar with creating/configuring topics, publishers, subscribers and file adapter endpoints. The tutorials will describe in detail how to create Box.com OAuth providers and adapter endpoints.
Tutorial Requirements
The four tutorials all have the following requirements:
- A Box.com developer account (see above)
- A Box.com JWT application created and configured (see above)
- Folders created in Box.com (see above)
- A new, blank Neuron Configuration that has been saved as BoxTutorialESB
- The Neuron ESB runtime is configured and started with the configuration BoxTutorialESB
Creating a Box.com OAuth Provider
Once you’ve created the JWT Application, downloaded the application config file and authorized the application for your enterprise, you can create the OAuth Provider in Neuron for Box.com. The adapter utilizes the OAuth provider when authenticating with Box.com.
Please verify the tutorial requirements above have been completed prior to starting this tutorial.
To create an OAuth Provider:
- Open Neuron Explorer and the BoxTutorialESB configuration referred to in the above requirements.
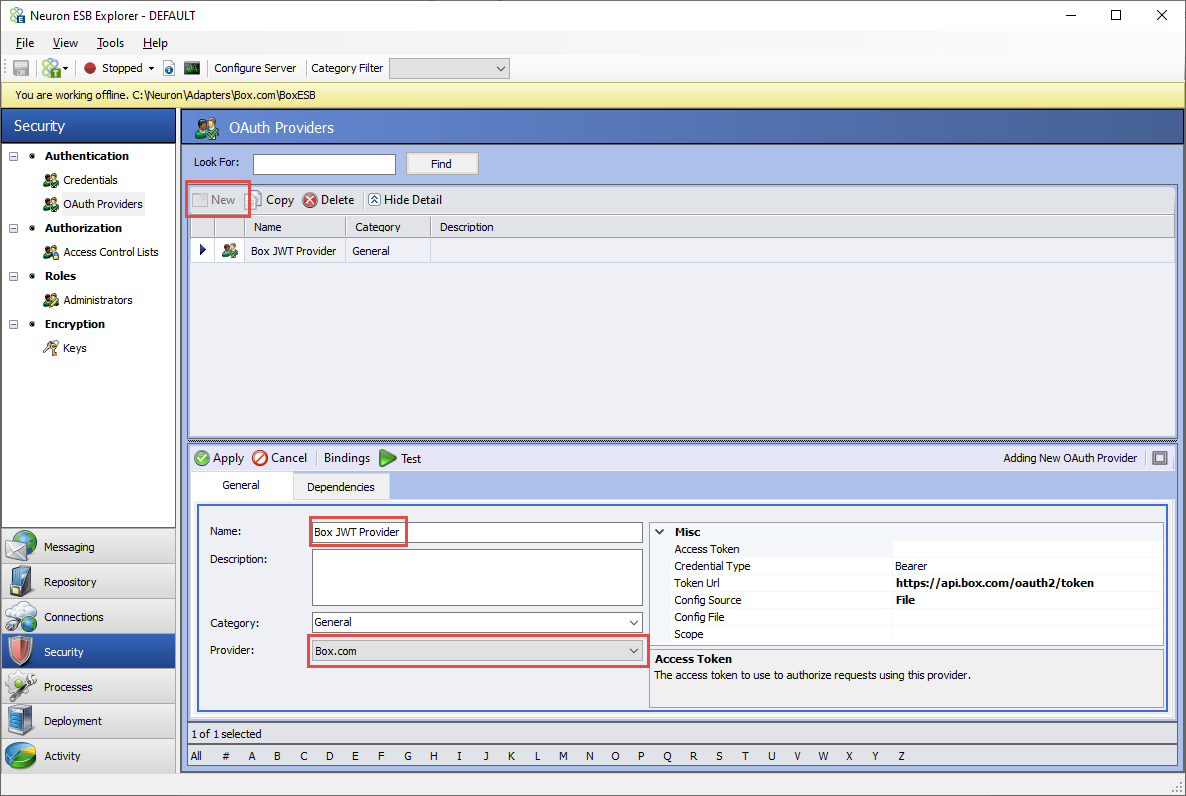
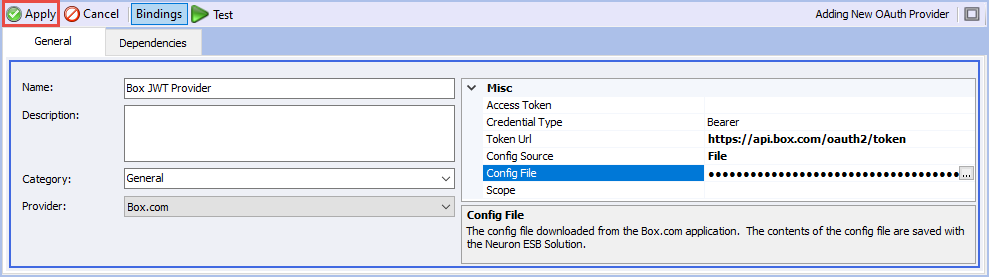
- In Neuron Explorer, click on the Security->OAuth Providers and click New. Set the name of the OAuth Provider to Box JWT Provider and select Box.com from the Provider drop-down list:
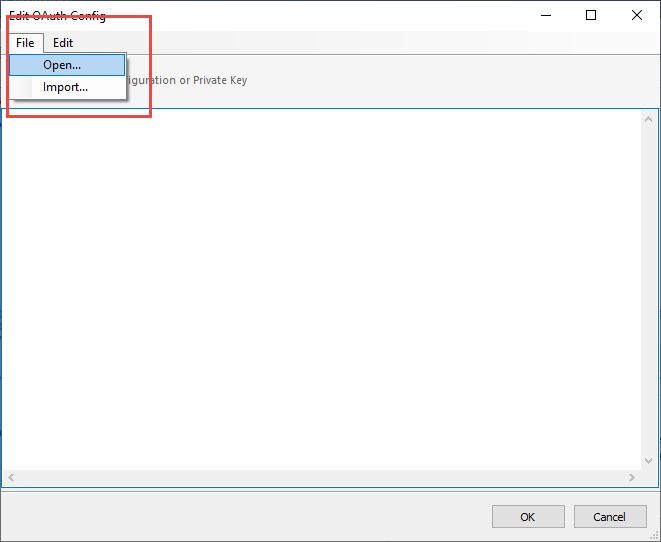
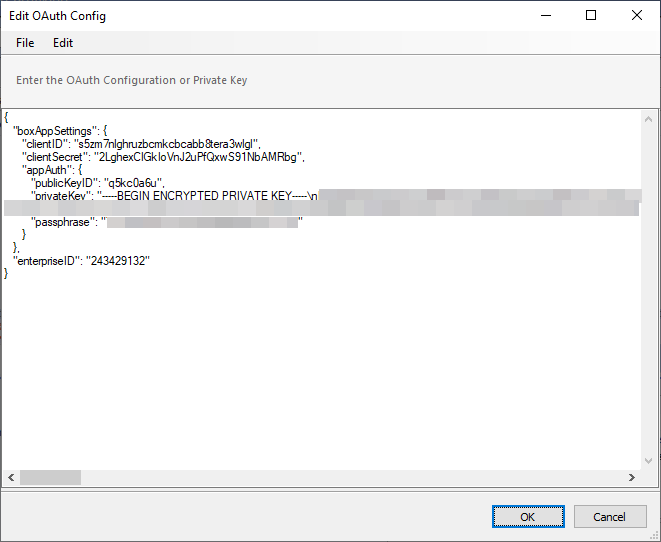
- In the properties for the Box.com OAuth Provider, set the Config Source property to File and select the Config File property. Click on the ellipsis button that is displayed. In the Edit OAuth Config dialog that is displayed, you can either copy/paste or open the application config file that was downloaded when you created the JWT Application in Box.com. Click File->Open and navigate to the downloaded file:
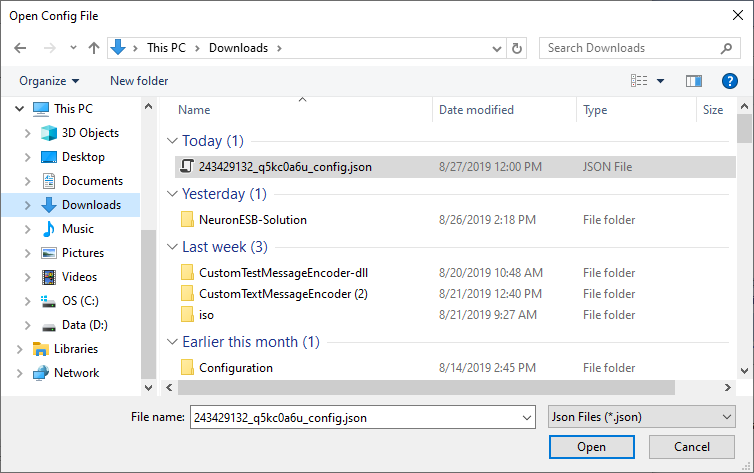
- Click Open:
- Click OK, then Apply:
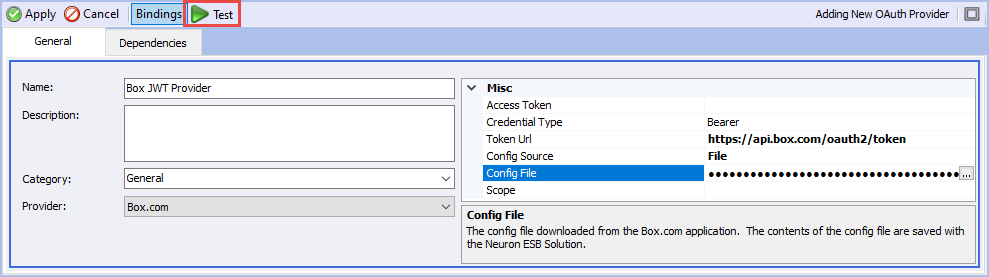
- You can test the OAuth Provider by clicking the Test button:
- You will receive this dialog if the test is successful:
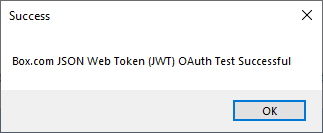
- Click OK to close the dialog. You will see that an Access Token has been to the OAuth Provider. This is a valid OAuth token, and the adapter will attempt to use it at runtime. If the access token expires the OAuth provider will automatically request a new one.
Uploading Files to Box.com (Subscribe Mode)
This tutorial walks you through building an integration that will read files from a local folder using the file adapter and uploading those files to a Box.com folder.
This tutorial requires:
- Verify the tutorial requirements above have been completed
- Complete the tutorial Creating a Box.com OAuth Provider
- Add the following items to the BoxTutorialESB configuration:
- Topic – File
- Subtopic – File.Outbound
- Publisher – FilePublisher with subscriptions to File. Outbound (Send)
- Subscriber – BoxSubscriber with a subscription to File.Outbound (Receive)
- Adapter Endpoint:
- Name – File In
- Adapter – File
- Mode – Publish
- Processing Mode – Messaging
- Publish/Subscribe – Checked
- Party Id – FilePublisher
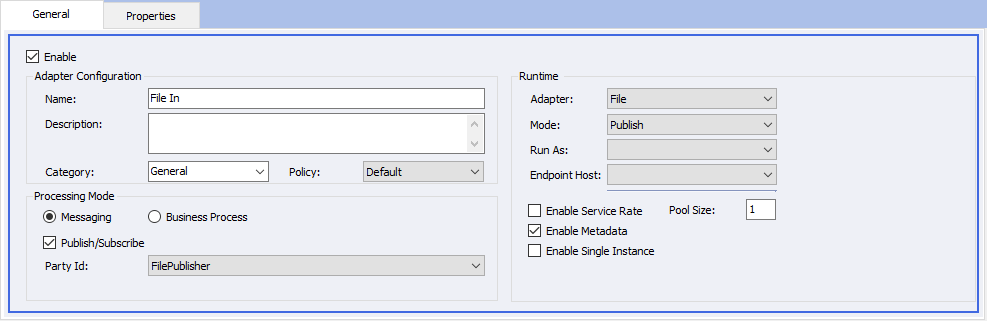
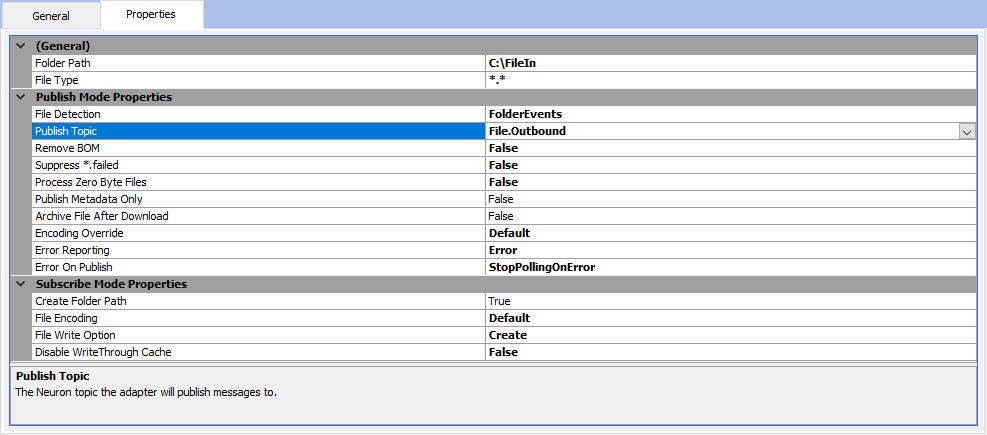
- Folder Path – C:\FileIn (or another folder that you choose)
- File Type – *.*
- Publish Topic – File.Outbound
- Topic – File
Save the Neuron configuration after applying the above changes.
*Note – Typically when performing one-way messaging with any adapter you should use a topic with a durable transport, either MSMQ or RabbitMQ. For this tutorial you can use TCP or Named Pipe for the topic transport for ease of setup.
Creating an Adapter Endpoint that Uploads Files to Box.com
- Navigate to Connections->Adapter Endpoints and click New. Set the name of the adapter endpoint to Box.com Upload, select Box.com from the Adapter drop-down list and select Subscribe from the Mode drop-down list. Select the Messaging radio button, check the Publish/Subscribe box and select BoxSubscriber from the Party Id drop-down list:

- Click on the Properties tab. Select the Box JWT Provider from the OAuth Provider drop-down list. Click on the Subscribe Folder property, then the ellipsis button. A dialog with the folders accessible to the Box.com adapter is displayed:

Select From Neuron and click OK: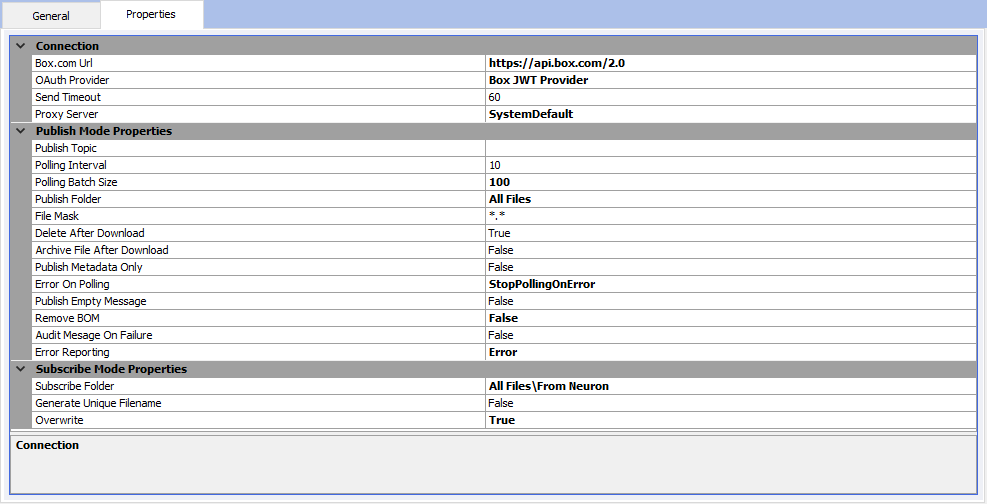
Don’t forget to click the Apply button! - Save the Neuron ESB configuration.
At this point, you should have a file adapter endpoint that publishes messages to the topic File.Outbound, and a Box.com adapter endpoint subscribing to messages from that same topic.
To test uploading files to Box.com, all you need to do is copy a file into the folder that you configured the File In adapter endpoint to read messages from. Once the file adapter has read the message from the local folder, it should appear in the Box.com folder From Neuron.
Uploading a File and Creating a Shared Link (Solicit/Response Mode)
This tutorial walks you through building a process that will upload a file to a Box.com folder, create a shared link and return the uploaded file info as a response.
This tutorial requires:
- Verify the tutorial requirements above have been completed
- Complete the tutorial Creating a Box.com OAuth Provider
Creating an Adapter Endpoint that Uploads Files to Box.com
- Navigate to Connections->Adapter Endpoints and click New. Set the name of the adapter endpoint to Box.com Solicit Response, select Box.com from the Adapter drop-down list and select Solicit Response from the Mode drop-down list. Select the Messaging radio button and uncheck the Publish/Subscribe box:

- Click on the Properties tab:
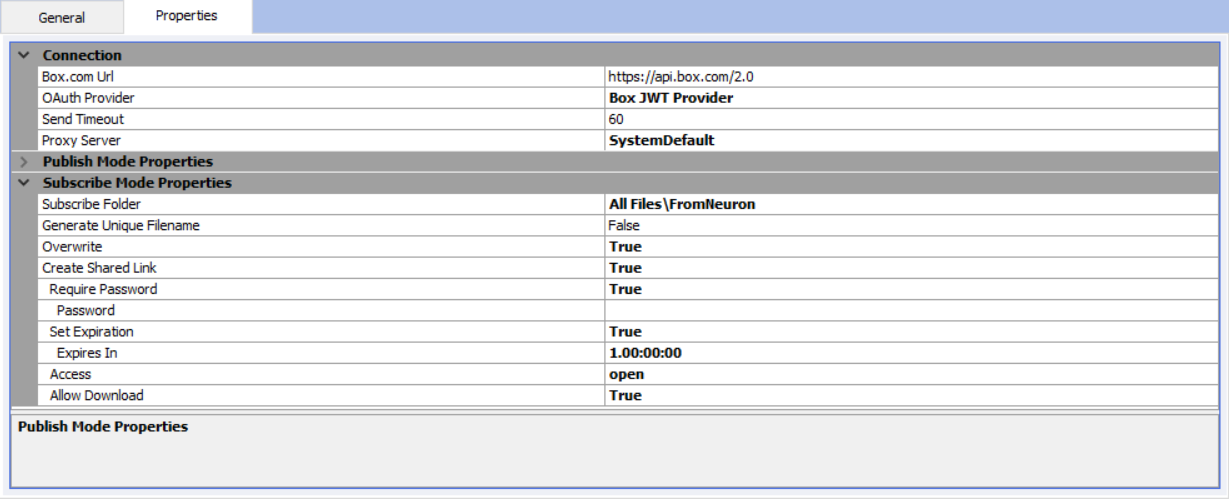
- Select the Box JWT Provider from the OAuth Provider drop-down list.
- Click on the Subscribe Folder property, then the ellipsis button. A dialog with the folders accessible to the Box.com adapter is displayed:

Select From Neuron and click OK. - Set the following properties:
- Generate Unique Filename = False
- Overwrite = True
- Create Shared Link = True
- Require Password = True
- Password – leave it blank, as you will dynamically set the password in a process
- Set Expiration = True
- Expires In = 1.00:00:00
- Access = Open
- Allow Download = True
Don’t forget to click the Apply button!
- Save the Neuron ESB configuration.
Create a Business Process that Uploads a File to Box.com
This process will demonstrate uploading a file to Box.com and receiving a file info response with a shared link.
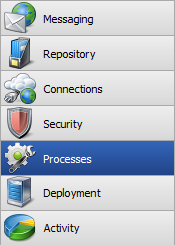
- Navigate to Processes in the Neuron ESB Explorer
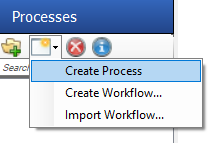
- Click the New drop down and select Create Process
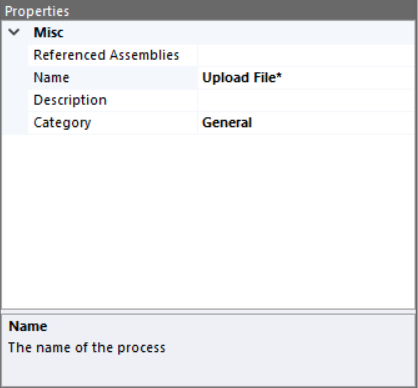
- Click on the UI element named New Process 1 and in the Property Grid on the right-hand side of the Neuron ESB Explorer enter “Upload File” in the Name text field.
- In the Search Steps text field of the Process Step Library enter “C#”
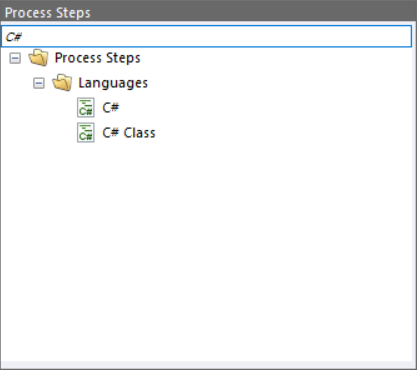
- Drag the C# process step on to the design canvas and drop it in the middle of the UI element labeled “Upload File”. Set the name of the process step to Set Filename and Password.
- Double-click on the C# step to open the code designer. The following code can be used to set the filename of the file being uploaded and generate a password to assign to the shared link that will be created:
// Set the Filename message property to use for the uploaded file
context.Data.SetProperty("box", "Filename", "test.xml");

// Generate a password to assign to the shared link that will be created
// Note - this is a simple password generator which would not necessarily solve specific password requirements.
// Modify this as needed for your own password requirements
string valid = "abcdefghijklmnopqrstuvwxyzABCDEFGHIJKLMNOPQRSTUVWXYZ1234567890";
System.Text.StringBuilder res = new System.Text.StringBuilder();
int length = 8;
Random rnd = new Random();
while (0 < length--)
{
     res.Append(valid[rnd.Next(valid.Length)]);
}

// Set the SharedLinkPassword message property
context.Data.SetProperty("box", "SharedLinkPassword", res.ToString());

// Output the password for testing purposes
context.Instance.TraceInformation("Password = " + res.ToString()); - Click the Apply button in the code editor and navigate back to the Upload File process.
- In the Process Step Library, find the Adapter Endpoint step and drag it onto the designer directly under the C# step:
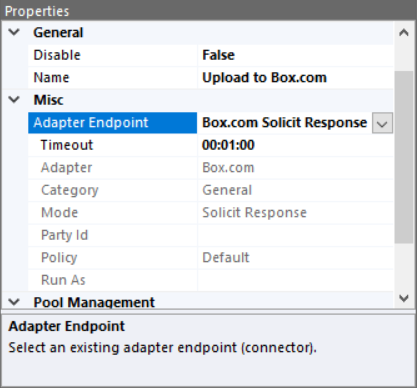
- Click on the Adapter Endpoint step, set the name to Upload to Box.com and select Box.com Solicit Response from the Adapter Endpoint drop-down list in the properties grid:
- In the Process Step Library, find the C# step and drag it onto the designer directly under the Adapter Endpoint step:

- Set the name of the C# process step to Get Download URL.
- Double-click on the C# step to open the code designer. The following code can be used to get the shared link download URL for the uploaded file:
var url = context.Data.GetProperty("box", "FileUrl", "");
context.Instance.TraceInformation("Download URL: " + url); - Click the Apply button in the code editor and navigate back to the Upload File process.
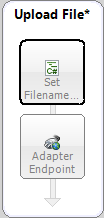
- This entire process should look like this:

- Apply the changes to the process by clicking the Apply button in the process designer toolbar:

Congrats! You are now ready to fully test the Business Process.
Testing the Box.com in Solicit/Response Mode
You can now test the above process using the Process Tester.
- Open the process tester by clicking the Test Process button in the process designer toolbar:

- The Edit Test Message dialog will appear. You do not need to enter or change the message body:
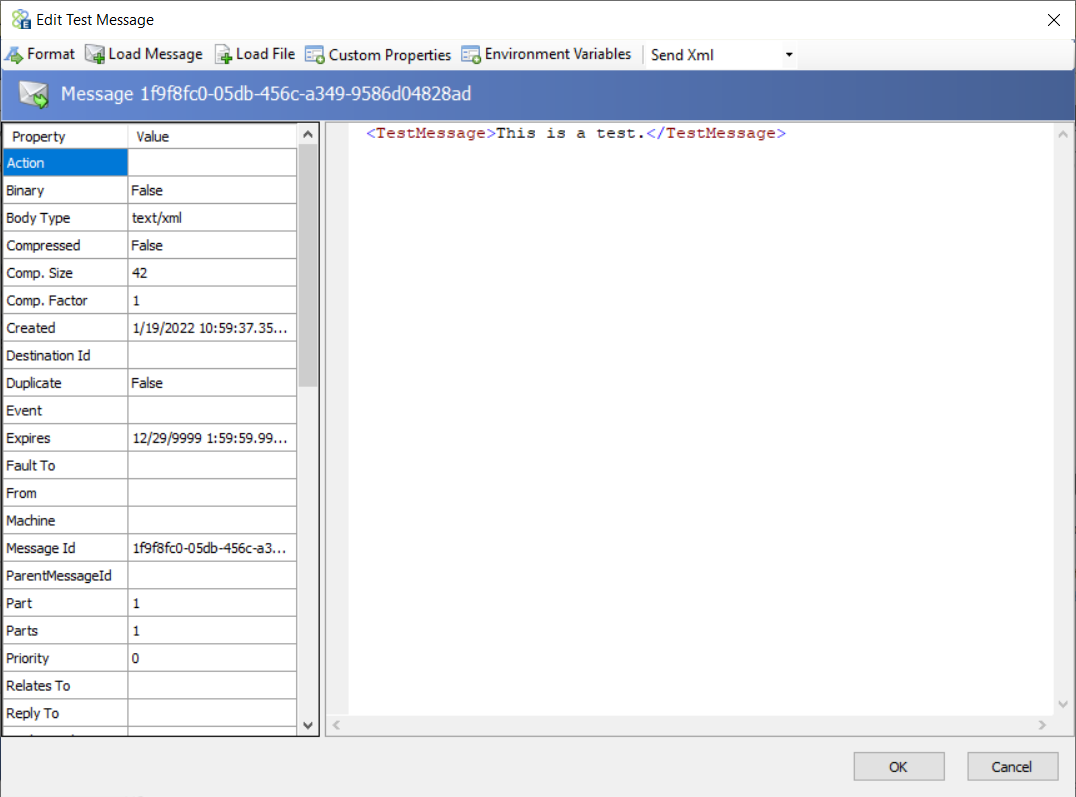
- Click the OK button, and you will see each step in the designer highlight as it is executed.
- Several entries will appear in the Output window at the bottom of the designer. Most of these are from the Box.com Adapter displaying its debug output. There will be two entries from the code steps in the process. The first one will appear at the beginning of the list. Drag the vertical scroll bar to the top of the output window:
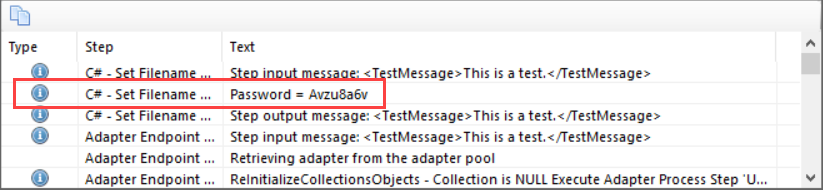
Here you will see the password that was generated for the download URL.
The last two lines in the output window at the bottom of the designer will contain the download URL and the file info response body: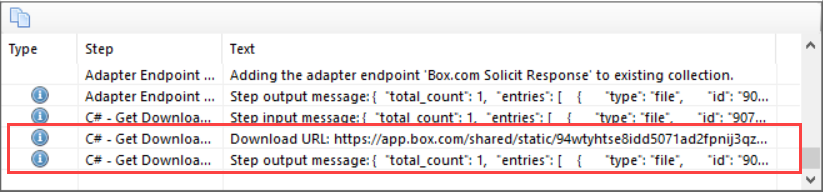
Double-click the last output entry to see the entire text.
You can copy the Download URL value and paste it into a browser to download the file. You will be prompted to enter a password, which you can also copy from the output entries.
Downloading Files from Box.com (Publish Mode)
This tutorial walks you through building an integration that will read files from a Box.com folder and saving those files to a local folder using the file adapter.
This tutorial requires:
- Verify the tutorial requirements above have been completed
- Complete the tutorial Creating a Box.com OAuth Provider
- Add the following items to the BoxTutorialESB configuration.
- Topic – File
- Add the subtopic – File.Inbound
- Publisher – BoxPublisher with subscriptions to File.Inbound (Send)
- Subscriber – FileSubscriber with a subscription to File.Inbound (Receive)
- Adapter Endpoint:
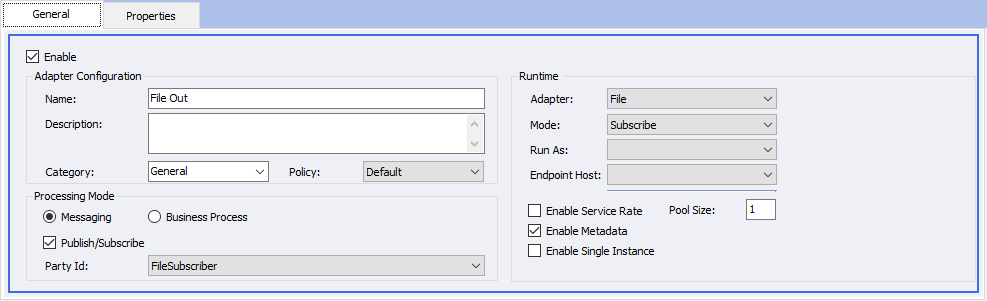
- Name – File Out
- Adapter – File
- Mode – Subscribe
- Processing Mode – Messaging
- Publish/Subscribe – Checked
- Party Id – FileSubscriber
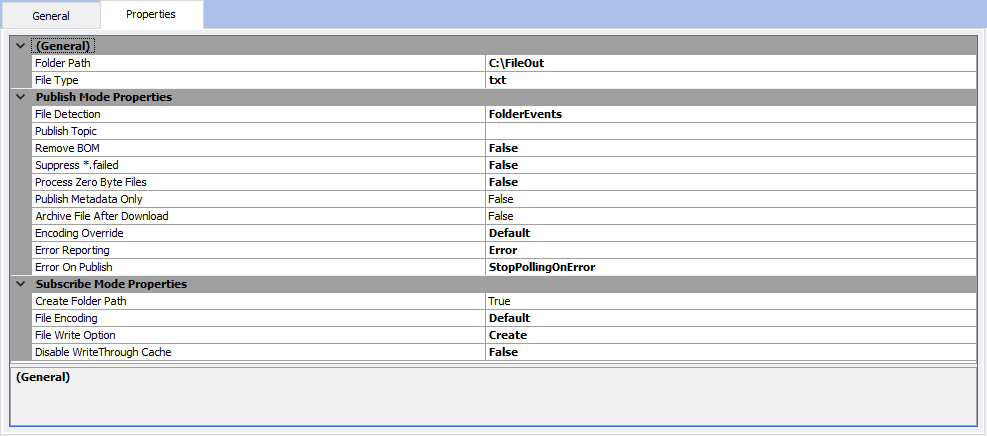
- Folder Path – C:\FileOut (or another folder that you choose)
- File Type – txt
Save the Neuron configuration after applying the above changes.
*Note – Typically when performing one-way messaging with any adapter you should use a topic with a durable transport, either MSMQ or RabbitMQ. For this tutorial you can use TCP or Named Pipe for the topic transport for ease of setup.
- Topic – File
Creating an Adapter Endpoint that Downloads Files from Box.com
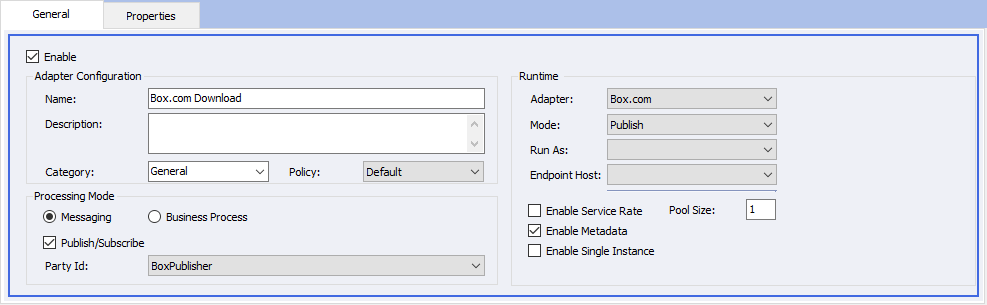
- Navigate to Connections->Adapter Endpoints and click New. Set the name of the adapter endpoint to Box.com Download, select Box.com from the Adapter drop-down list and select Publish from the Mode drop-down list. Select the Messaging radio button, check the Publish/Subscribe box and select BoxPublisher from the Party Id drop-down list:
- Click on the Properties tab. Select the Box JWT Provider from the OAuth Provider drop-down list and set the Publish Topic to File.Inbound. Click on the Publish Folder property, then the ellipsis button. A dialog with the folders accessible to the Box.com adapter is displayed:
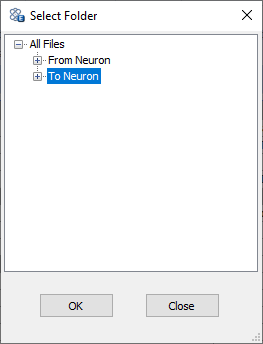
Select To Neuron and click OK:
Don’t forget to click the Apply button! - Save the Neuron ESB configuration.
At this point, you should have a Box.com adapter endpoint that publishes messages to the topic File.Inbound, and a file adapter endpoint subscribing to messages from that same topic.
To test downloading files from Box.com, all you need to do is copy a file into the To Neuron folder that you created in Box.com to read messages from. Once the file adapter has read the message from Box.com, it should appear in the local folder you configured for the file adapter named File In.
Directly calling the Box.com APIs
This tutorial walks you through building an integration that calls the Box.com APIs directly. You will learn how to use the Metadata Generation Wizard to browse the Box.com APIs and generate JSON examples for each call you want to make. The integration will utilize a Business Process that will query Box.com for the list of available files and download the oldest one.
This tutorial requires:
- Verify the tutorial requirements above have been completed
- Complete the tutorial Creating a Box.com OAuth Provider
- The File Out adapter endpoint created in the section Downloading Files from Box.com
Creating an Adapter Endpoint that Calls the Box.com API
- Navigate to Connections->Adapter Endpoints and click New. Set the name of the adapter endpoint to Box.com API, select Box.com from the Adapter drop-down list and select API from the Mode drop-down list. Select the Messaging radio button but uncheck the Publish/Subscribe box:
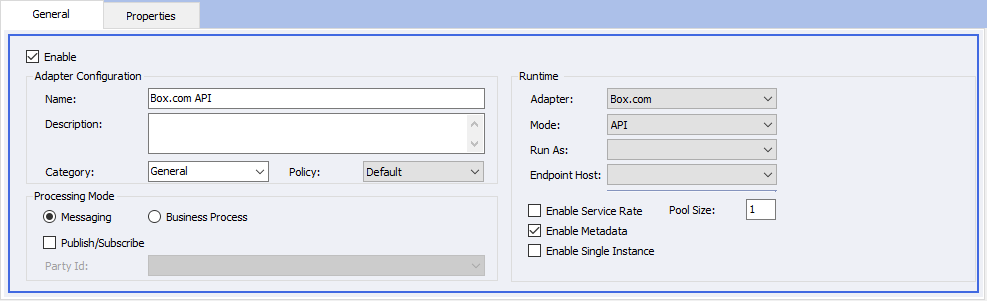
- Click on the Properties tab. Select the Box JWT Provider from the OAuth Provider drop-down list. Since this adapter endpoint will use the API mode you will not need to set any additional properties:
Don’t forget to click the Apply button and save your changes!
Using the Metadata Generation Wizard
The Metadata Generation Wizard is a tool that is used to generate sample messages and schema definitions for certain adapters and their operations. The Metadata Generation Wizard can be used to generate sample JSON request and response messages for the Box.com Adapter. This section requires that you’ve completed the previous section Creating an Adapter Endpoint that Calls the Box.com API.
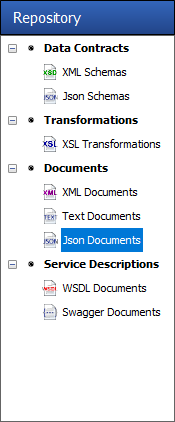
- First, in Neuron ESB Explorer navigate to Repository->Json Documents:
- Next, click the Generate button:

The Generate button can be accessed from any of the following menus:
- In the “Repository” tab in:
- XML Schemas
- XSL Transformations
- XML Documents
- Text Documents
- Json Documents
- Swagger Documents
- In the Connections tab in:
- Adapter Registration
- Adapter Endpoints
- On the Welcome Page, click Next:
- On the Connect to Data Source page choose an adapter and adapter endpoint. In this case, choose the Box.com and the Box.com API adapter endpoint created previously. Click Next:

- For the Box.com adapter, the Category represents all the APIs that are available in Box.com. For this tutorial, select a the Folders category and then select the Get items in folder operation by clicking the Add button:

- Repeat step 5 for the Files category and Download a file operation (don’t forget to click the Add button). Click Next:
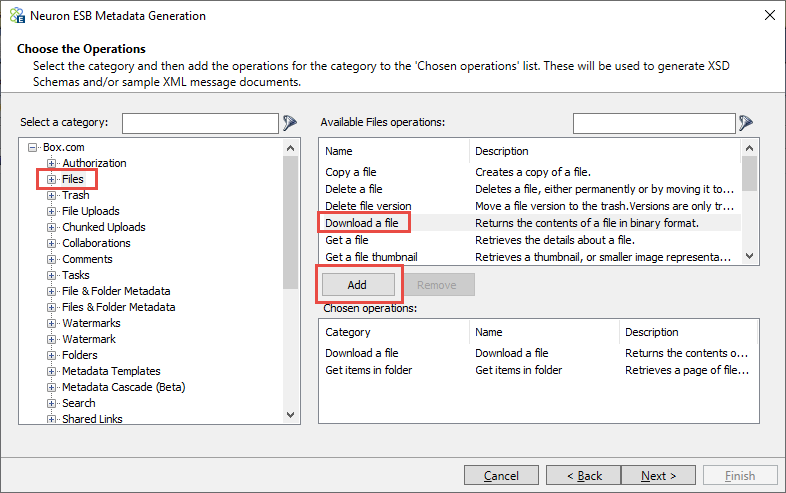
- Review the operations selected. Click Next:
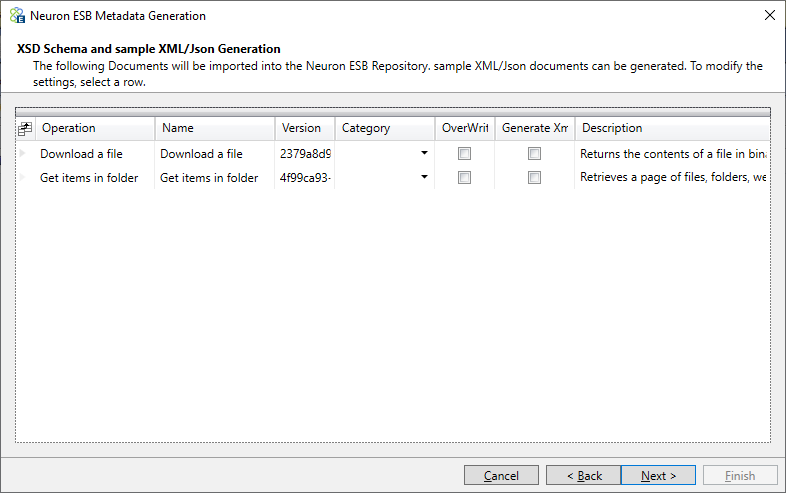
- Finally, click Finish to generate the documents:
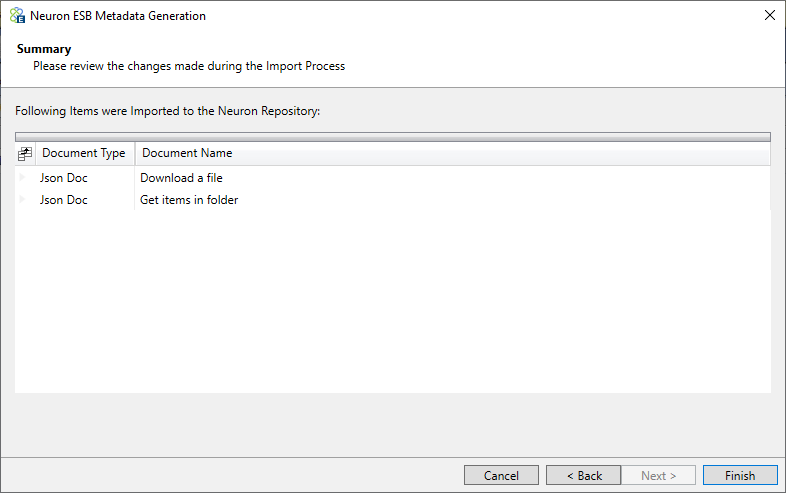
To see the sample message, navigate to the Json Documents Repository and select the document Get items in folder. For Json samples, the URL that would be called is set in the Source URL property: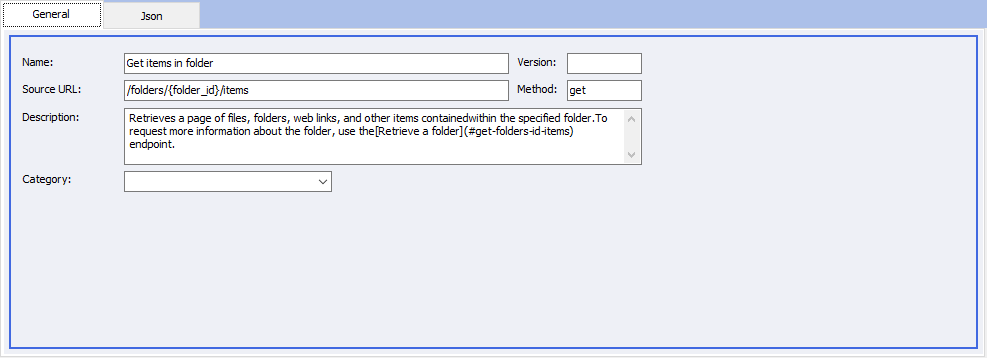
You can use these Json samples to guide your development when creating integrations to Box.com.
Create a Business Process that Calls Box.com APIs
This process will demonstrate calling out to Box.com to retrieve a list of files in a folder and then download the oldest file.
- Navigate to Processes in the Neuron ESB Explorer
- Click the New drop down and select Create Process
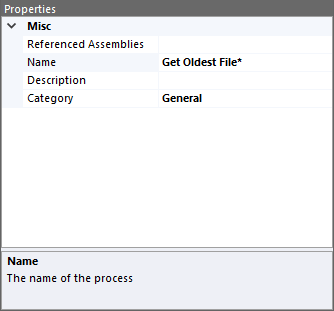
- Click on the UI element named New Process 1 and in the Property Grid on the right hand side of the Neuron ESB Explorer enter “Get Oldest File” in the Name text field.
- In the Search Steps text field of the Process Step Library enter “Http”
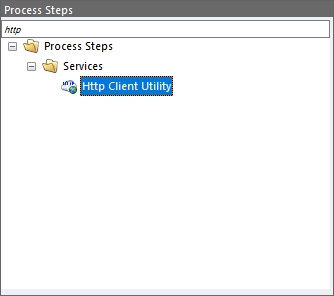
- Drag the Http Client Utility process step on to the design canvas and drop it in the middle of the UI element labeled “Get Oldest File”.
- Right-click on the UI element named “Http Client Utility” and select “Configure”. The Http Client Utility editor will open:
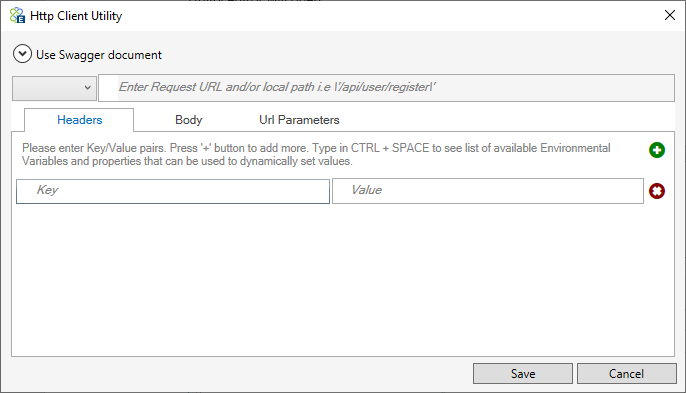
- The Box.com Folders API requires a folder ID, not a name, when retrieving the contents of a folder. Therefore, the first call to Box.com will be to retrieve a list of Folders in order to get the ID of the folder we want to retrieve a file from. The “root” folder in a Box.com account is called “All Files” and has the folder ID “0”. The first call to Box.com will be to get the items in the folder with ID of “0”.
Set the Method drop-down list to GET and the path to /folders/0/items. Click on the Body tab and check the box for “Clear ESB Message Body”: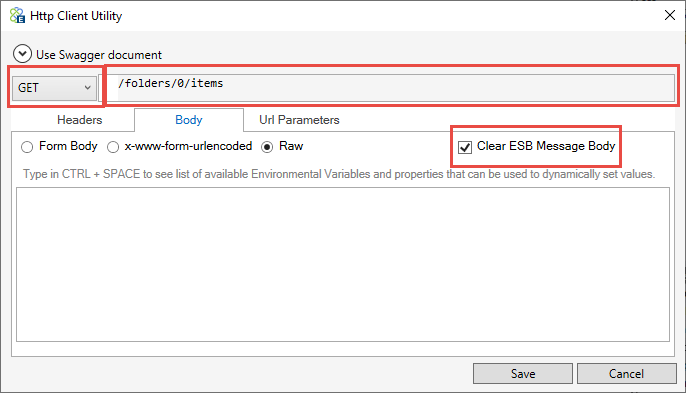
- Click the Save button to close the editor.
- In the Process Step Library, find the Adapter Endpoint step and drag it onto the designer directly under the Http Client Utility:
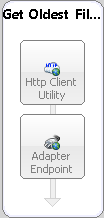
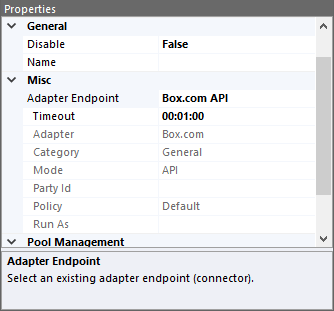
- Click on the Adapter Endpoint step and select Box.com API from the Adapter Endpoint drop-down list in the properties grid:
- Apply the changes to the process by clicking the Apply button in the process designer toolbar:

- If, at any point, you want to test the process, you can do so by clicking the Test Process button in the process designer toolbar:

The Edit Test Message dialog will appear. In this example you don’t need to change anything in the dialog, just click the OK button to start the test. If you want to see the results of the call to Box.com, add a Trace step after the Adapter Endpoint step. The last line in the Output window at the bottom of the designer will contain the response body: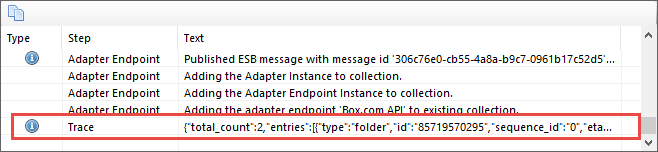
Double-click the Trace step output to see the text. Formatted, it’ll look similar to this:{In this call, there were three items in the All Files folder, the From Neuron folder, the Neuron API folder and the To Neuron folder. We want to look for the oldest file in the Neuron API folder, which in this instance has an ID of 85720314194.
"total_count": 3,
"entries": [
{
"type": "folder",
"id": "85719570295",
"sequence_id": "0",
"etag": "0",
"name": "From Neuron"
},
{
"type": "folder",
"id": "85848045376",
"sequence_id": "0",
"etag": "0",
"name": "Neuron API"
},
{
"type": "folder",
"id": "85720314194",
"sequence_id": "0",
"etag": "0",
"name": "To Neuron"
}
],
"offset": 0,
"limit": 100,
"order": [
{
"by": "type",
"direction": "ASC"
},
{
"by": "name",
"direction": "ASC"
}
]
} - Next, we will need to use a C# step to retrieve the folder ID from the response document. In the Process Step Library, find and drag a C# step to the designer right under the Adapter Endpoint step:
- Double-click on the C# step to open the code designer. The following code can be used to retrieve the Neuron API folder ID from the response JSON. Error handling has been added to check for the existence of the folder.
// Folder name to read from
string folderName = "Neuron API";

// Load the response into a JSON object
JObject folderItems = context.Data.ToJObject();

// Check to see if there are any entries
if ((int)folderItems["total_count"] > 0)
{
   // Get the entries array
   JArray entries = (JArray)folderItems["entries"];

   // Get the "To Neuron" folder entry
   var id = entries.Where(n => (string)n["name"] == folderName);

   // If the folder isn't there, throw an exception
   if (id.Count() == 0)
   throw new Exception(String.Format("The folder \"{0}\" was not found.", folderName));

   // Save the id as a context property
   context.Properties.Add("folderId", (string)id.First()["id"]);
}
else
{
   throw new Exception(String.Format("The folder \"{0}\" was not found.", folderName));
}
- The next step is to retrieve the list of items in the Neuron API folder. Drag another Http Client Utility to the designer, directly after the C# step:
- Double-click on the new Http Client Utility step to configure it. The Http Client Utility provides you a method for inserting dynamic data into the URL. If you place the cursor into the URL text box and press Ctrl-Space, you will see several macros that can be used. In our case we will use the {#context(<property>)} macro to insert the folder Id as part of the URL.
The Folders API will return all items in the folder, including subfolders and web links. The results are always sorted by type, with folders first, then files and then web links. Since we want to download the oldest file in the folder, we need to indicate what we the results sorted by date. We also want to sort by date so the file that has the oldest date is listed first. Finally, you will want the name of the file to use when it’s saved to the local folder. The API supports these requirements through query parameters:
sort=date
direction=ASC
fields=name,modified_at
When sorting by date, the API will return the items sorted by the date the file was last updated on the Box.com servers. We will set the direction to ASC, so the oldest file is listed first. The name and modified_at fields are requested to be returned as part of the results. The modified_at field is only requested for informational purposes.
In the Http Client Utility, set the Method drop-down list to GET and the path to /folders/{#context(folderId)}/items?sort=date&direction=ASC&fields=modified_at. Click on the Body tab and check the box for “Clear ESB Message Body”: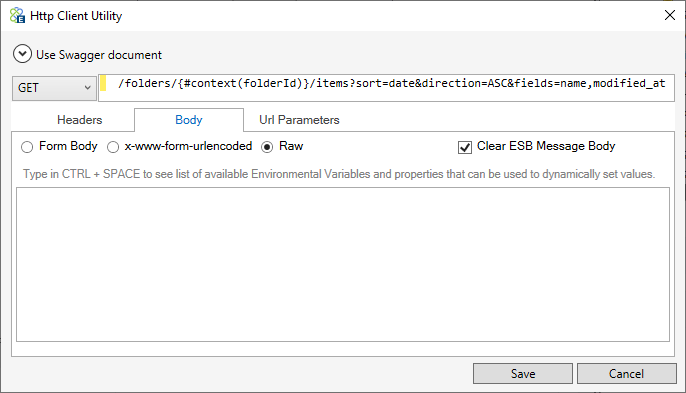
- Click the Save button to close the editor.
- Drag another Adapter Endpoint step and onto the designer directly under the second Http Client Utility. Click on the new Adapter Endpoint step and select Box.com API from the Adapter Endpoint drop-down list in the properties grid.
- If you’d like, test the process again to see what the response from the second call would look like. Make sure the Neuron API folder has a file in it first!
- The JSON returned from the second call will look something like this (assuming you have at least one file in the Neuron API folder):
{When we retrieve the file, we will use the file Id returned in the above results. In this case the oldest file would be 515520402604.
"total_count": 2,
"entries": [
{
"type": "file",
"id": "515520402604",
"etag": "0",
"name": "0000000001082832.txt",
"modified_at": "2019-08-29T02:55:29-07:00"
},
{
"type": "file",
"id": "515107149905",
"etag": "1",
"name": "0000000001082833.txt",
"modified_at": "2019-08-29T03:28:17-07:00"
}
],
"offset": 0,
"limit": 100,
"order": [
{
"by": "type",
"direction": "ASC"
},
{
"by": "date",
"direction": "ASC"
}
]
} - Since the folder items are returned sorted by date ascending, we don’t need to write code to find the oldest file. We just need to grab the oldest file. But we also need to check to see if *any* files are returned at all. Instead of using a C# step, drag a Decision step from the Process Step Library onto the designer, right after the second Adapter Endpoint step:
- You will use the Decision step to look at the results from the second Box.com API call and see if there are any files in the Neuron API folder, and to capture the file ID and file name. To set the condition in a Decision step, click on the “If” branch of the Decision step, and in the step Properties click the ellipsis button for the Condition property. This will open a code editor that will contain the condition for whether or not the “If” branch will execute. Use the following code that will check to see if there are any file entries in the folder, and if there are it will capture the Id and name of the first file in the sorted list:
// Load the response into a JSON object
JObject folderItems = context.Data.ToJObject();

// Check to see if there are any entries
if ((int)folderItems["total_count"] > 0)
{
   // Get the entries where type = "file"
   var entries = folderItems["entries"].Where(t => (string)t["type"] == "file").ToArray();

   // If there are any file entries...
   if (entries.Count() > 0)
   {
      // Save the first file's id and name as context properties
      context.Properties.Add("fileId", (string)entries[0]["id"]);
      context.Properties.Add("fileName", (string)entries[0]["name"]);

      return true;
   }
}

return false; - Add the following steps to the “If” branch of the Decision step:
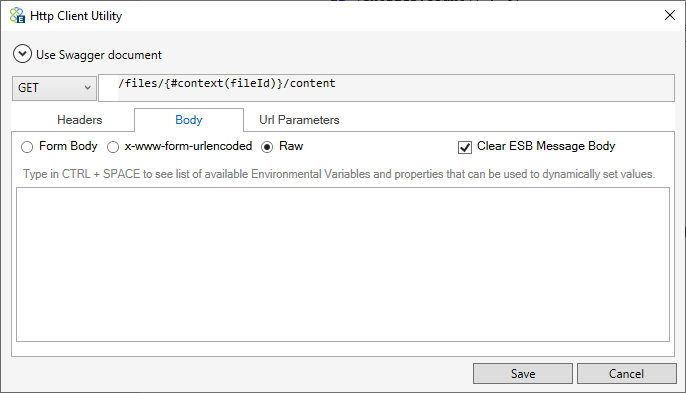
- Http Client Utility – This step will prepare the API call to download the file contents. Set the Method to GET and the path to /files/{#context(fileId)}/content. Click on the Body tab and check the box for “Clear ESB Message Body”:
- Adapter Endpoint – Select Box.com API from the Adapter Endpoint drop-down list in the properties grid.
- C# – This step will be used to set the filename the File adapter will use when writing the file to the file system. It gets the fileName property that was previous saved to the context.Properties in step 22. Enter this code in the C# step:
// Set the name of the file the file adapter will use when writing the file to the local folder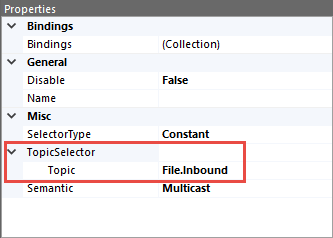
context.Data.SetProperty("file_out", "Filename", (string)context.Properties["fileName"]); - Publish – This step publishes the downloaded file to a topic. In the Publish step Properties grid, expand the TopicSelector topic and select File.Inbound from the drop-down list:
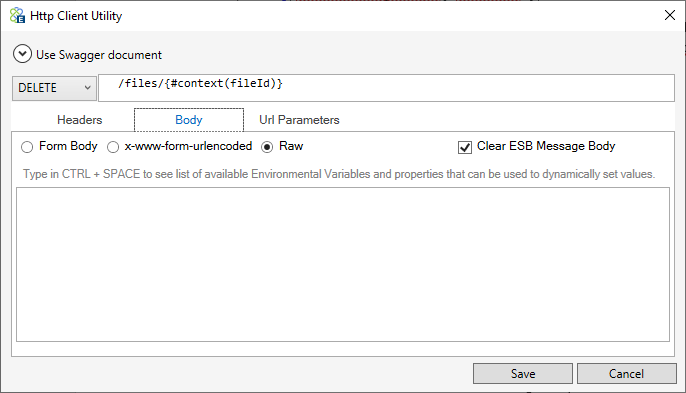
- Http Client Utility – This step will prepare the API call to delete the file from Box.com. Set the Method to DELETE and the path to /files/{#context(fileId)}. Click on the Body tab and check the box for “Clear ESB Message Body”:
- Adapter Endpoint – Select Box.com API from the Adapter Endpoint drop-dow
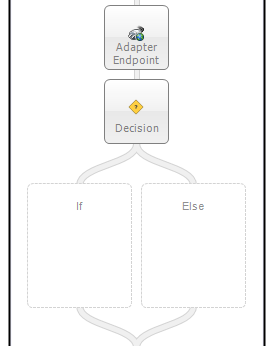
- The Decision step will now look like this:
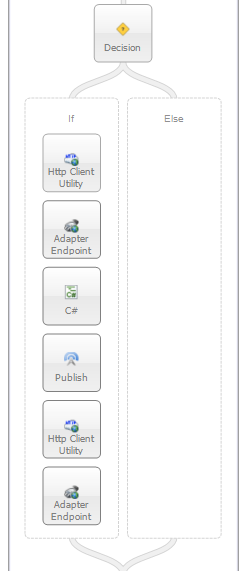
Notice that the “Else” branch is empty. That’s intentional – when there aren’t any files to download, the process doesn’t do any more work.
- Http Client Utility – This step will prepare the API call to download the file contents. Set the Method to GET and the path to /files/{#context(fileId)}/content. Click on the Body tab and check the box for “Clear ESB Message Body”:
- You’re just about done. The last step you need to add to the process is a Cancel step. Because this process publishes the downloaded message to a topic using the Publish step, you don’t need to publish anything else once the process ends. The Cancel step ends the process. If this process were attached to a Client Connector, the last message response from calling the Box.com API would be returned to the caller.
Congrats! You are now ready to fully test the Business Process. If you want to make sure you’ve built the process correctly, the entire process flow can be found in the appendix.
Testing the Box.com in API Mode
You can now test the above process using the Process Tester.
- Open the process tester by clicking the Test Process button in the process designer toolbar:

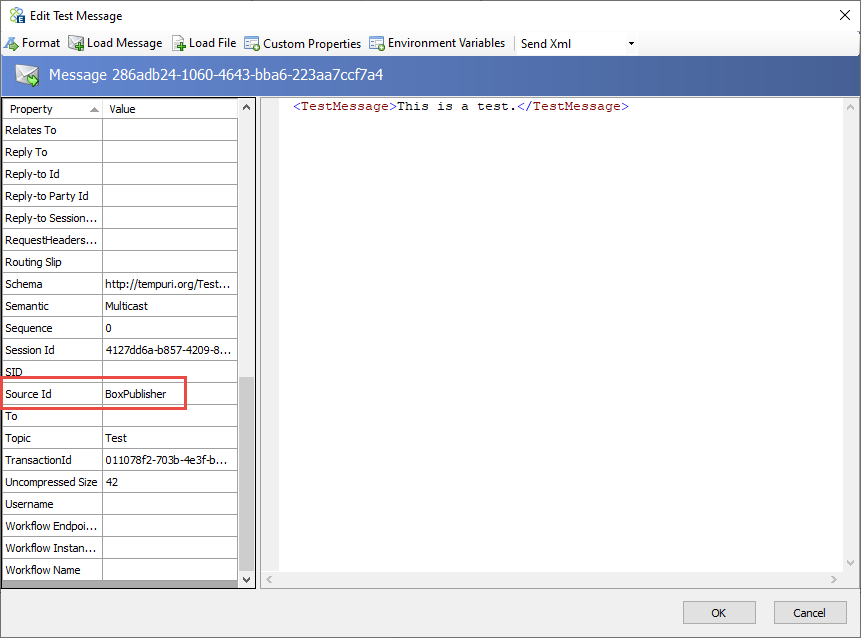
- The Edit Test Message dialog will appear. Because you are using a publish step in the process, you will need to set the Source Id property to BoxPublisher in the property list. You do not need to enter or change the message body:
- Click the OK button, and you will see each step in the designer highlight as it is executed.
- The output of the test will be displayed at the bottom of the designer:

Appendix
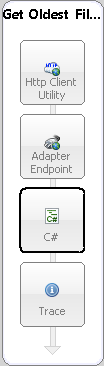
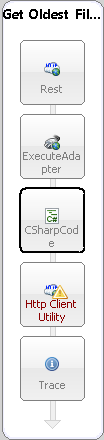
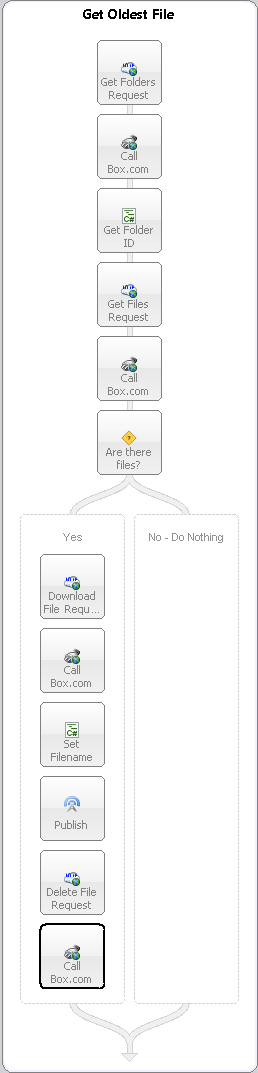
Get Oldest File Process
Process Code Blocks
Get Folder ID C# Step
// Folder name to read from
string folderName = "Neuron API";

// Load the response into a JSON object
JObject folderItems = context.Data.ToJObject();

// Check to see if there are any entries
if ((int)folderItems["total_count"] > 0)
{
   // Get the entries array
   JArray entries = (JArray)folderItems["entries"];

   // Get the "To Neuron" folder entry
   var id = entries.Where(n => (string)n["name"] == folderName);

   // If the folder isn't there, throw an exception
   if (id.Count() == 0)
      throw new Exception(String.Format("The folder \"{0}\" was not found.", folderName));

   // Save the id as a context property
   context.Properties.Add("folderId", (string)id.First()["id"]);
}
else
{
   throw new Exception(String.Format("The folder \"{0}\" was not found.", folderName));
}
Are There Files Decision Step
// Load the response into a JSON object
JObject folderItems = context.Data.ToJObject();

// Check to see if there are any entries
if ((int)folderItems["total_count"] > 0)
{
   // Get the entries where type = "file"
   var entries = folderItems["entries"].Where(t => (string)t["type"] == "file").ToArray();

   // If there are any file entries...
   if (entries.Count() > 0)
   {
      // Save the first file's id and name as context properties
      context.Properties.Add("fileId", (string)entries[0]["id"]);
      context.Properties.Add("fileName", (string)entries[0]["name"]);

      return true;
   }
}

return false;
Set Filename C# Step
// Set the name of the file the file adapter will use when writing the file to the local folder
context.Data.SetProperty("file_out", "Filename", (string)context.Properties["fileName"]);