Finding the data field that you want to map
In a relatively simple integration, mapping data fields is easy and intuitive. In more complex integrations or in integrations that handle large sets of data fields, mapping from source to target is easier when you have some background about how to use the Data Mapper.
The Data Mapper displays two columns of data fields:
- Source is a list of the data fields that you can map to target fields.
- Target is a list of the data fields that you can map source fields to.
To quickly find the data field that you want to map, you can do any of the following:
- Search for it – The Source panel and the Target panel each have a search field at the top. Enter the name of the field you want to map.
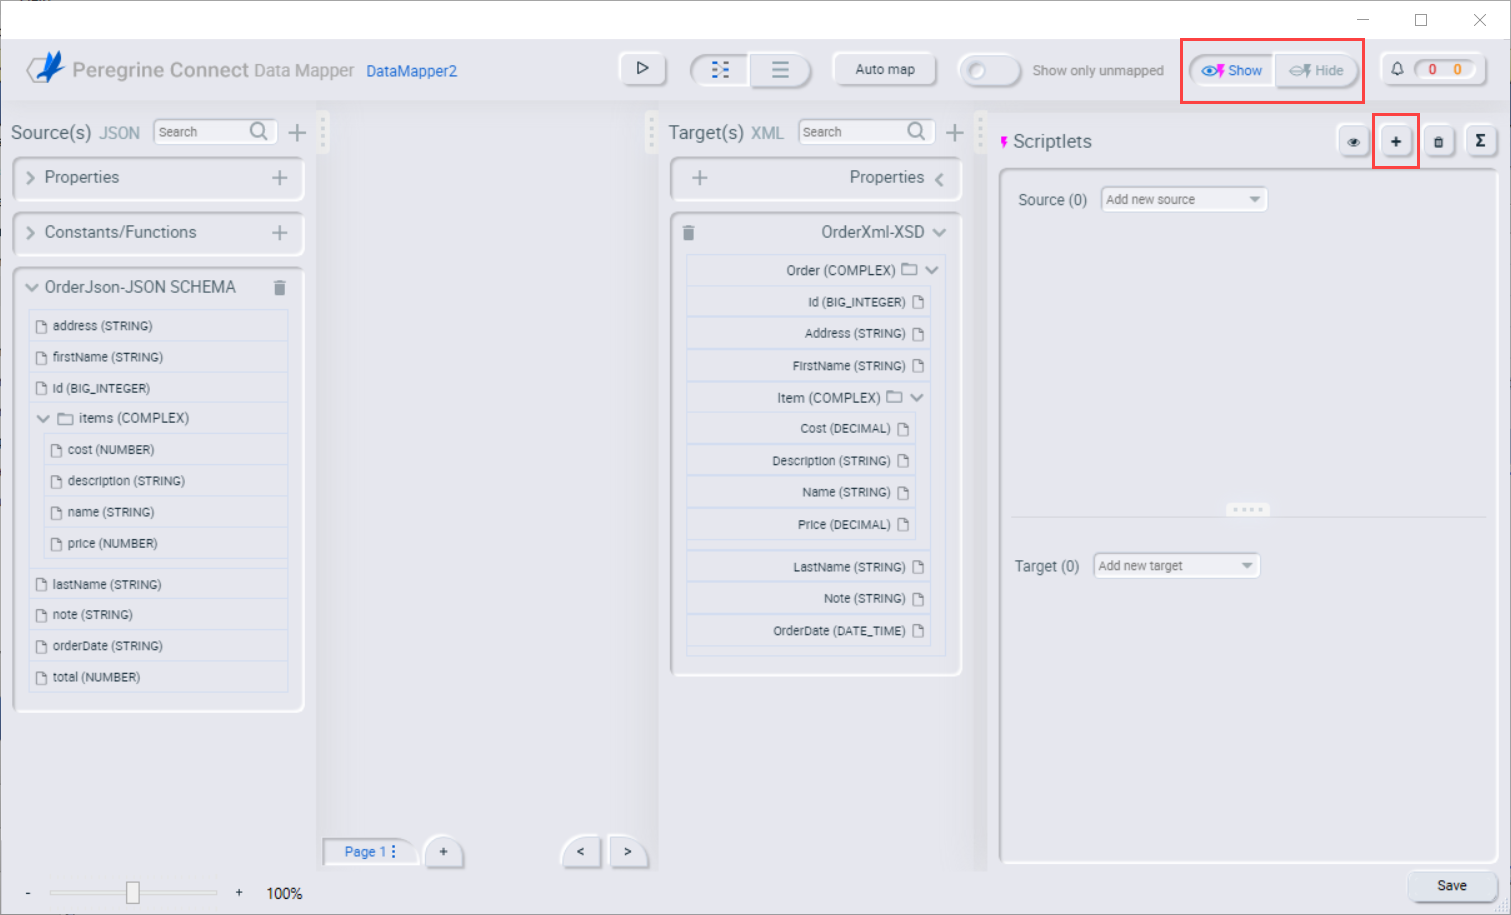
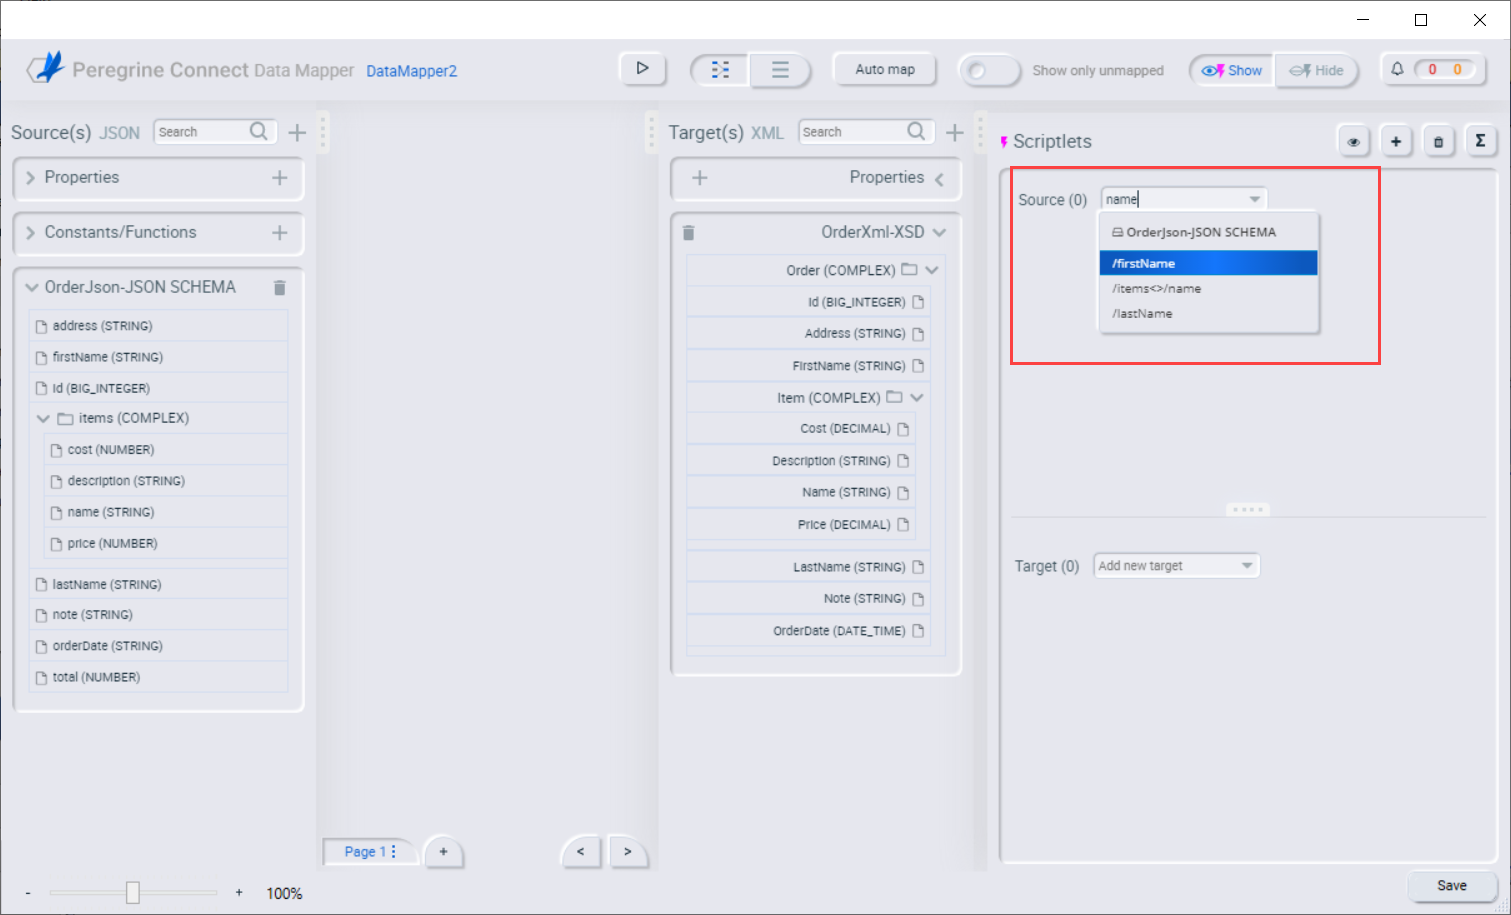
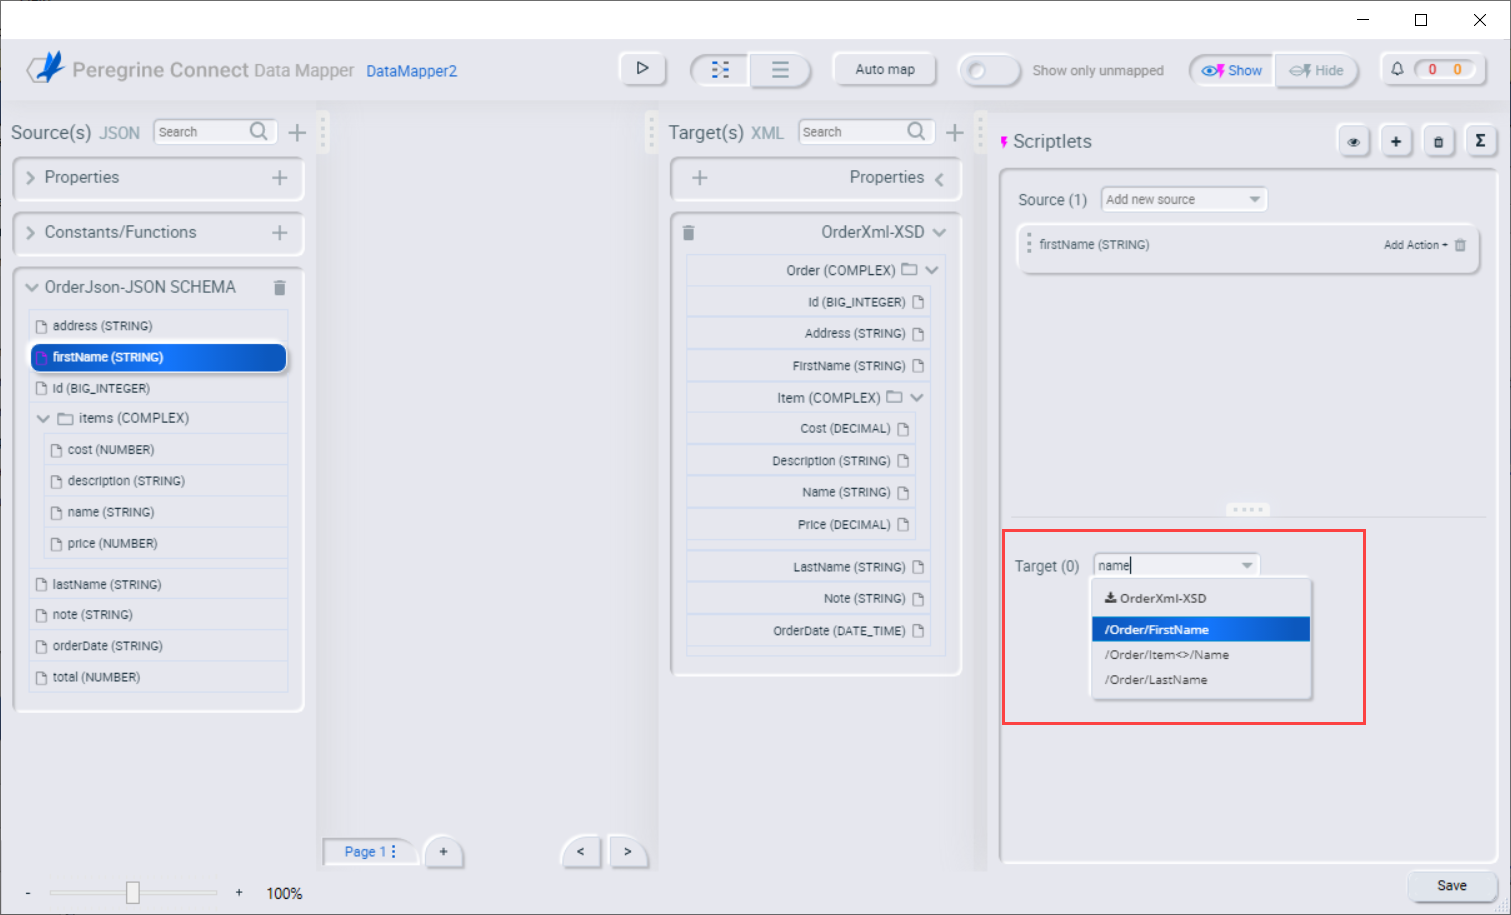
- Enter the names of the fields that you want to map in the Scriptlets panel:
- Click on Show | Hide button to show or hide the Scriptlets Panel
- Click
 in the toolbar to add a new empty mapping.
- In the Source section, enter the name of the source field and select the appropriate value:
- In the Target section, enter the name of the target field and select the appropriate value:
- Collapse folders to limit the visible fields – the Data Mapper allows you to expand and collapse collections of data to change the number of visible fields. Once the appropriate field is visible, you can create a mapping by dragging the field from source and dropping it on the target field.