Introduction
The Neuron ESB AlphaTrust Connector (Adapter) provides access to the AlphaTrust eSignature API. Using this adapter, organizations can easily integrate their applications such as Salesforce, NetSuite, Box or Dropbox with the AlphaTrust eSignature system. This adapter operates in both subscribe as well as solicit/response (or query) mode. When developing applications that utilize this adapter, developers will be able to use the Adapter Metadata Generation Wizard to provide JSON or XML samples that describe the request and/or response documents that are exchanged with AlphaTrust.
Before reading this document
If you are not familiar with Neuron ESB Adapters, take a moment to consult our online help: https://www.peregrineconnect.com/documentation/doc-development-external-systems. This document assumes you have the following knowledge:
- What adapters are and how they are leveraged in Neuron ESB
- Create an Adapter Endpoint in a Neuron ESB Solution
- Set Neuron ESB Adapter Endpoint Properties
- Invoke a Neuron ESB Adapter Endpoint
This adapter exposes the functionality provided by the AlphaTrust e-Sign API. All requests and replies are identical to those described in the AlphaTrust e-Sign documentation. If you are not familiar with the Web API, review the online help:
https://developers.alphatrust.com/documentation/web-services/overview.html
Supported Modes
The AlphaTrust Adapter supports two modes:
- Subscribe: Used to send calls to AlphaTrust without receiving a response back.
- Solicit Response: Used to send request-reply calls to AlphaTrust and will return a response. This mode can be used to call any operation exposed by the Web API.
AlphaTrust Adapter Properties
Every Neuron ESB Adapter has design time properties that can be configured within a standard Microsoft property grid (as shown below). These properties are used to determine the behavior of the adapter at runtime.
Connection Properties
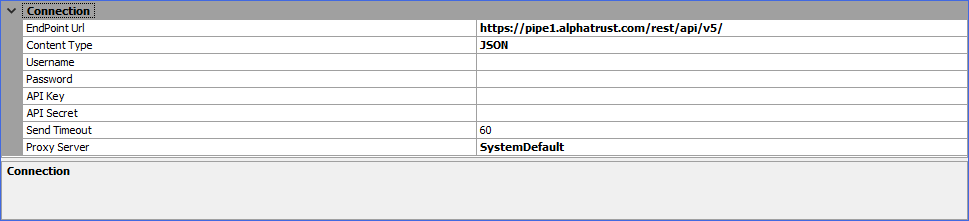
The group of Connection properties is used to configure the AlphaTrust Endpoint URL, along with the security credentials used when sending requests to AlphaTrust.
Endpoint URL
The URL for the AlphaTrust server to connect to. The endpoint URL is made up of two parts – the URL of your AlphaTrust instance + “/rest/api/v5”. For example:
https://prod.alphatrust.com/rest/api/v5
When making calls to AlphaTrust, you will programmatically provide the remainder of the URL, referred to as the local path and query parameters. In this tutorial you will retrieve a list of departments. To do that you will set the local path to “table/cmn_department”.
The URLs used by the adapter are the same URLs that would be used for calling the AlphaTrust REST API directly. You can find more information regarding the AlphaTrust REST API and the URL formats in the AlphaTrust REST API Swagger documentation. The Swagger docs are usually exposed from your AlphaTrust server using the following URL format:
The AlphaTrust adapter supports both JSON and XML content types. You can choose which one to use in the adapter endpoint property grid. Depending on which value your set, the correct HTTP Content-Type and Accept headers are set with the request message sent to AlphaTrust.
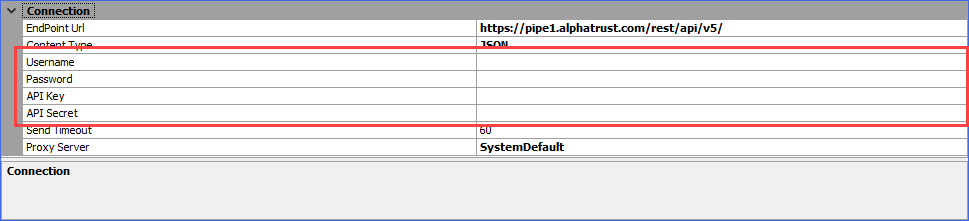
Security Credentials
The AlphaTrust adapter utilizes a combination of username/password and API key/secret credentials for authentication. Prior to using the AlphaTrust adapter you will need to obtain these credentials from your AlphaTrust administrator.
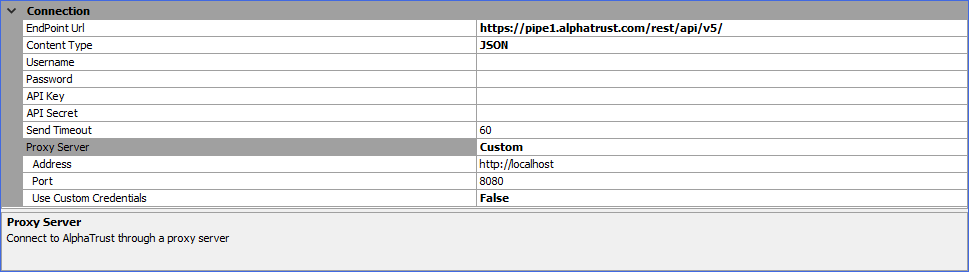
Proxy Server
Allows you connect to AlphaTrust via a proxy server. By default this value is set to System Default. Changing the value to Custom will expose additional properties:
- Address – The URL address to the proxy server
- Port – The port for the proxy server address
- Use Custom Credentials – By default this is set to false and will use the credentials that the Neuron ESB instance is running under. Changing this value to True will allow you to select a stored credential from Neuron ESB.
Send Timeout
The period of time, in seconds, after which a call to AlphaTrust will time-out.
Using the AlphaTrust Adapter
When making calls to AlphaTrust using the adapter, creating the request messages can be done in many different ways. You can use a C# or C# Class step in a process or workflow. You can also use the JSON step to transform XML into JSON (or JSON into XML) that AlphaTrust will accept. This document focuses on creating the requests with a C# step in a process.
Security
As noted previously, the adapter supports using a combination of Username/Password and API Key/Secret credentials when calling the AlphaTrust Endpoint URL. The adapter handles all the security requirements at runtime. When you’re constructing a request message to send to AlphaTrust you do not need to worry about setting credentials.
Walk-through: Creating an Adapter Endpoint
This walkthrough has the following requirements:
- An AlphaTrust account. Contact your AlphaTrust administrator for a username/password and API key/secret.
- The AlphaTrust REST API base URL. The full URL will be similar to https://dev.alphatrust.com/rest/api/v5/.
- Neuron ESB 3.7, build 630 or later installed
- A new Neuron Configuration with the following items already created:
- 1 Topic – Employee
- 1 Subscriber – AlphaTrust Subscriber, with a subscription to the Employee topic with Receive permissions
- 1 Publisher –Employee Publisher, with a subscription to the Employee topic with Send permissions
- The Neuron ESB runtime is configured and started with the above solution
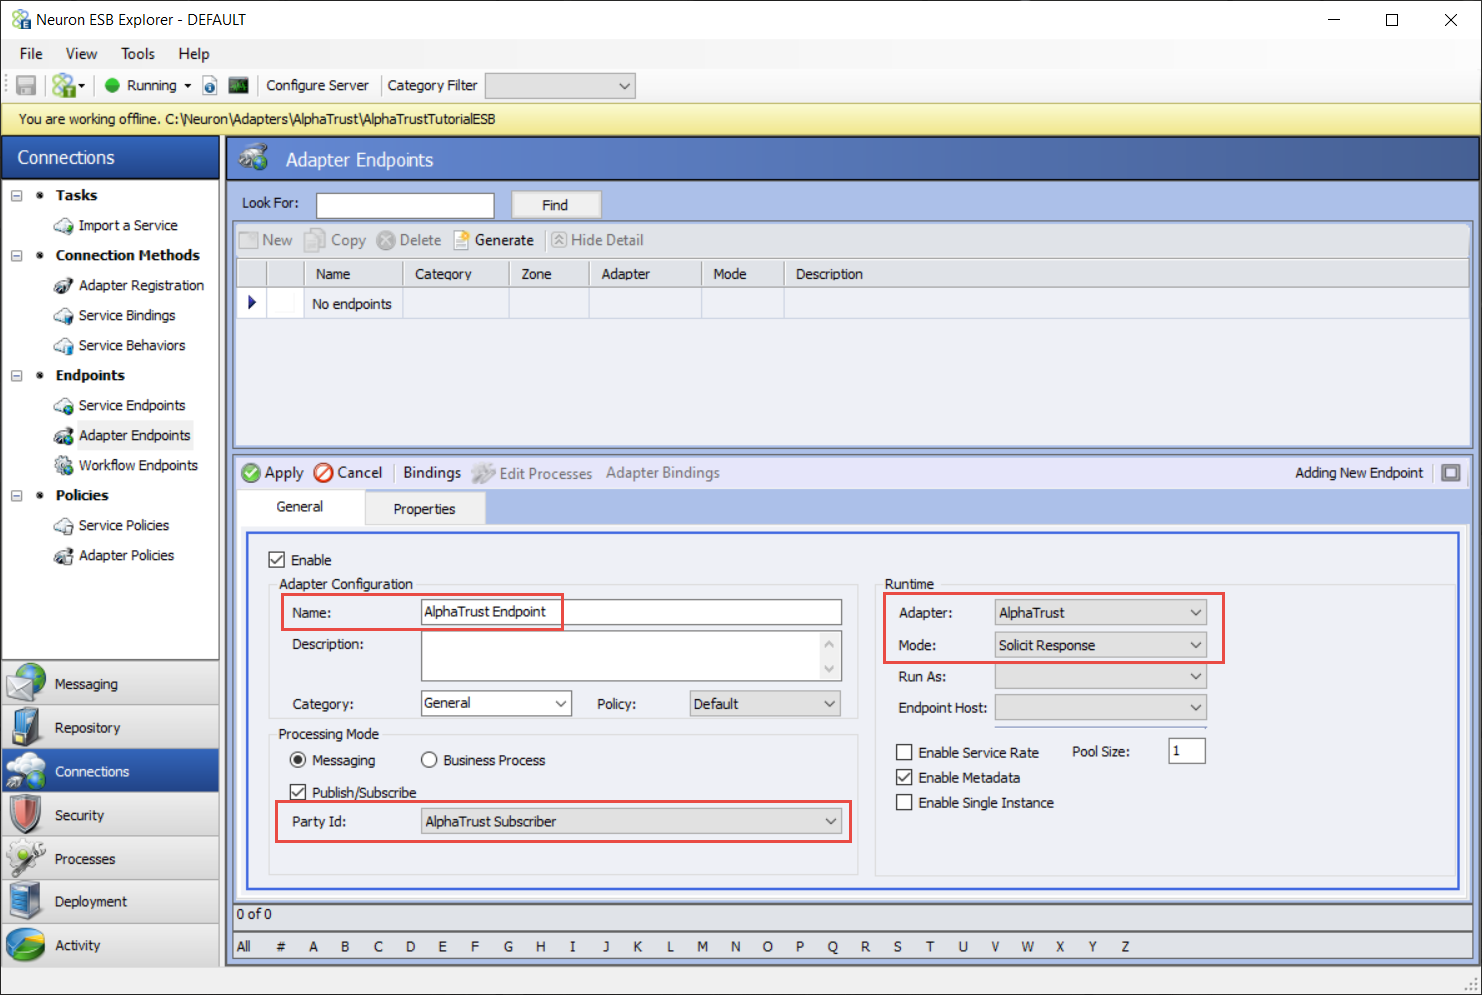
- Navigate to Connections->Adapter Endpoints and click New. Set the name of the adapter endpoint to AlphaTrust Endpoint, select AlphaTrust from the Adapter drop-down list, select Solicit Response from the Mode drop-down list and select AlphaTrust Subscriber from the Party ID drop-down list:
- Click on the Properties tab. Enter the AlphaTrust Endpoint URL for the AlphaTrust server to connect to. Select JSON as the Content Type and enter in the Username, Password, API key and API Secret for your AlphaTrust connection. Click Apply:
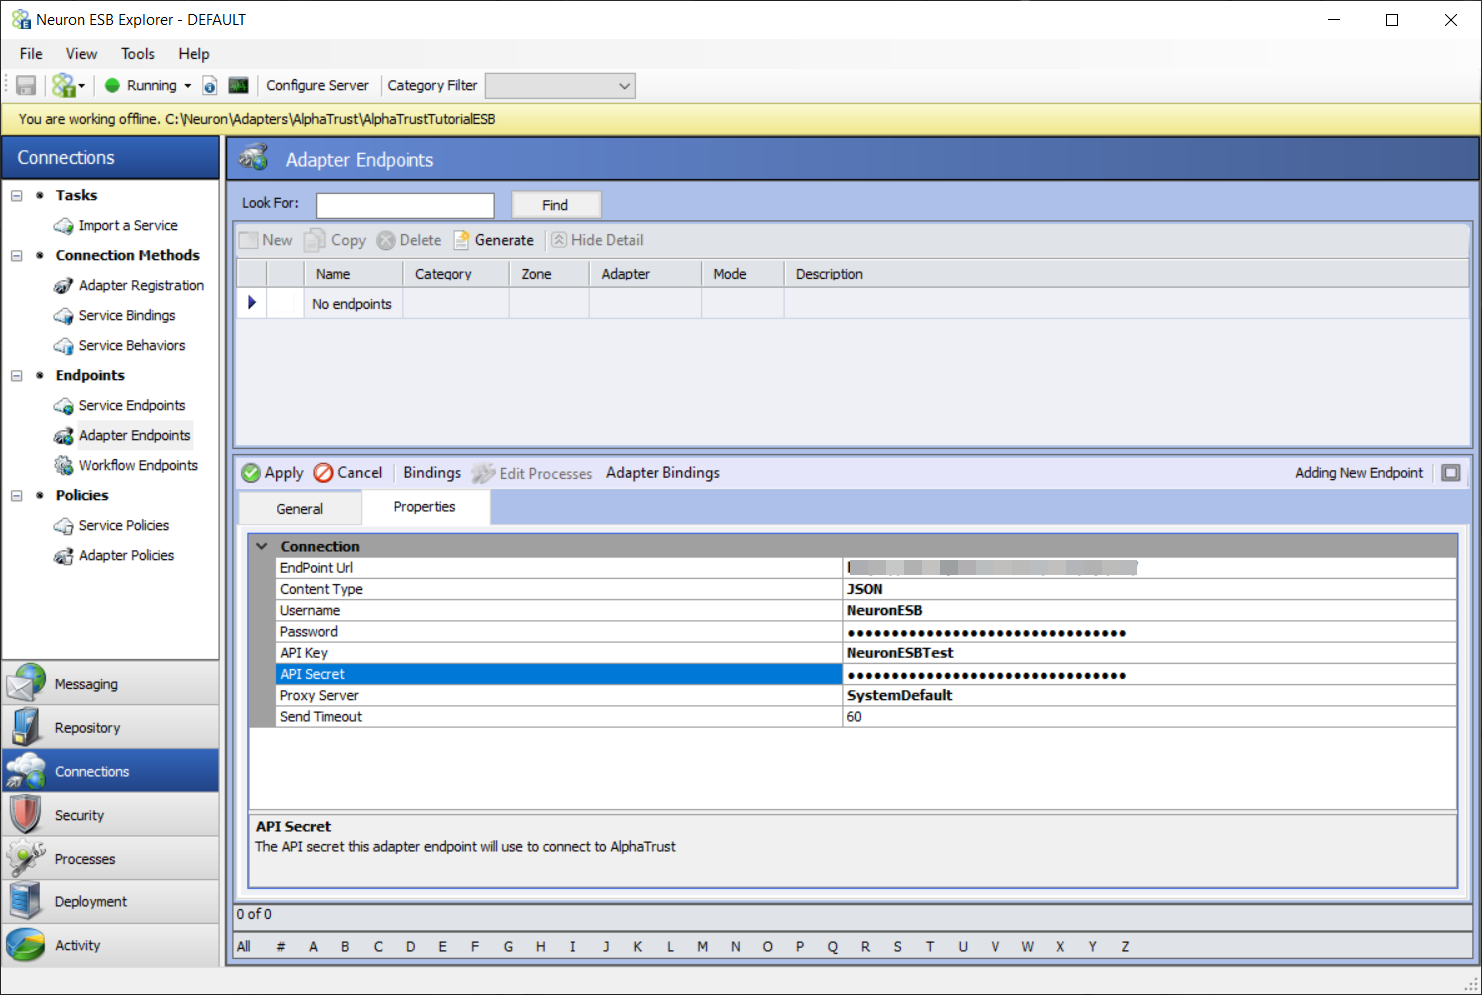
In the next walk-through, you will use this adapter endpoint in the Metadata Generation Wizard to create JSON schemas and sample JSON messages.
Request and Response Message Formats
The AlphaTrust adapter supports both JSON and XML content for request and response messages. This option is set as a property in the adapter endpoint. The request and response message formats depend on the service operation being called. You can retrieve request and response schemas and samples, using the Metadata Generation Wizard described below.
Dynamic Message Properties
The AlphaTrust adapter supports the same message properties as a REST-based Service Connector.
These properties are used to dynamically set values for request messages sent to AlphaTrust:
- LocalPath – Used to provide the path to the resource (appended to the URL set in the adapter endpoint property grid)
- Http.Method – The Http Method to call, i.e. GET, POST, etc
- Http.Query – Used when adding a query string to the URL being called
- Http.Headers – Sets the request headers sent to AlphaTrust with the request (note – Content-Type and Accept headers are set automatically by the adapter and will be overwritten if set dynamically)
These properties are applied to responses from AlphaTrust when using the adapter in Solicit Response mode:
- Http.Headers – Contains the Http headers returned with the response message
- Http.StatusCode – Response status code
- Http.StatusDescription – Response status description
Walk-through: Using the Metadata Generation Wizard
The Metadata Generation Wizard is a tool that is used to generate sample messages and schema definitions for certain adapters and their operations. The Metadata Generation Wizard can be used to generate schemas and sample request and response messages for the AlphaTrust Adapter, in either XML or JSON format. The following guide assumes you have already completed the first walk-though – Creating an Adapter Endpoint.
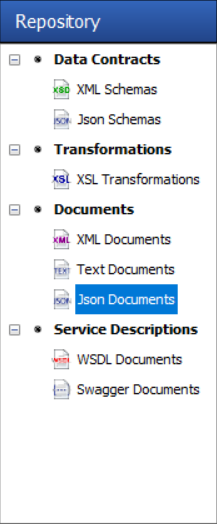
- First, in Neuron ESB Explorer navigate to Repository->JSON Documents:
- Next, click the Generate button:

The Generate button can be accessed from any of the following menus:
In the “Repository” tab in:
XML Schemas
XML Documents
JSON Schemas
Json Documents
In the Connections tab in:
Adapter Registration
Adapter Endpoints
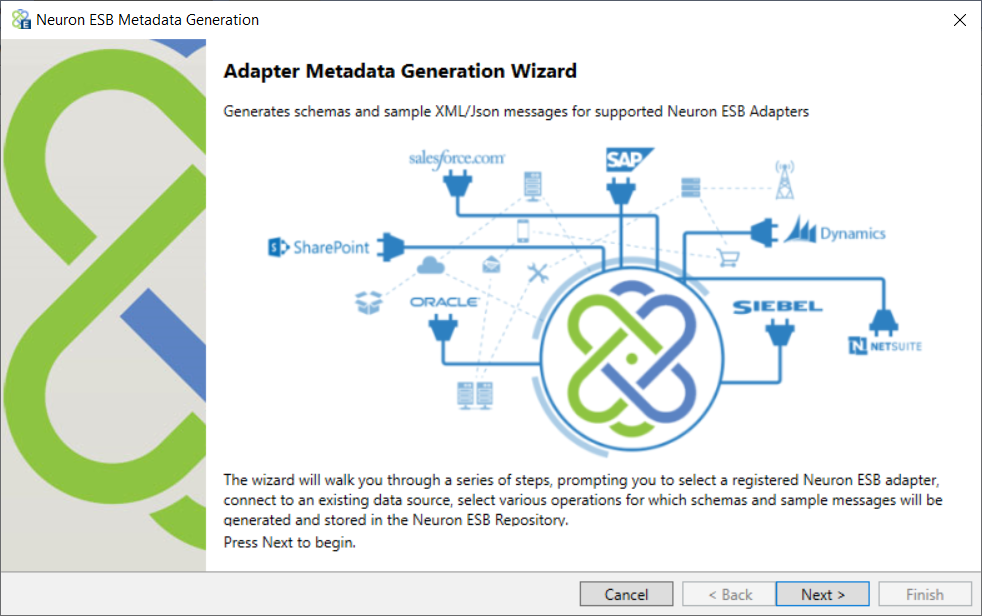
- On the Welcome Page, click Next:
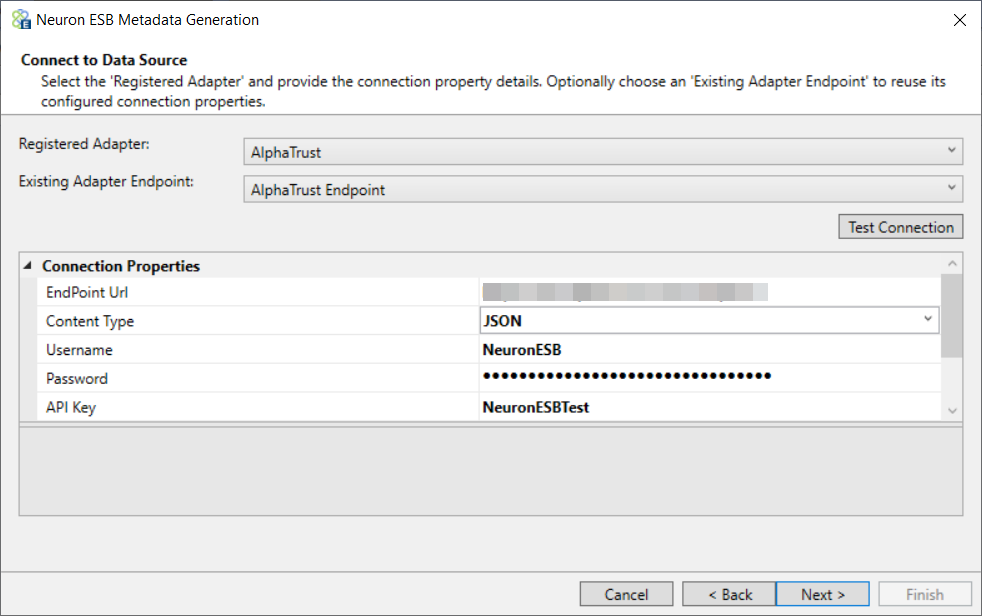
- On the Connect to Data Source page choose an adapter and adapter endpoint. In this case, choose AlphaTrust and the adapter endpoint created in the first walk-through. Click Next:
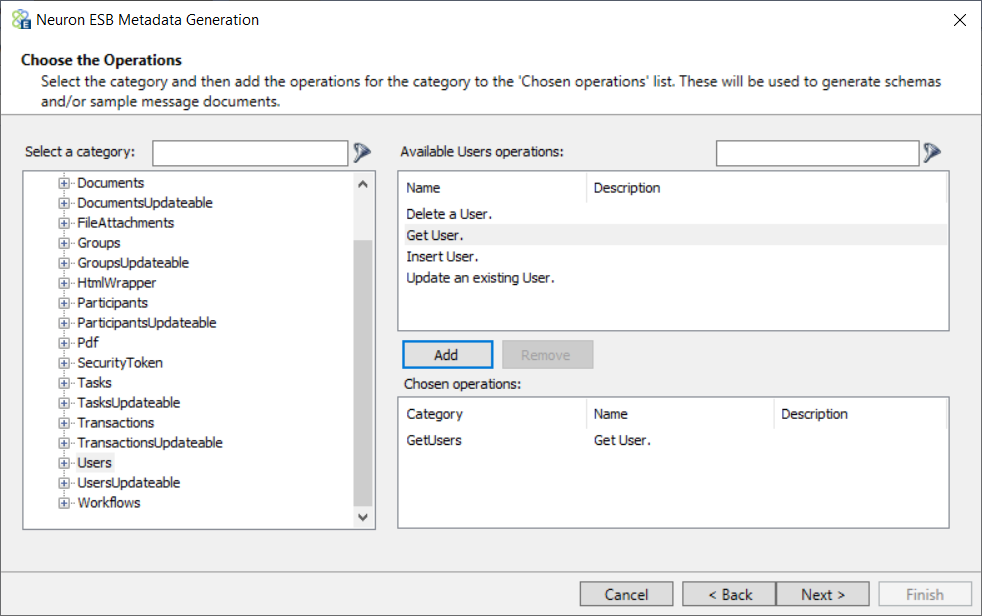
- For the AlphaTrust adapter, the Category represents all the resources that are available at the Endpoint URL that was set in the adapter endpoint. Select a resource (i.e. Users) and then select the Operation (i.e Get User.) you want to perform and add them to the list of Chosen Operations by clicking the Add button. More than one operation can be added by choosing each operation and adding it to the list. Click Next:
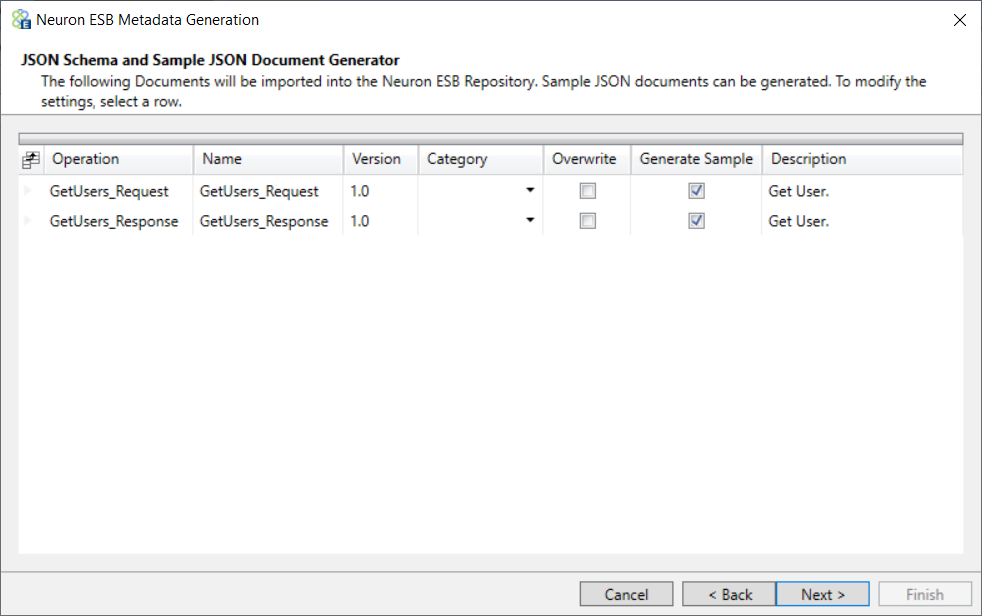
- Choose whether or not to overwrite the JSON schemas, if they have already been added, by clicking on the appropriate boxes. You can also choose whether or not to generate JSON samples for each schema. Click Next:
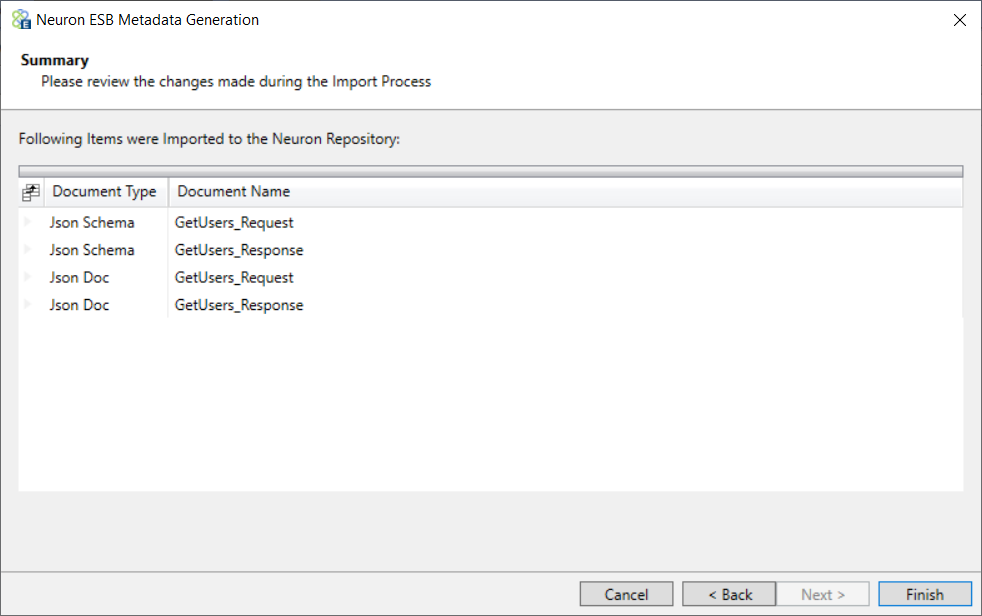
- Finally, click Finish to generate the documents:
To see the sample request and response messages, navigate to the JSON Documents Repository and select a document. This is an example of a JSON document:
{
  "prontoIDs": [
  "sample"
  ],
  "iDs": [
    1
  ],
  "usernames": [
    "sample"
  ],
  "emailAddresses": [
    "sample"
  ],
  "isLockedOut": false,
  "isExpired": false,
  "signingAuthorityType": "sample",
  "controlPanelAuthorityType": "sample",
  "enableLogging": false,
  "resultsCountLimit": 1,
  "resultsCountStart": 1
}
The above steps generated JSON schemas and sample because the adapter endpoint was configured to use the JSON content type. If you want to generate XML schemas and samples, modify the adapter endpoint and set the Content Type property to XML and repeat the above steps.
Walk-through: Testing the AlphaTrust Adapter
This walk-through will show you how to test the AlphaTrust Adapter at runtime. This assumes you completed the previous walk-throughs and the Neuron ESB Service is configured to host the Neuron configuration you’ve been working on.
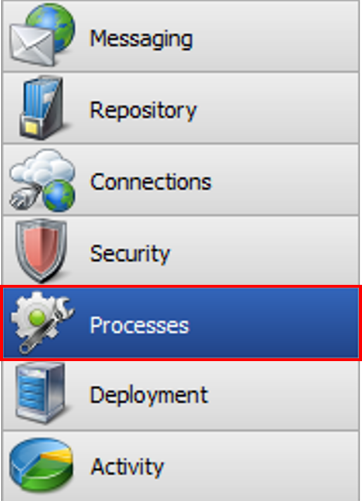
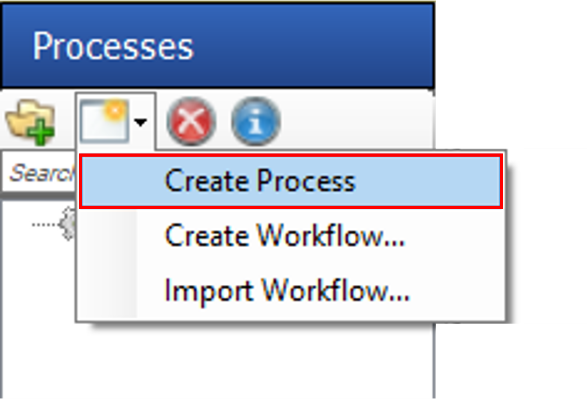
- Navigate to Processes in the Neuron ESB Explorer
- Click the New drop down and select Create Process
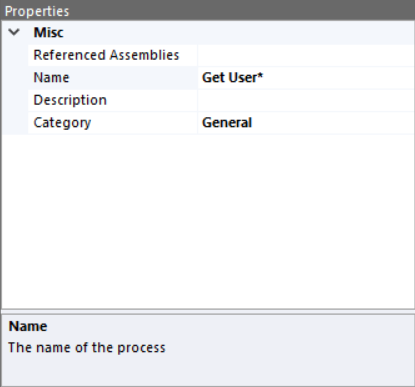
- Click on the UI element named New Process 1 and in the Property Grid on the right hand side of the Neuron ESB Explorer enter “Get User” in the Name text field.
- In the Search Steps text field of the Process Step Library enter “Http”
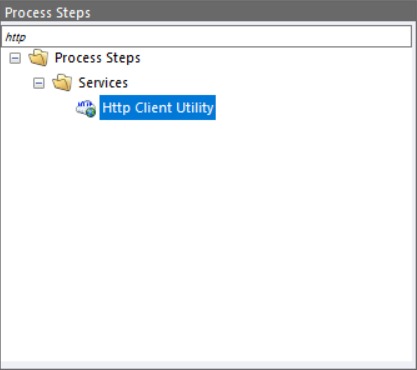
- Drag an Http Client Utility process step on to the design canvas and drop it in the middle of the UI element labeled “Get User”.
- Right-click on the UI element named “Http Client Utility” and select “Configure”. The Http Client Utility editor will open:
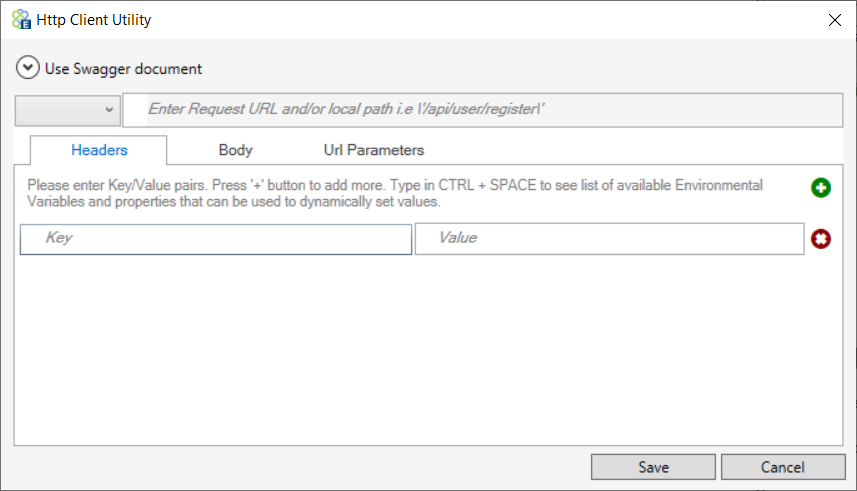
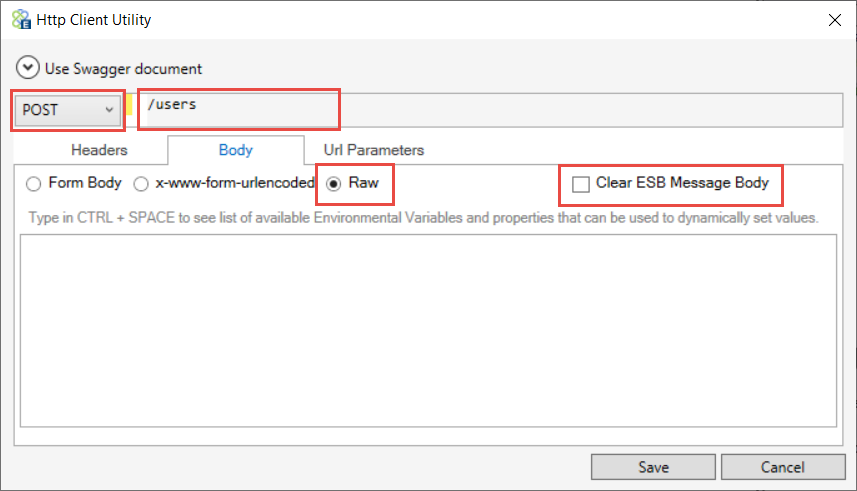
- Set the Method drop-down list to POST and the path to /users. Click on the Body tab, select the “Raw” radio button and ensure the box for “Clear ESB Message Body” is NOT checked:
- Click the Save button to close the editor.
- Click the Apply button to save the “Get User” business process.
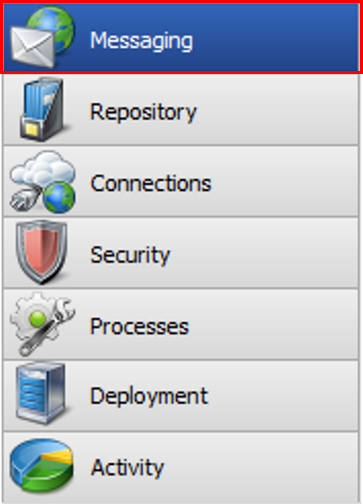
- Navigate to Messaging
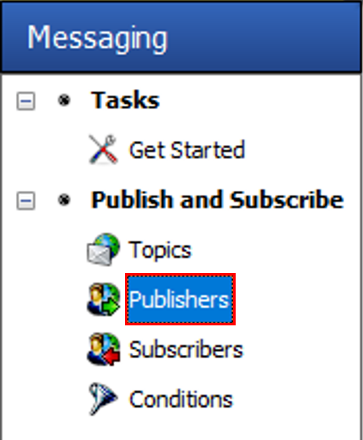
- Click on Publishers
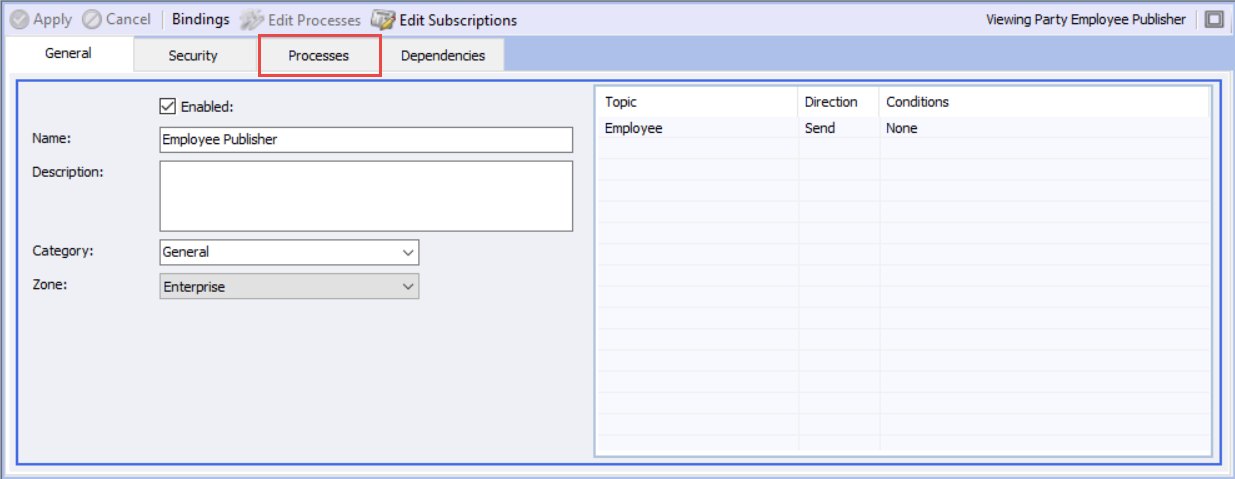
- Click on the Employee Publisher
- In the Publisher Property Grid that opens at the bottom of the Neuron ESB Explorer, click on the Processes tab.
- Click Edit Processes to launch the Processes dialog window.

- Select the “Get User” process and move it to the Selected Processes using the right arrows.
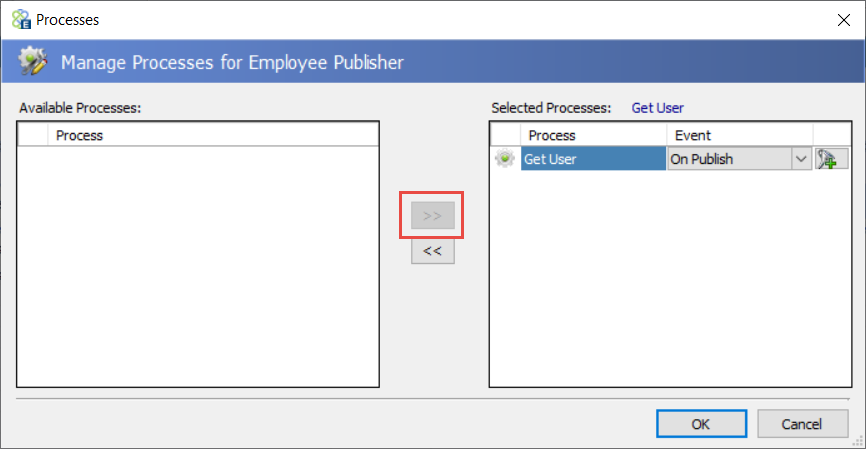
- Click OK
- Apply your changes to the Employee Publisher
- Save the Neuron ESB Configuration.
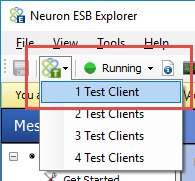
- Open a Neuron Test Client by clicking on the Test Client icon in the Neuron ESB Toolbar and select 1 Test Client:
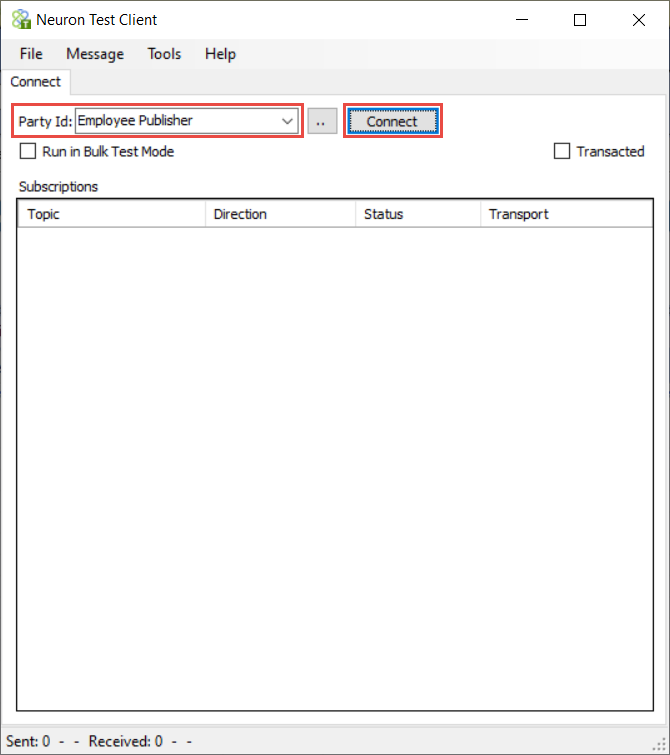
- When the Neuron Test Client opens, select Employee Publisher from the Party Id drop-down list and click the Connect button:
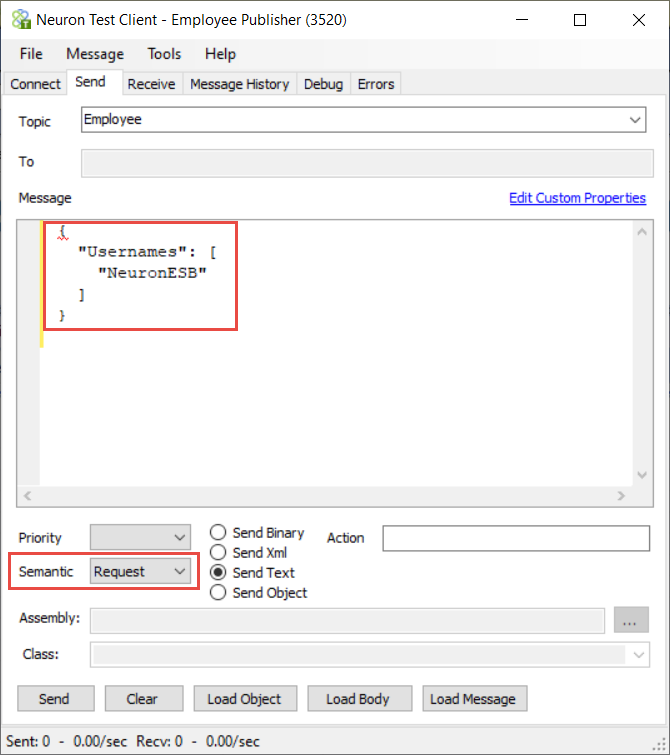
- In the Neuron Test Client, click on the send tab. Set the Semantic to Request and set the Message body to:
{
  "Usernames": [
    "NeuronESB"
  ]
}
You will need to replace “NeuronESB” with a valid AlphaTrust username. You can use the same username that you set in the AlphaTrust Adapter Endpoint in the first walkthrough.
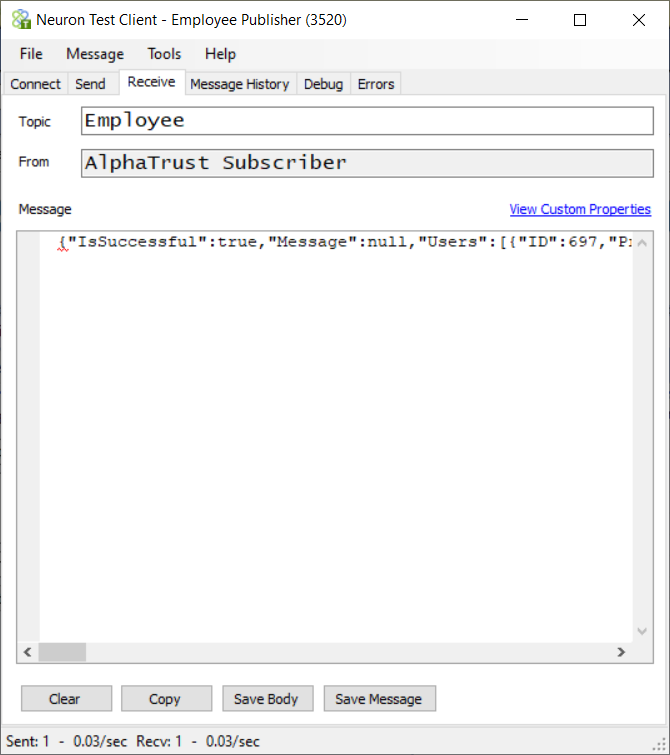
- Click the Send button. If everything works correctly, you should see the Recv: counter at the bottom of the Test Client increase by one. Navigate to he Receive tab to see the response message:
About the Author
Joe Klug is a Solution Architect for Peregrine Connect, responsible for pre-sales engineering, post-sales support, training, architectural reviews, product development and consulting. Prior to joining the team, he spent a number of years at Microsoft.
Read more about Peregrine Connect

-
Rabbit MQ Topics
Introduction Due to the open-source nature of RabbitMQ and constant updates, it is...
-
Port Sharing
One of Neuron ESB’s scalability features is the ability to install multiple...

-
The Integration Journey to...
The Integration Journey to Digital Transformation with Peregrine Connect
-
Saving Time and Money by...
Neuron ESB Application Integration and Web Service Platform: A Real-World Example...

-
Neo PLM
-
Loomis Case Study
Loomis Chooses Peregrine Connect as Their No/Low-Code Integration Platform:...

-

Decision Test Data Mapping
- Use decisions to drive the execution of...
-
Map Testing
Learn how to utilize FlightPath's testing functions...